
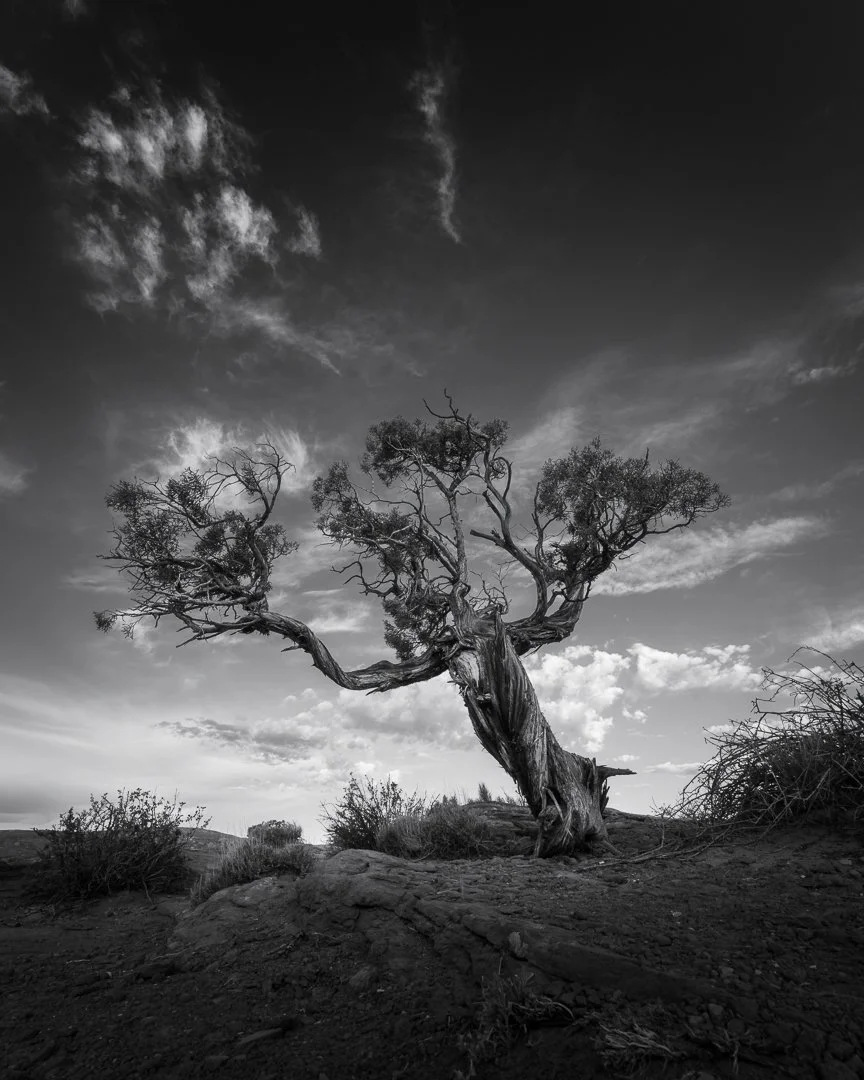
We’ve all had a similar experience. This morning, I was walking the rim at Dead Horse Point State Park just outside my home in Moab, Utah. The morning light is shifting fast, about 30 minutes past sunrise. The grand landscapes are calling, but then a single, weathered Utah juniper catches your eye.
I kneeled down, composed the shot, and clicked the shutter once. Looking at the back of my camera’s LCD viewfinder, my immediate instinct was to press delete. It didn't look like much. It felt ordinary. I almost threw it away right then and there—but I hesitated, kept it, and moved on.
That single exposure turned out to be the image you see above: "Twisted, Not Broken." Here is why that near-miss was the perfect reminder about the dangers in field editing, and why I recommend that you never delete your photos in the field. Memory cards are cheap. Fill ‘em up and wait to decide whether to keep or delete a photo until you see it on a proper monitor.
The Danger of Chasing the "Perfect" Viewfinder
When we photograph the dramatic desert landscapes of Moab during our photography workshops, it’s easy to get trapped by expectations. We want the epic, burning sky over the canyon. When a quick composition on a 3-inch LCD screen doesn't instantly match that grand vision, it’s tempting to start chimping and purging. Resist the temptation!
With this shot, I didn't even think the subject was worth further exploration. I took exactly one handheld exposure and walked away.
But RAW files are inherently flat, and standard camera previews rarely do justice to the hidden data living inside your sensor. Not only that, but it can take time for an image to “mature” and for you to develop an opinion of it. If I had hit the delete button on the rim of Dead Horse Point, this image would be gone forever.
The Golden Rule of Field Photography: Unless an image has an obvious technical flaw—like completely missed focus, severe accidental camera shake, or catastrophic overexposure—leave it alone until you get home.
Redefining the Image in Lightroom
Tonight, I finally had some time to import this morning’s images into Lightroom. Free from the bright, distracting glare of the desert sun, I saw the frame with fresh eyes. The twisted texture of the bark and the dramatic sweep of the branches screamed for a high-contrast black and white edit.
By stripping away the color, the image transformed:
The Textures Pop: The deep grooves of the juniper trunk, sculpted by decades of harsh desert winds, became the main event.
The Sky Take Shape: A subtle gradient filter brought out the wispy, streaking clouds that I barely noticed in the field, complimented by multiple radial gradients to selectively lighten and darken different parts of the image.
A Story Emerges: The high-contrast tones emphasized the resilience of the desert—a tree twisted and weathered by the elements, yet stubbornly unyielding.
Technical Breakdown
Camera: Sony A7IV
Lens: Sigma 14-24mm f/2.8 DG DN Art @ 14mm
Tripod: We don’t need no stinkin’ tripods - handheld
ISO: 100
Settings: 1/20s @ f/16
Backpack: Shimoda Explore V2 30
The ultra-wide perspective of the Sigma 14-24mm allowed me to get low to the ground, aiming the camera up toward the tree to emphasize the tree stretching its limbs toward the vast Utah sky.
Final Takeaway: Give Yourself Room to Experiment
If there is one lesson to take away from "Twisted, Not Broken," it’s to give your creative process room to breathe. Photography isn't just about executing a perfect, pre-planned shot; it's about experimentation.
Slow down, take the shot that catches your eye—even if you aren't sure it works—and protect your digital negatives until you are sitting in front of a calibrated monitor. Your future favorite image might be the one you almost deleted.
Want to master the art of composition and post-processing in the American Southwest? Join me on a private photography workshop and explore the iconic landscapes of the Moab area with my expert guidance.