Have you ever looked at a breathtaking landscape photograph—one with a perfect, explosive sunrise, dramatic storm clouds, and razor-sharp details stretching from the immediate foreground all the way to the distant horizon—and assumed the photographer just got lucky?
While serendipity occasionally plays a role, the truth behind most portfolio-grade images is far more calculated. The secret weapon of successful landscape photographers isn’t a more expensive camera body or a collection of premium filters; it is meticulous location scouting.
Yesterday, I spent the day hiking the rugged canyon rims at Dead Horse Point State Park, just outside my home in Moab, Utah. I wasn’t there to capture final, print-ready masterpieces. Instead, I was doing the vital homework required to capture them later: mapping compositions, logging technical requirements, timing the angles of the sun, and creating visual reference frames.
By scouting during the flat daylight hours, I can prepare an exact blueprint for when the magic hour arrives. In this article, I’ll take you behind the lens of my scouting session to show you exactly how to approach location scouting like a professional, utilizing four reference frames I captured along the Dead Horse Point trails.
1. Finding Your Focal Points and Scale
When you first stand on the rim of Shafer Canyon, the scale can be utterly overwhelming. A great scouting session helps you break down a massive panoramic vista into compelling, intentional compositions rather than chaotic snapshots.

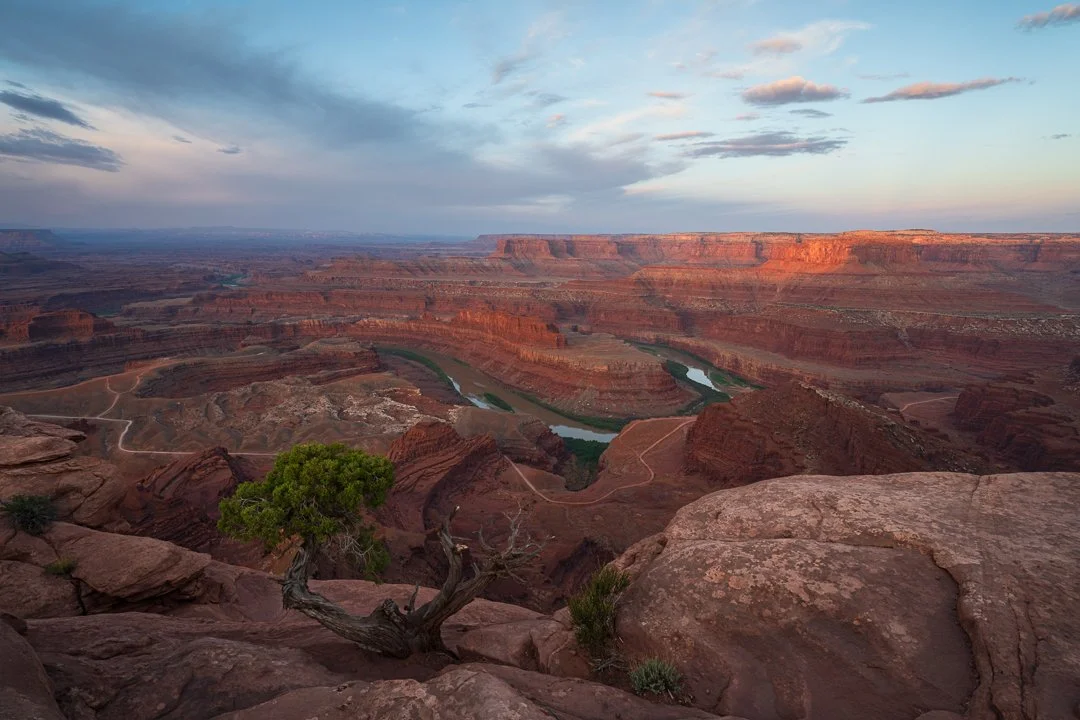
Testing compositions along the West Rim Trail. Incorporating a subject provides scale to the immense drop-off of Shafer Canyon and the prominent red-rock towers below.
Scouting Notes & Composition: Using a human element is a fantastic way to convey the true, mind-boggling scale of the Moab desert. This ledge along the West Rim Trail provides a clean shelf to isolate a subject against the deep canyon drop-off.
Ideal Timing: Sunset. The sweeping canyon walls face East/Southeast, meaning late afternoon and golden hour light will paint the layered sandstone cliffs directly across the canyon, casting long, dramatic shadows from the prominent red-rock tower in the mid-ground.
Lens Selection: A standard zoom lens like the Sony 24-105mm I used here works beautifully. It allows you to keep the immediate foreground ledge intact while preventing the distant canyon features from shrinking into insignificance.
Technical Strategy: This frame benefits from an aperture of f/5 with the hiker as the focal point. This draws the eye to your subject - the sharpest thing in your image - and prevents the viewer’s eye from wandering throughout the frame. However, if you pivot to shoot directly toward the setting sun further down the rim, exposure blending (bracketing) will be mandatory to preserve the brilliant sky details without losing the deep canyon shadows.
2. Framing and Constructing Foreground Interest
A common mistake in canyon photography is shooting straight down into the abyss without a strong foreground anchor. Scouting allows you to explore the rim for unique elements that guide the viewer’s eye into the scene.
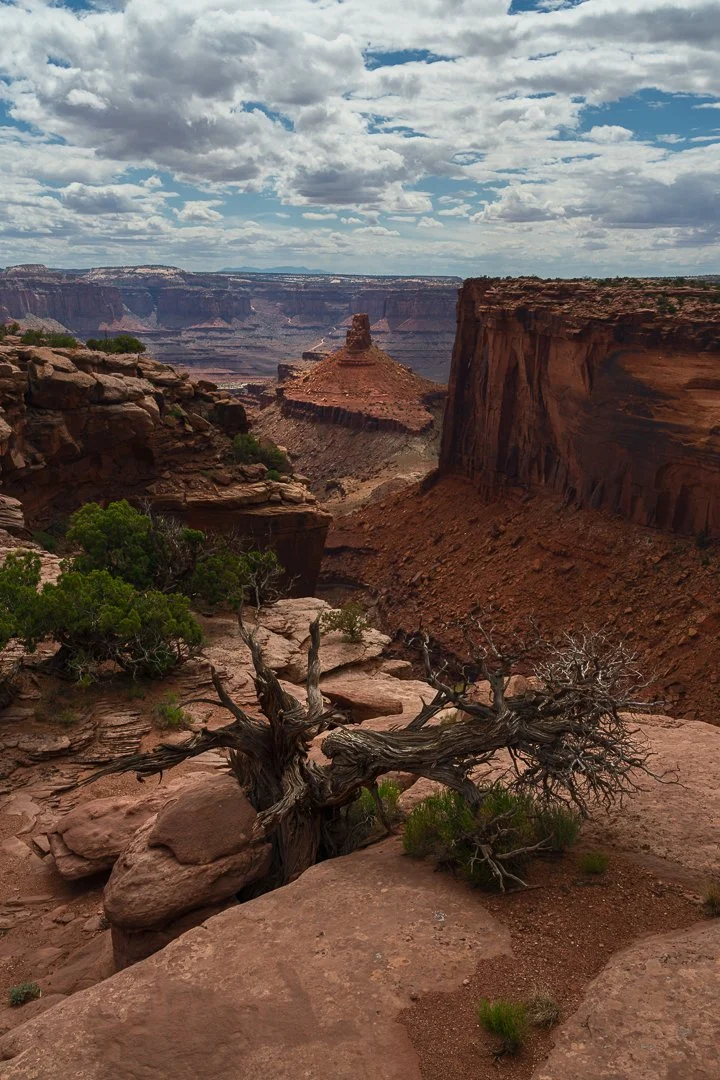
Foreground anchors are everything in the desert. This ancient, gnarled juniper root creates a striking leading line that draws the viewer’s eye past the sheer canyon drop-off and straight toward the distant sandstone butte.
Scouting Notes & Composition: Walking along the rim, I located this skeletal, twisted juniper tree. It acts as an aggressive, dramatic leading line pointing straight toward the isolated sandstone tower in the distance.
Ideal Timing: Sunrise or a stormy, overcast afternoon. The vertical canyon walls to the right require low-angle directional light to accentuate their rich textures without completely washing them out.
Lens Selection: I photographed this on my Sony 24-105mm lens but an ultra-wide lens like the Sigma 14-24mm would also work well here if you scrambled down and shot closer to the tree. By positioning the camera low and close to the ancient wood, you could dramatically exaggerate the foreground elements.
Technical Strategy: Shooting very wide and close to the foreground juniper would require Focus Blending (Focus Stacking). Because the foreground wood would be mere inches from the lens while the background tower is far away, even an aperture of f/16 won't yield edge-to-edge sharpness. The plan for my return is to capture 3 to 4 separate frames at f/8 or f/11, shifting the focus point systematically from the immediate bark texture to the distant rim, and then blending them later in Photoshop. (If you are unfamiliar with how to merge these frames in Photoshop later, check out this excellent step-by-step focus stacking tutorial on YouTube that simplifies the process).
3. Embracing Creative Vision and Abstract Framing
Scouting isn't just about finding the grand, classic vistas. It’s also about training your eye to see the landscape differently and finding unique, intimate framing opportunities that other photographers walk right past.
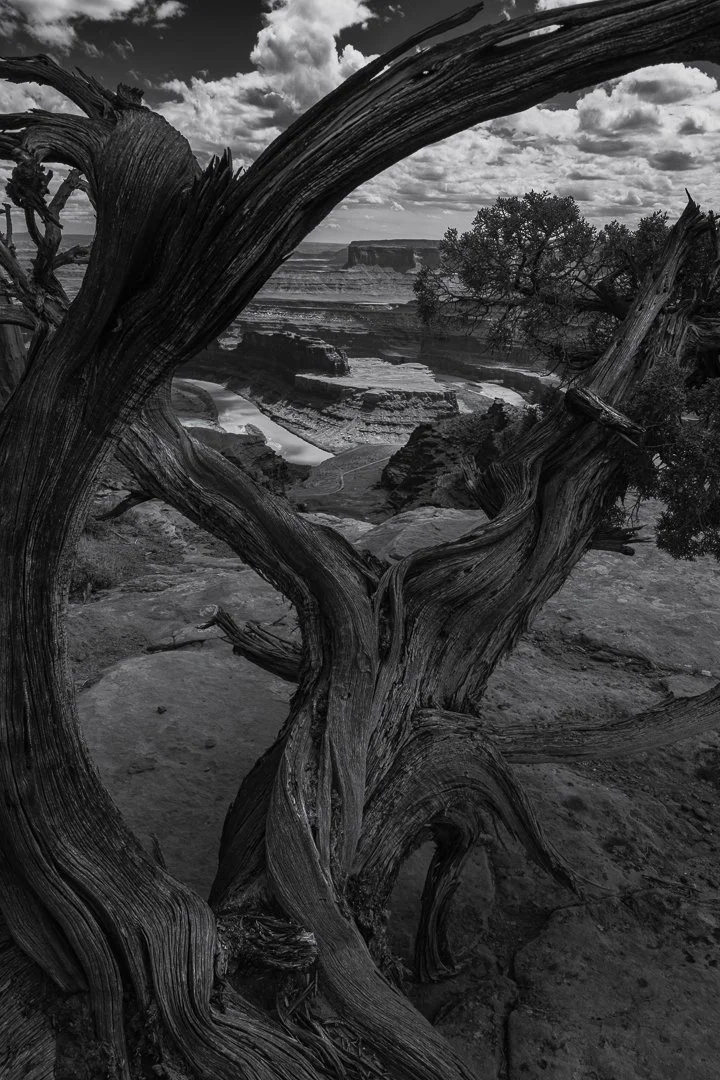
Pre-visualizing in high-contrast monochrome. By physically shooting through the hollowed center of an ancient, weathered juniper trunk, the wood provides a striking abstract frame around the Colorado River loop far below.
Scouting Notes & Composition: I discovered this juniper trunk that creates a natural, gnarled circular window framing the iconic gooseneck of the Colorado River far below. Pre-visualizing this scene in monochrome highlights the raw, stark patterns of the desert.
Ideal Timing: Mid-to-late afternoon, or during dynamic monsoon clearing storms. This frame relies heavily on shape, form, and contrast rather than soft golden hour color.
Lens Selection: An ultra-wide 16-35mm lens pushed deep into the tree structure to maximize the framing effect.
Technical Strategy: The dynamic range here is punishingly extreme. The dark, weathered wood in the shade contrasts heavily against the sunlit river and bright clouds. I was able to use a single exposure on this image but different light may require a 3-frame exposure bracket (-2, 0, +2 EV) to ensure the intricate textures of the bark are recovered alongside the highlights in the sky. Modern cameras record such large dynamic ranges that you will rarely need a bracket of more than 3 exposures. Nick Page has a short, easy-to-follow YouTube video tutorial taking you step-by-step through the process of manual exposure blending.
4. Documenting Texture and Alternate Vantage Points
Weather in the desert is famously unpredictable. A critical part of a professional scouting notebook is identifying adjacent, secondary setups so you can pivot instantly if the light or cloud cover shifts.
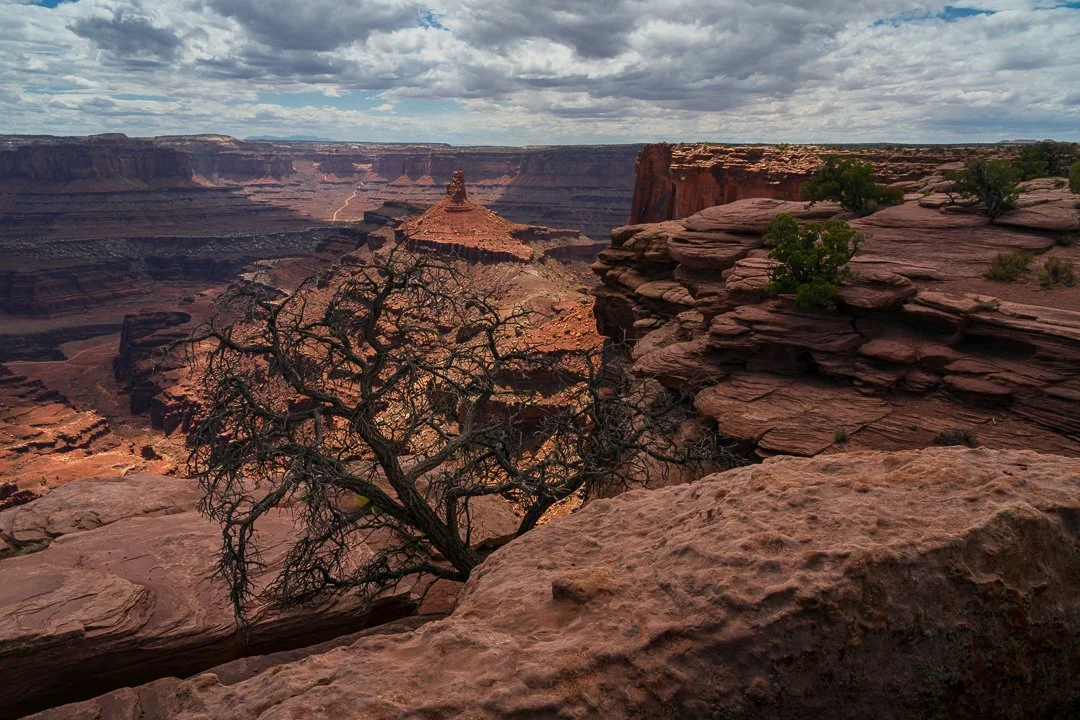
Capturing the intricate textures of the terraced sandstone shelves along the canyon rim. This setup is perfectly positioned for a low-angle sunrise shot to illuminate the foreground ridges and the dramatic cloud bellies above.
Scouting Notes & Composition: This terraced rock shelf features incredible pockmarks and textures. By placing a weathered pinyon pine on the third-line grid, you anchor a beautifully classic wide-angle composition.
Ideal Timing: Sunrise. As the sun breaches the eastern horizon, it will skim low across this shelf, catching the ripples and ridges of the immediate sandstone foreground while illuminating the cloud bellies above.
Logistics & Hiking Time: This spot is roughly a 20-minute hike from the nearest parking area along the West Rim Trail. An early start in total darkness is required to be locked, loaded, and tripod-mounted 30 minutes before actual sunrise. Why 30 minutes? Blue hour! Look for an upcoming post about the joy and beauty of blue hour photography.
The Backup Plan: If low horizon clouds block the morning sun, this specific location features deep sandstone potholes. During the late-summer monsoon season, these potholes fill with rainwater, offering an incredible backup opportunity for mirror-like sky reflections right on the canyon edge.
The Master Plan: Waiting for the Perfect Conditions
With these reference images, lens selections, and technical notes securely logged in my digital notebook, I am no longer guessing when I pack my bag. I know exactly which tripod spots to claim in the pitch black, which lenses need to be mounted before the light breaks, and the precise techniques required to execute the shot.
Now, I simply watch the weather forecast. My ideal target is the late-summer monsoon season, when intense afternoon thunderstorms clear out just before sunset, leaving behind massive, dramatic, sun-lit cloud towers over the canyon rims.
Photograph Dead Horse Point Like a Pro
Landscape photography is an investment of your time, energy, and passion. Don't leave your dream images to chance or luck. If you want to bypass the trial-and-error phase and stand in the exact right spot at the exact right second with the perfect technical blueprint, I have two ways to help you:
Option 1: Hire Me as Your Private Photo Guide
Skip the scouting completely and let me do the heavy lifting. I offer private, fully tailored Moab Photo Workshops designed around your specific skill level and creative goals. I’ll get you to these exact hidden rim locations at Arches, Dead Horse Point, Canyonlands and other dramatic locations around Moab, guiding you through exposure blending, focus stacking, and composition in real-time as the light explodes.
👉 Explore Private Guided Moab Photo Tours with Me
Option 2: Download the Comprehensive eFotoGuide to Dead Horse Point
Prefer to explore the rims at your own pace? My premium eFotoGuide to Dead Horse Point State Park contains all my personal scouting notes, exact GPS coordinates, optimal focal lengths, seasonal lighting angles, and step-by-step technical workflows for every major overlook and hidden gem along the rim.