• Home
    • About Us
    • Resources
    • Moab Photography Tips
    • Current Moab Photo Conditions
    • eBooks
    • Private Workshops
    • Workshop FAQ's
    • Testimonials
    • Arches National Park
    • Canyonlands National Park
    • Magnificent Moab
  • Contact
  • Blog
Menu

Moab Photography Workshops

137 N. Main St.
Moab, Utah 84532
6025714170

Your Custom Text Here

Moab Photography Workshops

  • Home
  • Info
    • About Us
    • Resources
    • Moab Photography Tips
    • Current Moab Photo Conditions
  • eFotoGuide
    • eBooks
  • Workshops
    • Private Workshops
    • Workshop FAQ's
    • Testimonials
  • Images of Moab
    • Arches National Park
    • Canyonlands National Park
    • Magnificent Moab
  • Contact
  • Blog

An Evening in Arches with the Aurora Borealis

October 15, 2024 Bret Edge

The aurora borealis makes an exceedingly rare appearance in the starry sky above Balanced Rock in Arches National Park near Moab, Utah.

When you’re a photographer who lives in Moab, you’ve got an endless variety of incredible landscapes to photograph. Wildflowers in the spring, monsoon storms in summer, gorgeous multi-hued leaves in the fall and pristine snow on red rocks in winter. There are canyons and waterfalls, arches and balancing rocks and twisted juniper trees, mountains and lakes, wildlife and wild sunsets. What you don’t have though, is the aurora. Colorful waves of light dancing across the northern sky before a curtain of twinkling stars. And then, on an autumn day in October, an aurora alert flashes across your iPhone screen. For three hours, from 9 to midnight, there’s a KP rating of 8 and a predicted 100% aurora viewing opportunity. It’s already dark, so you step into the backyard and point your iPhone camera to the north. There, on the screen, is a brilliant red aurora hovering over the roof of your neighbor’s house.

That’s exactly what happened to me last week. At almost 54 years old, and having been a nature photographer for 25 years, I was about to photograph my first aurora. The next few minutes were chaotic as I quickly threw on hiking boots, gathered my gear, grabbed a drink and some snacks, and tossed everything into the backseat of my Land Cruiser. Adrenalin flowing, Melissa and I excitedly sped toward Arches National Park. In the distance, a steady stream of headlights were visible climbing up the entrance road that ascends a series of switchbacks leading from the valley floor into the heart of the park. Clearly, I wasn’t the only one who had received an aurora alert.

We made our first stop at Courthouse Towers, where several prominent landscape features erupt skyward in great pillars of red sandstone. I’ve shot this location dozens of times, in every season, and at all times of the day. I know it intimately and quite frankly, I’m embarrassed to say that I’ve grown somewhat tired of it. Until this night, that is. Nothing could have prepared me for the moment after the first click of my shutter. There on the LCD screen appeared an image of a hulking monolith known as The Organ, and above it was a vibrant ruby red, star filled sky. For what felt like minutes, I just stared at the screen. There they were, the freaking northern lights above the Moab desert! I was an aurora photographer!

Then, I zoomed in and quickly realized, I was an aurora photographer who was so overcome with excitement, I’d forgotten to focus my lens. That’s when reality bitch slapped me in the face. I knew absolutely nothing about photographing auroras. I’d gotten a few helpful tips from my friend Jason Hatfield, an insanely talented photographer with extensive experience shooting the night sky, including too many auroras to count. I took a moment to collect myself before my second attempt. Have you ever tried to manually focus on a distant object in near complete darkness? It ain’t easy. At least in my experience, it’s a matter of trial and error. Set the focus, shoot, check for sharpness, make a minor adjustment, repeat. Eventually, I got my focus dialed in and then went to work finding an optimal exposure. Jack up the ISO, set the exposure, keep the aperture at f/2.8. Nope, way too dark. Increase exposure, try again. And again. And again. Until finally, burned onto the memory card was a sharp(ish), mostly properly exposed image.

Aurora Borealis in Sky Above Courthouse Towers in Arches National Park NR.jpg
Aurora Borealis Above Balanced Rock, La Sal Mountains and Ham Rock NR.jpg
Aurora Borealis Behind Balanced Rock at Arches National Park.jpg
Aurora Borealis in Sky Above The Organ at Arches National Park NR.jpg

We stayed at Courthouse Towers for quite some time. I made a few dozen images, experimenting with different compositions, each one unique in that no two northern light photos are ever the same. When the colors began to fade, we moved on. Our next stop was Balanced Rock, where a significant crowd had gathered to enjoy this rare spectacle. The process repeated itself, and again we stayed until the aurora vanished. We moved on to the Windows area, but didn’t stay long as the colors were muted and occupied only a small area of the sky.

Reluctantly, we decided to call it a night. As we made our way out of the park, Melissa noticed a faint glow in the rear view mirror. We stopped again at Courthouse Towers to quickly check for the aurora using our iPhone cameras, one of the tips Jason had shared with me. Digital camera sensors are far more sensitive to light than our eyes, and auroras that may not be visible to the naked eye, can be easily recorded via camera and viewed on-screen. Much to our delight, the sky was again brimming with color! We stayed until the aurora disappeared completely. This time, I experimented with a lower ISO (400) and longer exposures (20 - 25 seconds), knowing that it would result in cleaner (i.e. less noise) image files. I was also pleased to discover that with a faint aurora, using a longer exposure seemed to result in brighter colors that covered more of the sky.

We pulled into our driveway at midnight. I had a Zoom meeting in just a few hours and though I was eager to download and view my images, I did the responsible thing and went to bed. That night, I dreamt of auroras. In my dreams, I could see them in the sky with my own eyes and they swirled around in a kaleidoscope of psychedelic colors. Following my meeting, I popped the SD card into my computer and began to cull through over 200 images from my incredible night with the northern lights, ultimately narrowing it down to about ten photographs, a few of which are displayed in this post. I guess now I need to order new business cards, so I can add “Aurora Photographer” to my title. ;-) This was an evening I won’t soon forget and if I’m lucky, somewhere down the road, I’ll have another opportunity to experience the northern lights.

In Essays Tags moab photography, moab photo guide, moab photos, moab aurora, moab northern lights, aurora borealis, aurora borealis photography, northern lights photography, arches national park, national park photography, nature photography, landscape photography, night sky photography, astrophotography
Comment

New Outdoor Photography Packs by Peak Design

September 9, 2024 Bret Edge

Most outdoor photographers - myself included - subscribe to the N+1 theory of gear ownership, especially when it comes to backpacks. Over the last 26 years I’ve carried by camera gear in backpacks by no fewer than a dozen different manufacturers. You name it, I’ve probably worn it. Some were good, a couple were pretty great and a few were downright terrible. My current pack, the f-stop Tilopa, is somewhere between good and pretty great. Even so, when a well-known company launches a new backpack designed for hard core outdoor use, my ears perk up. When that company happens to be one whose products I already use and love, I’m even more eager to dig into the details.

So, when an email announcing the launch of Peak Design’s Outdoor Line landed in my inbox, I couldn’t click on it fast enough. The Outdoor Line consists of two new backpacks, a 25L and a 45L, and two slings in 2L and 7L sizes. The new packs and slings are compatible with Peak Design’s existing line of Camera Cubes and Ultralight Packing Cubes, both of which I currently use. Peak Design is launching all of the new products through Kickstarter. Their success with other products on Kickstarter is somewhat legendary, and as of this post they’ve already far exceeded their funding goal.

The pack that I find most attractive - and the one I’m personally backing - is the 45L. There are so many unique features of this pack that I can’t cover them all here, but some of my favorites include:

Outdoor-Backpack-45L-Eclipse-0067.jpg
Outdoor-Backpack-45L-Eclipse-0065.jpg
Outdoor-Backpack-45L-Black-passthrough.jpg
Outdoor-Backpack-45L-Black-0057.jpg

- Fully adjustable harness designed to fit a wide range of body types, with built-in storage pockets and built-in Capture Clip attachment points on the shoulder straps AND waist belt. I use the Capture Clip on my f-stop for quick camera access without having to remove the pack and it’s brilliant.

- Access through the back panel, which isn’t uncommon on camera packs but for me, it’s an absolute necessity. If a pack doesn’t have it, I’m not interested.

- Load lifters. Like back panel access, any pack of this size that doesn’t utilize load lifters is automatically DQ’d. If you don’t know what these are, they are straps that attach the shoulder straps to the top of the backpack that allow you to snug the backpack into your back, thus increasing stability and in my own experience, comfort.

- Dedicated hydration bladder pocket with hose routing. There are actually two pockets in which you can carry your hydration bladder, one of which is also padded to protect up to a 16” laptop. Obviously, you wouldn’t carry your bladder and laptop in the same pocket.

- The Ultrazip backpack closure is probably one of the most unique and functional backpack closure design I’ve ever seen. Not only does it offer super fast access through the top of the pack, it allows for pack expansion and the carry of additional equipment on top of the pack. I’m super psyched about this feature!

The Peak Design Outdoor Line 45L pack has the potential to be one of the very best photo packs on the market. If it’s as good as the other Peak Design gear I regularly use, it’ll be fantastic. If you’re wondering what other Peak Design products I use, they are:

- Peak Design Travel Tripod. By far, my favorite tripod for air travel. It packs down very small, weighs next to nothing and has been as reliable as a Toyota for over a year now.

- Peak Design Travel Backpack 30L. I’m on a plane almost every week, and this pack is my go-to carry on. It’s comfortable to wear, looks sharp, swallows more stuff than you would think possible and has stow-away shoulder straps.

- Peak Design Tech Pouch. My job requires me to carry a variety of cables, cords, and other gizmos and the Tech Pouch easily stashes it all in several pockets, making it super easy to organize.

- Peak Design Camera Cube. My f-stop Tilopa came with it’s own Internal Camera Unit but I prefer the Peak Design Camera Cube size and design, so I’ve been using it in my f-stop pack.

If you’re in the market for a new backpack for outdoor photography, definitely check out the Peak Designs Outdoor Line 45L as it might just be exactly what you’ve been looking for.

In Reviews Tags peak design, peak design outdoor line, outdoor photography backpacks, outdoor photography gear, nature photography backpacks, nature photography gear, nature photography equipment, landscape photography gear, landscape photography equipment, landscape photography backpacks, f-stop tilopa, peak design tech pouch review, peak design travel tripod review, peak design travel backpack review
Comment

A Last Minute Sunset Adventure at Corona Arch

September 2, 2024 Bret Edge

Corona Arch frames a juniper tree as it glows fiery red and orange, illuminated by sunset light sneaking through a small break in dark, ominous storm clouds near Moab, Utah.

One of the benefits of living in a place like Moab is that you can look out the window, assess conditions, and make a last minute decision to rally for a sunset. Such was the case recently on an unusually warm winter weekend. All day the sky alternated between partly to mostly cloudy, and at three hours before sunset a streak of blue sky spread on the western horizon below a blanket of light clouds. If it held, the sun would drop below the clouds just minutes before sunset and the sandstone would explode with vibrant shades of red, orange and yellow. Having spent the day in the house doing chores and running errands, I felt the need to escape beyond the walls. I invited Melissa and Jackson to join me for a sunset mission at Corona Arch and I was thrilled when they agreed.

We grabbed packs, threw on hiking boots, filled water bladders and were on the road within 45 minutes, arriving at the trailhead an hour and a half before sunset. I was surprised to see several cars bearing out of state plates in the parking lot. Moab locals usually get our town and trails back from the tourists in winter. This being one of the more popular hikes, we’d have to share it with a few others. As we ascended the first steep stretch of trail I looked over my shoulder and noted that the band of blue sky was quickly disappearing. My confidence in a dramatic sunset was beginning to wane.

It’s a quick hike to the arch and along the way a small, contorted juniper tree improbably sprouts from a crack in the sandstone. I’ve passed it at least a dozen times and never once considered photographing it. Today, however, it intrigued me. Melissa and Jackson continued toward the arch as I circled the tree, experimenting with various compositions. From one perspective, the sandstone appeared to form a vortex, perhaps responsible for the forces that twisted the juniper into its tortured shape. After creating a few images of the tree under the soft, diffused light I beat feet toward the arch, only to be stopped once again by yet another lovely intimate landscape.

Bowtie Arch, a pothole style arch with a small seep below supporting a surprisingly diverse hanging garden, greets hikers rounding the corner toward Corona Arch. This creates a weeping wall with patterns resembling abstract art. A small single leaf ash desperately clinging to autumn, leaves still ablaze, caught my eye. Maneuvering to a position that placed the ash in front of the weeping wall, I went to work fine tuning a composition. Colorful leaves backed by the almost monochromatic, textural sandstone provided a visual treat for my camera.

I regularly use the Peak Finder app as a photography tool, not only to learn the names of nearby mountains but more frequently to find the precise location of sunrise and sunset. I glimpsed at the western horizon and saw a hole in the clouds beginning to form. Referencing the app, I confirmed that the sun would set directly through that break in the clouds! I raced toward Corona Arch and begin scouting for compositions to the sounds of a drone flying overhead. Two men were seated directly under the arch, using the drone for selfies. Luckily, they moved out of the way but the drone continued to, well…drone, for the next 45 minutes with only a brief respite when the device required a battery change. So much for a peaceful experience in nature.

Having visited this spot at least a dozen times, I knew of a perfectly placed juniper tree that could be composed such that it filled the inside of the arch. Not knowing how long the sunset light would last, I set up my tripod and dialed in this composition. I then wandered around experimenting with other compositions through my camera’s viewfinder. On the left, a basic image of the arch rising from a sea of slickrock. To the right, a scraggly buckwheat plant that would make a wonderful foreground.

Colorful sunset clouds fill the sky behind the massive span of Corona Arch near Moab, Utah.

Returning to the original composition, I mounted my camera to the tripod, crossed my fingers and waited for the golden light I hoped would materialize. I didn’t have to wait long. Soon, a faint but noticeable glow emerged, quickly moving from pastel to neon as the entire area exploded with warm light! Working hastily, I made a few images, confirming each exposure before moving on to the other compositions. The light would ebb as the sun passed through cloud layers, then blow up again, which made for an exciting evening of photography.

Seeing what appeared to be a shadow of Corona Arch on a huge slickrock ramp behind it, I moved closer to the arch and couldn’t believe my luck. There it was, a perfect shadow! I had just enough time for two more photographs before the sun dove below the horizon. Hungry and chilled, I was tempted to pack it in but the thought of leaving the arch too early, and missing out on a colorful sky, overrode my hunger pangs. Cloud by cloud, the western sky transitioned from purplish blue, to light blue, to various shades of sherbet. As quickly as it arrived, the color faded and darkness began to fall.

We hiked out in the fading light without stopping to dig out our headlamps. The low light and lack of contrast demanded careful attention to each footstep, but we soon arrived back at the trailhead. In almost seventeen years, with more than a dozen visits to Corona Arch, this was the most spectacular light show I’ve witnessed here. Some days, it pays to look out the window and forego all responsibilities for a quick sunset hike!

Check out my guide to photographing Corona Arch, available for only $5.00 and downloadable as a PDF that can be viewed on almost any device.

In Essays Tags moab photography, moab photography guides, moab photography locations, moab photos, corona arch, corona arch sunset, utah, utah photography, utah photos, southwest photography, desert photography, desert southwest photography, bowtie arch, intimate landscapes, intimate landscape photography, sunset photography, southwest photography tips, southwest photography guide, colorado plateau photography, hiking photography, photography essays, landscape photography essays, nature photography, nature photography essays, nature photography stories, nature photography tips, nature photography ebooks, landscape photography ebooks
2 Comments

Offroad Vehicle Safety for Outdoor Photographers - And Everyone Else!

August 26, 2024 Bret Edge
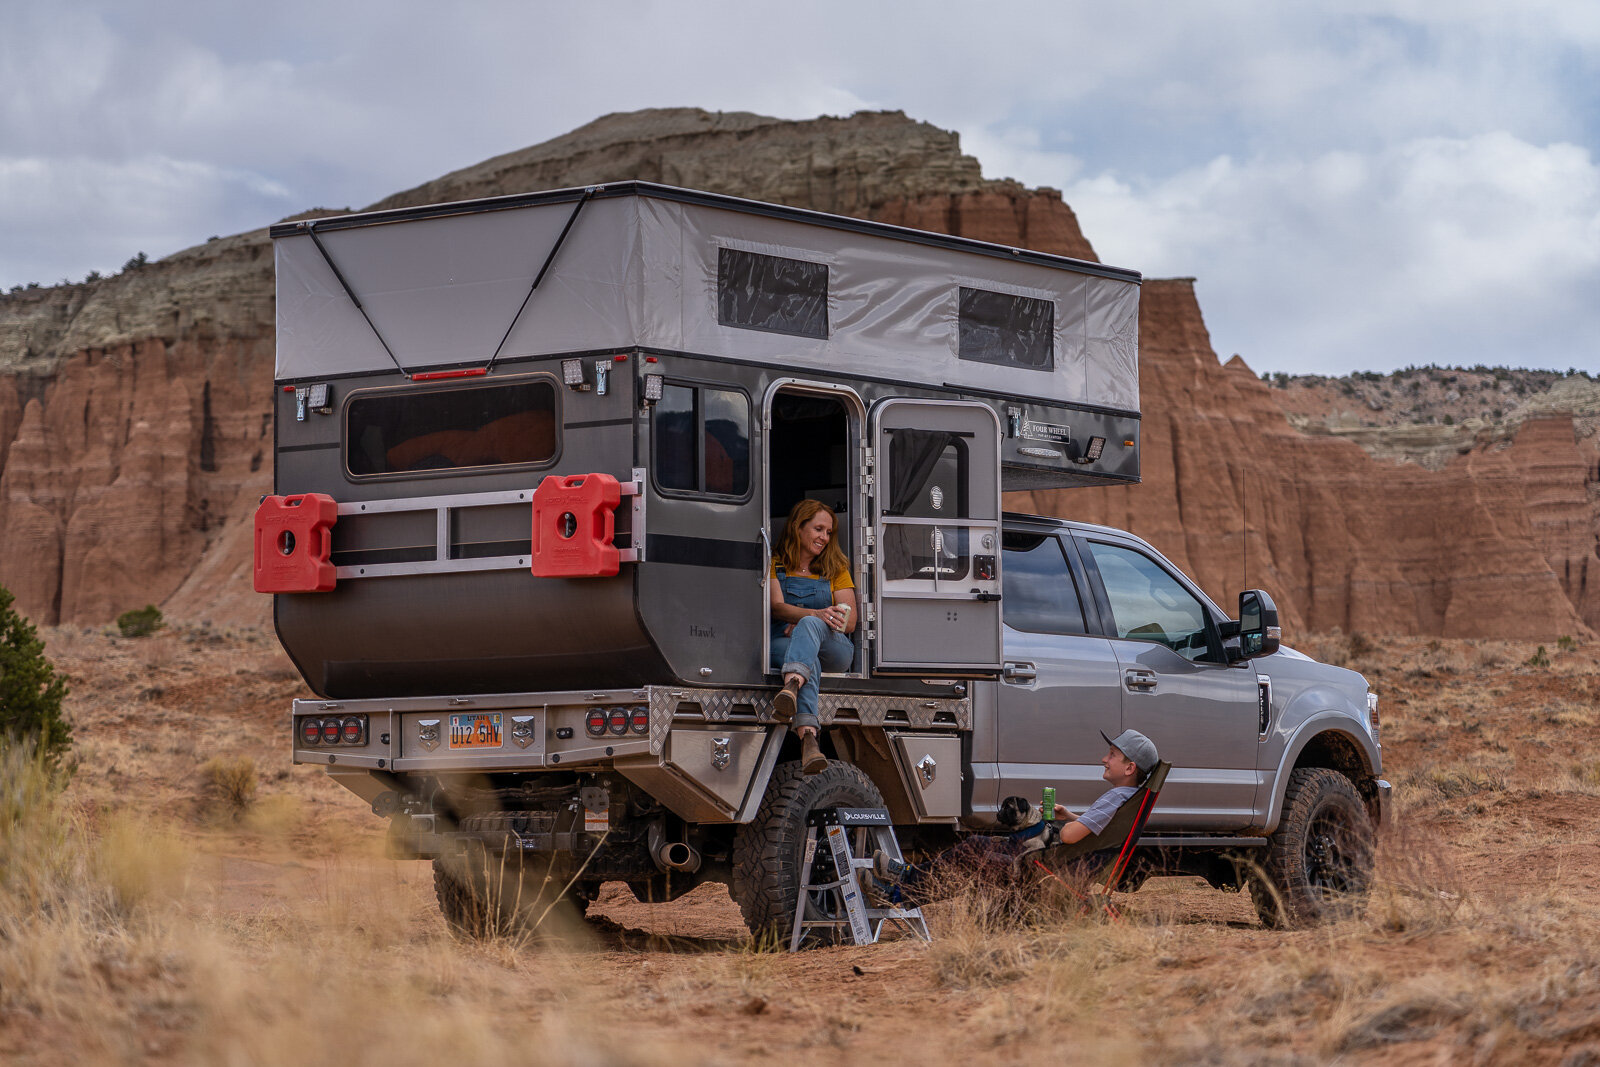
A Ford F250 Tremor equipped with a Norweld Deluxe Weekender tray and Four Wheel Campers Hawk UTE travels a dirt road below the Henry Mountains near Glen Canyon, Utah.

A Ford F250 Tremor equipped with a Norweld Deluxe Weekender tray and Four Wheel Campers Hawk UTE travels a dirt road below the Henry Mountains near Glen Canyon, Utah.

As outdoor photographers, we spend more time alone in remote backcountry locations than the average Joe. We are always on the hunt for that next epic photo and sometimes we let the thrill of the chase override common sense. Usually, we have lady luck on our side but every once in a while, things do go south. Are you prepared to self-rescue when it does? 

In this article I’ll present a few tips you can use to maximize personal safety during offroad or overland vehicle travel. In future articles I’ll cover other important topics related to staying safe while making images in the great outdoors.

All-Wheel Drive vs. Four Wheel Drive

First and foremost, let’s get something important out of the way. All-wheel drive (AWD) and four-wheel drive (4WD) are not the same thing. Most AWD vehicles can safely navigate forest roads and some can perform on mildly technical terrain, but they are not designed for the rough conditions encountered on a true 4WD trail. What is an AWD vehicle? Think Subaru. Moving now to 4WD vehicles, some – but not all – generally have more ground clearance, stronger frames, better suspension and a transfer case with high and low gearing. Examples of true 4WD’s are the Toyota Tacoma and 4Runner, Ford Bronco and the venerable Jeep Wrangler. Knowing the difference between AWD and 4WD – and being able to identify the limitations and capabilities of your own vehicle – is critically important to your safety. If you really want to geek out on the differences between AWD and 4WD, Expedition Portal recently published an excellent article that delves deep into this topic.

Haystack Rock dominates the horizon behind an overlanding camper on McPhillips Beach near Pacific City, Oregon.

Haystack Rock dominates the horizon behind an overlanding camper on McPhillips Beach near Pacific City, Oregon.

Maximize Safety with These Two Important Factors

Now that you have a basic understanding of AWD vs. 4WD, let’s talk about what might be the two most important factors that contribute to the safety of your offroad vehicle adventures; judgment and skill. Not getting yourself into trouble in the first place is the single best way to guarantee your safety. Trust me, I get it. The conditions are all lining up for what promises to be an epic sunset, and that spectacular canyon view you read about is just a couple miles down the benign looking dirt road in front of you. “Eh, I’m sure it’ll be fine. Let’s do this!” And then, you’re off. The dirt road begins to deteriorate, but you press on, and soon you’re high centered on a boulder…or worse. Knowing when it’s time to admit defeat and turn around, i.e. using good judgment, will save your bacon almost every time. Almost. At this point I need to emphasize that Mother Nature is always in control. We can and should do everything possible to prepare for and respond to the worst but in the end, sometimes our best just isn’t good enough.

Next up, skill. Unfortunately, when you buy a Jeep the skill to safely and confidently drive it offroad isn’t an included feature. Driving offroad on even moderately technical trails places unique demands on a driver and having a capable rig without the skill to drive it is a recipe for disaster. One of the best ways to get up to speed fast is to take an offroad driving course with a qualified instructor. The Offroad Safety Academy and Barlow Adventures are two of the best in the business. After that, you’ll enhance your skillset every time you turn off the pavement by applying the knowledge you learned in real world situations.

Overlanding Rig Descending Ophir Pass-2.jpg
Ford F250 Overland Camper Flexing On Narrow 4x4 Road in Superstition Mountains-2.jpg
Evening Light on Mount Kinesava Behind Overlanding Campsite on Gooseberry Mesa-4-2.jpg
Ford F250 Overland Vehicle Splashes Through Muddy Water in Pothole on Buffalo Park 4x4 Road II-2.jpg

Have a Plan, Share the Plan, Stick to the Plan

Before you wander off into the great unknown, tell someone where you’re going and when you expect to be home. Better yet, write it down or text it to a trusted friend or family member. Then, stick to the plan. Don’t deviate. When you squirrel and get stranded or injured somewhere that wasn’t part of your plan, and your friend or family member notifies the authorities because you never made it home, you’re making the SAR team’s job much more difficult. In a grave situation, it could be the difference between life and death. Stick to the plan. 

Prepare for Self-Rescue, Be Ready for Self-Sufficiency

What do you carry when you’re headed off-pavement? There are a few things that are mandatory, and a couple that are nice to have. Let’s explore the mandatory items first.

  • Ideally, your spare tire should be the same size as the other four, properly inflated, and it should be in good condition. A donut tire does not count, but a regular offroad tire – even one smaller than the other four – will usually get you home safe. Along with the spare tire, you’ll need a jack and all the tools you need to change a flat. This includes a lug nut key, if you’re using anti-theft lug nuts. You should also know how to change a flat tire in off-road conditions because there are unique challenges. 4 Wheel Parts covers this in depth in their article, “How To Change a Flat Tire Off-Road”. For those of us running large tires, which can weigh over 100 pounds, Nena Barlow filmed a terrific video demonstrating how to handle heavy tires without making your chiropractor rich(er).

  • Carry a small tool kit – or at least a multi-tool – with zip ties and duct tape. You’d be surprised how many pickles you can get yourself out of with a bit of ingenuity and a few very basic supplies. I’ve seen friends use bailing wire to repair catastrophic vehicle damage that otherwise would have left them stranded.

  • Top off your gas tank before you leave civilization and if possible, carry extra fuel – especially if the location you’re visiting is especially remote. I carry two 3 gallon Rotopax fuel cans on the back of my rig. They’re usually empty, but when I know I’ll be somewhere far away from fueling stations, I fill them up. There are myriad ways to mount these to the outside of your vehicle, which is where they belong. Never carry extra fuel inside your vehicle.

  • I can’t overstate the importance of carrying potable water. My current rig has two large built-in tanks but in the past, I carried a 5 gallon water jug. You don’t have to spend a lot of money on a good, leak-proof jug. I’ve always had good luck with Reliance rigid containers and GSI collapsible water jugs. Before that, when I was much younger and financially limited, I just carried a couple one gallon jugs of water. It’s also a good idea to carry a water filter that allows you to use any water source you can find to create potable water. I carry two Lifestraws in my rig and keep one in my hiking backpack.

  • You can get by without a first aid kit, but you need a trauma kit. You’ll live if you can’t put a bandage on your ouchy, but survival odds are not in your favor if you can’t tourniquet an arterial bleed or prevent a large open wound from bleeding out. I carry a CAT tourniquet in my rig and backpack – and have seen multiple lives saved by them during my years in law enforcement. I also carry a QuikClot bandage for serious wounds where a tourniquet won’t work. Learn how to use them and practice applying the tourniquet on yourself until it’s second nature. Don’t forget to pack any mandatory medications that you may need.

  • For better or worse, outdoor photographers spend a lot of time outside, alone. Jumper cables are useless in this scenario. Carry a portable jump pack and be sure to keep it charged. I carry the NOCO Boost XL GB50 in my overland camper, which we had to use recently while camped in the Cascade Mountains of Oregon. The NOCO Boost GB40 lives in our Land Cruiser and 4Runner. Both NOCO models hold a charge for one year and provide multiple jump starts on a single charge.

  • When you get stuck (not if, but when) you’ll need a way to get unstuck. For solo recoveries, it’s hard to beat a winch – assuming you know how to use one safely – but a set of Maxtrax recovery boards can also be invaluable. I carry them on the back of our truck and have used them multiple times – luckily only to help other drivers free their vehicles. They are very easy to use but I’d still recommend watching this short video for some tips. I also carry a recovery strap but am switching to All-Top kinetic recovery rope. Like a winch, using these can be dangerous and you should familiarize yourself with proper technique. Here’s an article and a video that are both worth reading/watching for valuable insight into using these products safely and effectively. Even better, take a vehicle recovery course!

  • If cold temperatures are possible, a warm sleeping bag or at least a camping blanket are essential. I carry a Voited Cloudtouch blanket in all of my vehicles, which can be used as a soft, fleecy blanket or you can stuff it into a built-in pocket to create a pillow. There is no reason every vehicle you own shouldn’t have a cheap emergency blanket in the glovebox. On an early 90’s backpacking trip in the Grand Canyon, my friend and I were caught in a spring thunderstorm that saw a precipitous dip in temperatures. Woefully unprepared, we hid out in a small alcove and wrapped ourselves with our emergency blankets. They kept us mostly dry and warm enough to avoid hypothermia.

  • The batteries don’t die on a map, and thick tree cover doesn’t render them useless because they can’t view satellites. While a GPS can be a useful tool - if you know how to use one - a map is equally valuable. Regardless of whether you use GPS or not, having a good old fashioned paper map can be the difference between being lost and knowing exactly where you are.

  • You do not want to be caught with your pants down, and without toilet paper. You never know when nature is going to call and you don’t want to resort to leaves or smooth rocks to perform clean-up duty. Carry TP, a small shovel and dog poop bags. When you’ve gotta go, dig a hole at least 6” deep and at least 200’ from any water source, and then cop a squat over the hole to do your business. After wiping, place the used TP in the dog poop bag, tie it off with a knot, and carry it out with you. Do not bury it. DO NOT BURN IT. Should your interest be piqued and you’d like to learn everything there is to know about pooping outside, read REI’s article “How to Go to the Bathroom in the Woods”.

Now, let’s take a look at optional but nice to have items.

  • Newer iPhones have the ability to send an SOS signal via satellite and if the rumors are true, the next iPhone will also allow you to send text messages and perhaps even make phone calls. Alternatively, something like the Garmin InReach satellite communicator allows you to notify authorities when things have gone so far south that you need emergency assistance. The iPhone is good, but the Garmin is even better.

  • You can survive for several days without food, but it won’t be comfortable. Packing some high calorie, stable snacks may be just enough to stave off the hangry and help you maintain a positive mindset. I always bring a hearty trail mix, granola bars, and jerky or beef sticks. For extra credit, pack a small backpacking stove and some dehydrated meals or MRE’s. My favorite backpacking stove is the JetBoil, and of all the various dehydrated meal brands, Peak Refuel has been my go-to for several years.

  • You could have all of these things rolling around your car but it would be unsafe and, at least to me, annoying. I carry everything that will fit in a Radius Outfitters Gearbox 5500. You don’t need to spend $300 on a storage box, though. A plastic tote from your local dollar store is a great budget option or for something a little more durable, Rubbermaid Action Packers have been serving dutifully in this capacity for as long as I can remember.

  • A small fire can be useful as a signal or for warmth. Obviously, you’ll need a lighter or waterproof matches to get the fire going, but it’s even easier if you have a fire starter – especially if the wood you’re using is damp. Also, this is where common sense is critically important. If the conditions are such that you wouldn’t build a campfire, i.e. extremely dry, windy, building a signal fire is a terrible idea.

  • More times than I can count, I’ve been driving down a remote dirt road or 4WD trail and found a tree blocking my path. I know several serious overlanders who carry chainsaws. If I had the room, I would too. For now, I carry an axe and a 10” folding saw, and have used both to cut up fallen trees. I’ve also used my recovery strap around the cut logs, connected to my truck, to pull them out of the way.  

Autumn Snowstorm Clearing Above Overlanding Campsite in La Sal Mountains-2.jpg
Foxglove and Fog at Overlanding Campsite in Coast Range.jpg
Evergreens Framing Overlanding Campsite at Sunset in San Juan Mountains-2.jpg
Colorful Sunrise Sky and Overlanding Camper Reflect in Pothole near Zion National Park-2.jpg
Dramatic Sunset Sky Above Overlanding Campsite near Bozeman-2.jpg
Overlanding Campsite near Waterfall in San Juan Mountains-3.jpg
Faint Anticrepuscular Rays in Sky Above Overlanding Campsite near Moab-2.jpg
Cotton Candy Sunset Sky At Overlanding Campsite near Sedona.jpg

Don’t Be a Jackass – Tread Lightly

Do you enjoy being able to access those stunning backcountry locations by vehicle? Do you want to maintain that access? Then please, don’t be a jackass. Most of us who have spent enough time offroad in the backcountry have seen “that guy”. The one who passes others by blazing through the tundra, or who parks their rig in a protected area so they can get a photo for Insta, or who just can’t help but high mark a desert badland. These people are part of the reason access is getting cut off to popular spots all over the West. How can you avoid being a jackass? Abide by the Tread Lightly principles. It’s that simple.

So, there you have it. Heed these tips and go forth into the great unknown with the confidence to know that you’re prepared for (almost) whatever comes your way. This is not an exhaustive list, nor will everyone agree with my recommendations. If you feel I’ve left something out, drop it in the comments! We can all share ideas and learn from one another. Just know that if you leave a comment that isn’t constructive, I’ll delete it. Stay safe out there, everyone!

Note: Some links in this article are affiliate links, which means if you click on it and make a purchase, I may receive a small commission at no additional cost to you. Like, small. Really small. But if enough of them add up, I could buy an iced tea (with extra ice), or some dark chocolate, or when I save up for a few months, I could probably even get an SD card. I never recommend products I don’t use and believe in, or that I haven’t vetted to be consistent with my high standards.

In Outdoor Photo Safety, Reviews Tags 4x4, North america, bret edge, camper, camping, campsite, car camping, colorado plateau, flatbed camper, ford f250 tremor, fortknocker canyon, four corners, four wheel campers hawk ute, glen canyon, henry mountains, norweld deluxe weekender tray, off highway, offroad, offroading, outdoor adventure, overlander, overlanding, sony alpha, southwest, travel, traveling, truck camper, united states, usa, outdoor safety, outdoor adventure safety, offroad safety, offroad vehicle safety, offroad driving safety, 4x4 safety, 4x4 vehicle safety, 4x4 operation safety, overland travel safety, overlanding safety, overlanding usa
4 Comments

Gear Review: iBuddy Bench Seat Cover

June 9, 2024 Bret Edge

Bret Edge offers his thoughts on the iBuddy Bench Seat Cover from Amazon in this long-term review.

Read more
In Reviews Tags ford f250 tremor, ford f250 super duty tremor, rear seat protector, pet seat covers, pet seat protectors, ibuddy bench seat protector, seat protector reviews, seat cover reviews
Comment

My Thoughts on the 2024 Four Wheel Campers Upgrades

December 15, 2023 Bret Edge

Today Four Wheel Campers announced a host of substantial upgrades and options for their popular line of off-road truck campers. We’re on our second Four Wheel Camper - the Hawk UTE flatbed - which we’ve had for almost three years. Our first FWC was a slide-in Raven model, which we used for over a year before upgrading to the Hawk UTE. In this post I’ll cover each one of the new options and offer my thoughts on whether they are must-haves ro just nice to haves. I’ll also share a few changes I hope to see Four Wheel Campers embrace at some point…hopefully in the near future. Let’s dive in.

Standard Lithium Batteries - MUST HAVE - Upgrade Cost: $1,295 - $6,695

Both of our FWC campers came with AGM batteries from the factory. They were…eh. Even dual AGM’s with 320 watts of solar failed to keep up with our power demands. Admittedly, we are heavy power users. After going through two sets of AGM batteries in our Hawk UTE over a two year period, we made the decision to do a full lithium upgrade using 200 ah of Battleborn Batteries and Victron components. It wasn’t cheap, but it truly has been a gamechanger. That word gets thrown around a lot but in this case, it’s accurate. The lowest I’ve seen our battery level is 74%, and that is without limiting our power usage. For a full breakdown of our power system, check out this post: Should You Upgrade Your Overland Camper or Van to a Lithium Power System

FWC now includes one 135ah lithium battery as standard on all campers with the exception of Project M, with the option to upgrade to two or even three 135ah batteries. This is huge. HUGE. Along with the lithium power systems, Four Wheel Campers has also upgraded all of the wiring, which has been a weak spot in the past.

Roof Mounted Solar Panels - MUST HAVE - Upgrade Cost: $2,195 - $4,275

Some might argue that solar panels are not a must-have, but in my experience they absolutely are. Unless you drive a lot in between campsites you will have no way to top off your batteries without solar. Roof mounted solar panels go everywhere your rig does and don’t take up any additional internal storage, unlike portable panels. Lithium batteries charge significantly faster than AGM batteries, and solar panels will help to keep your batteries topped off. How much solar you need depends on a few variables, i.e. how many batteries you have, your average battery draw, environmental considerations, etc.

Truma Varioheat Furnace - NICE TO HAVE - Upgrade Cost: $1,100

This is a bigger deal than you might think. Four Wheel Campers has had major issues with their heaters for several years. The heaters in both of our campers failed after a short time, and in our Hawk UTE we invested in a Propex heater as a replacement for the factory model. It has functioned flawlessly for over two years. Truma Varioheat furnaces have a stellar industry reputation, and I’m thrilled to see Four Wheel Campers moving to this model. Do you need a heater? Only you can answer that but I will tell you that waking up to a toasty warm camper when the outside temperature is hovering in the single digits is a luxury that, once experienced, kind of changes your perspective.

Truma AquaGo Comfort Water Heater - NICE TO HAVE - Upgrade Cost: $1,225

Our first Four Wheel Camper didn’t have hot water. Our Hawk UTE does. For us, it was a must-have but I understand that for some, it may not be necessary. Washing greasy dishes with cold water has poor results. Splashing ice cold water on your face in the morning may be energizing, but not pleasant. Previous FWC’s used a standard hot water heater. We’ve never had an issue with ours, and I actually like that having a water heater with a tank allows us to carry more than 20 gallons of water. But, the Truma AquaGo Comfort is an on-demand hot water heater that, like the Varioheat, has proven itself as a reliable option for many years. Four Wheel Campers made a good decision to use it in their new campers.

Electric Roof Lift (Two Options) - NICE TO HAVE - Upgrade Cost: $825 - $4,995

For some, this might be a must-have. Longer camper roofs are heavy and not everyone will have the strength to manually lift them into place. There are two options for the electric roof lift; an internal or external linear actuators. The internal option can be retrofitted to older campers and is $825. The external actuators cannot be retrofitted, and they cost $4,995. Unfortunately, the external actuators don’t do away with the roof clips, which really would have been nice. I’m not too sure about this one. I see the utility of it, but I’m not convinced that it’s worth the significant additional expense (at least for us). Also, the external actuators are mounted on the sides of the camper, where they may be prone to damage from trees, rocks, etc. Also, the external actuators are placed such that they partially block the view from the soft side windows. The internal actuator is a little more cumbersome but not exposed to the elements, and costs about six times less than the external actuators. If you want a FWC camper but can’t lift the roof manually, at least now you have this as an option.

Extended Cabover and Underbed Storage - NICE TO HAVE - Upgrade Cost: $1,995

I was tempted to call this one a must-have. For us, it is. But, it may not be for all FWC owners. We spend a lot of time in our camper, and we carry hiking, mountain biking, photography and camping gear for three people plus a dog. If you need the storage, you need it. The extended cabover also means the bed covers less of the countertop when it’s slid out.

Roof Mounted Air Conditions - NICE TO HAVE - Upgrade Cost: $4,995

This is definitely a nice-to-have, but certainly not necessary unless you spend the majority of your time camping in extremely hot climates. We’ve used our Hawk UTE in temperatures in the 90’s. With both roof vents open and one fan set to exhaust, with the other blowing air in, and all windows open, it was reasonably comfortable inside. If you option the air conditioner Four Wheel Campers requires you to also purchase dual batteries and an electric roof lift. Perhaps more important, the air conditioner will only run on battery power for a limited amount of time. Air conditioners are a very high draw appliance and they will quickly deplete your batteries. Four Wheel Campers recommends that the camper be plugged into shore power when using the air conditioner for an extended period of time.

Quilted Thermal Liner - NICE TO HAVE - Upgrade Cost: $1,275

We recently upgraded our thermal liner to this new quilted version. We haven’t used it yet but are about to spend two weeks in the camper exploring Arizona. Initial impressions are positive. It’s certainly got an all-around more premium look and feel to it. It comes with window coverings for all the glass windows, too. Installation is simple and you can still put the top down with the thermal liner in place.

Standard Flush Mount Sink and Stove - STANDARD

A flush mount sink and stove are now standard. Also, the stove has been upgraded. I think this is fantastic. They look better and when not in use, you’ve got more counter space.

What Would I Like to See Four Wheel Campers Do Next?

My wish list is relatively short.

  • Double pane acrylic awning style windows - This would do away with curtains, allow for less thermal transfer and, for those of us who use our rigs in rough environments, aren’t going to shatter when impacted by tree branches, rocks, etc.

  • Windows at front and rear of soft side fabric - I’m not sure how this could be accomplished with the conventional roof lift as the lift panels cover most of the front fabric but on the electric roof with external actuators, it looks like it would be possible.

  • Roof clips - Be gone with you, roof clips! They’re unsightly, delay deployment of the roof and, if you forget to unclip one, will damage your roof.

  • Composite construction - This one is huge. I fully understand that Four Wheel Campers has built their brand on aluminum frames and skins. But, there are so many new overland campers constructed of composite materials that offer far better insulation, strength, durability and virtually no thermal bridging. With Four Wheel Campers legendary reputation and loyal customer base, it is my opinion that a composite FWC camper would catapult the company to new heights.
  • External access to internal storage - On the Four Wheel Camper flatbed models, you’ve got storage under the dinette seats. It’s a large space and we love it, but it can only be accessed from inside the camper. I would be thrilled to be able to access it from outside, too. I dunno, maybe I’m just lazy? But, having access to all of our mountain biking gear without going into the camper would be amazing.
More Information About 2024 Four Wheel Campers Upgrades

Truck Camper magazine has a great interview with Stan Kennedy, Four Wheel Camper’s Brand Champion, about the new upgrades. Solid insight into their thought process on all of these new upgrades.
Four Wheel Campers Website

Four Wheel Campers Feature Launch Video

Four Wheel Campers YouTube Channel

Well folks, there you have it. My thoughts on the new Four Wheel Campers upgrades. It really seems like they came out swinging this time, and have an eye on the future. These upgrades aren’t for everybody, but they’re a giant step forward and something tells me the masterminds at FWC aren’t going to sit around on their hands. I’m curious to hear what you think about all the new features. Drop a comment and let me know what you think!

Tags 4x4, Sunset, United States, bret edge, camper, camping, campsite, car camping, clouds, colorado plateau, flatbed camper, ford f250 tremor, four wheel campers hawk ute, gooseberry mesa, mount kinesava, north america, norweld deluxe weekender tray, offroad, offroading, outdoor adventure, overlander, overlanding, rockville, skies, sky, sony alpha, southwest, travel, traveling, truck camper, zion national park
Comment

Should You Upgrade Your Overland Camper or Van to a Lithium Power System?

November 21, 2023 Bret Edge

Overland camper equipped with Four Wheel Campers Hawk UTE and Battleborn Batteries at campsite near Moab, Utah.

Overland photographer and writer Bret Edge discusses the pros and cons of upgrading an RV or overland camper to a lithium power system utilizing Battleborn Batteries and Victron Energy components. Should you upgrade your van, camp trailer or overland vehicle? Read Bret’s post to learn more that will help you make this important decision.

Read more
In Ultimate Adventure Rig, Reviews Tags overlanding gear, overlanding gear review, overland travel, overlanding, battleborn batteries review, battleborn battery review, lithium battery review, lithium batteries review, rv lithium batteries, rv lithium battery, victron energy reviews, victron energy inverter reviews, battleborn batteries 12V GC2 LiFePO4 heated batteries review, Victron multiplus C 2000W inverter/charger review, lithium batteries for overlanding, four wheel campers solar power, four wheel campers upgrades, four wheel campers flatbed hawk, four wheel campers options, four wheel campers hawk ute reviews, four wheel campers lithium batteries, four wheel campers lithium battery upgrade, lithium battery upgrades, lithium batteries in rv, lithium batteries in camper, lithium batteries in camp trailer
Comment

Gear Review: Tamron 28-200mm f/2.8-5.6 Di III RXD Lens

August 24, 2023 Bret Edge
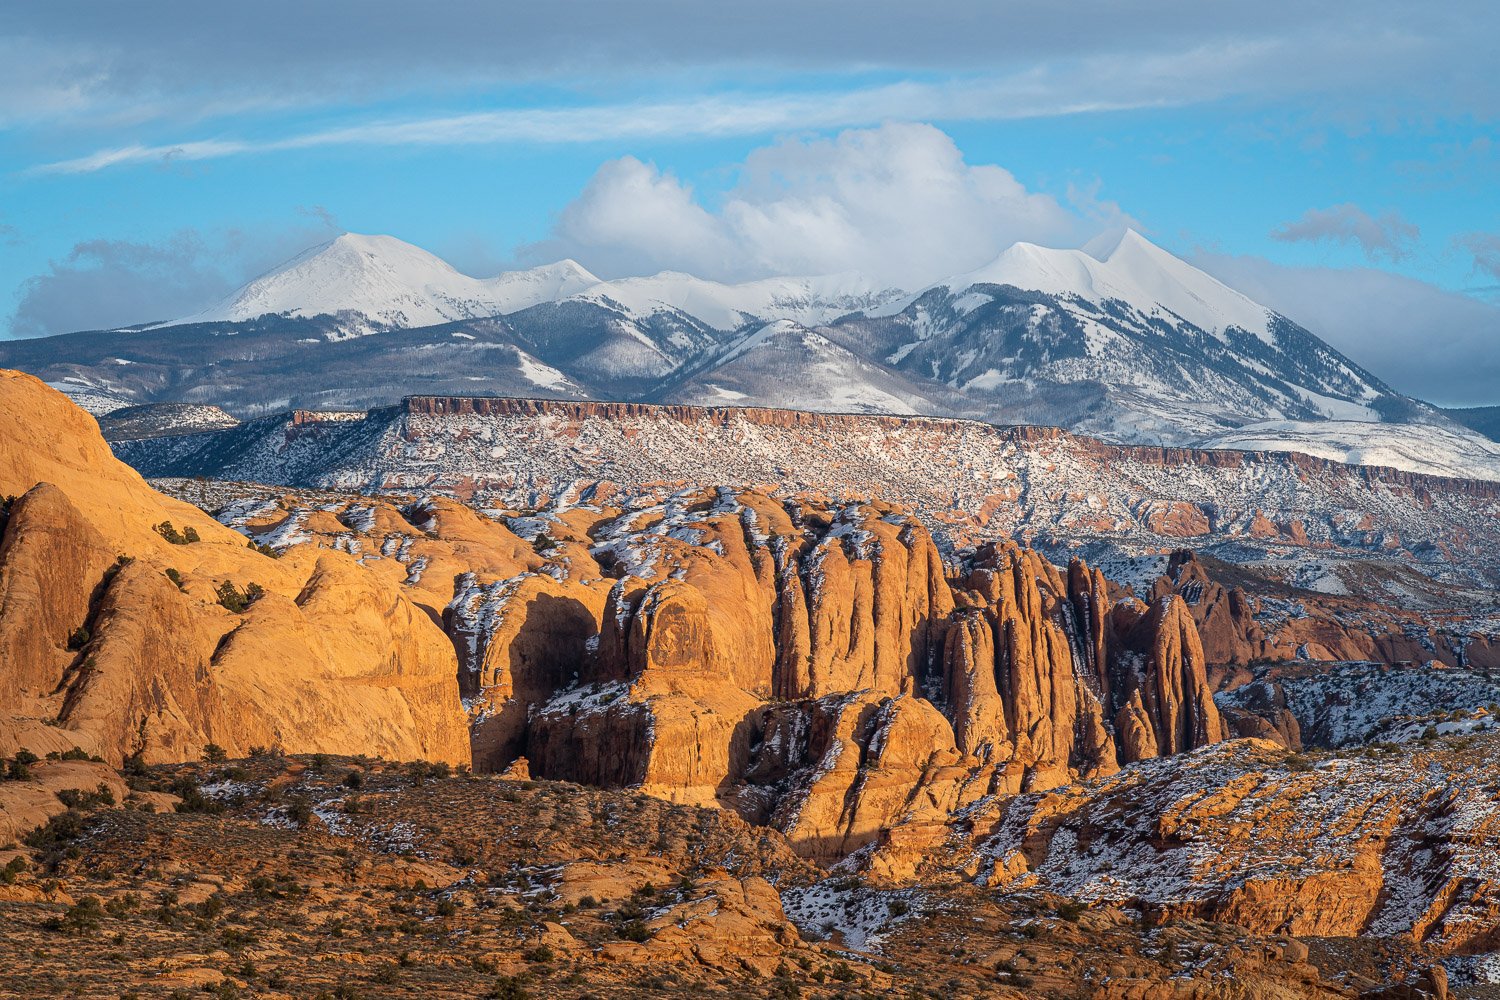
The snowcapped La Sal Mountains and sandstone fins embrace the warmth of sunset light in Moab, Utah.

Professional nature and adventure photographer Bret Edge reviews the Tamron 28-200mm f/2.8-5.6 Di III RXD lens. Does it earn a permanent place in his camera bag?

Read more
In Reviews Tags photography gear reviews, camera lens reviews, tamron 28-200mm f/2.8-5.6 Di III RXD lens review, sony camera reviews, pictureline, nature photography, landscape photography, camera equipment reviews, adventure photography gear reviews, adventure photography equipment reviews, lens reviews, sony camera lens reviews, tamron lens reviews, tamron lenses
2 Comments

2022 Zion National Park Fall Color Update

October 27, 2022 Bret Edge
A riot of colorful foliage lines a muddy creekbed in one of many side canyons of Zion National Park, Utah.

A riot of colorful foliage lines a muddy creekbed in one of many side canyons of Zion National Park, Utah.

Professional landscape photographer Bret Edge offers an update on fall colors in Zion National Park for October, 2022

Read more
In Photo Conditions Updates Tags zion national park ebooks, zion national park, zion national park photo guide, zion fall colors, zion autumn foliage, springdale utah fall colors, springdale utah autumn, fall color, fall color updates, utah fall color updates, national park photography, zion national park photography, zion national park photo guides, national parks photo guides, fall photography tips, autumn photography tips, how to photograph zion
Comment

Heads on a Swivel, Photographers - A Tip from Arizona Highways

October 12, 2022 Bret Edge
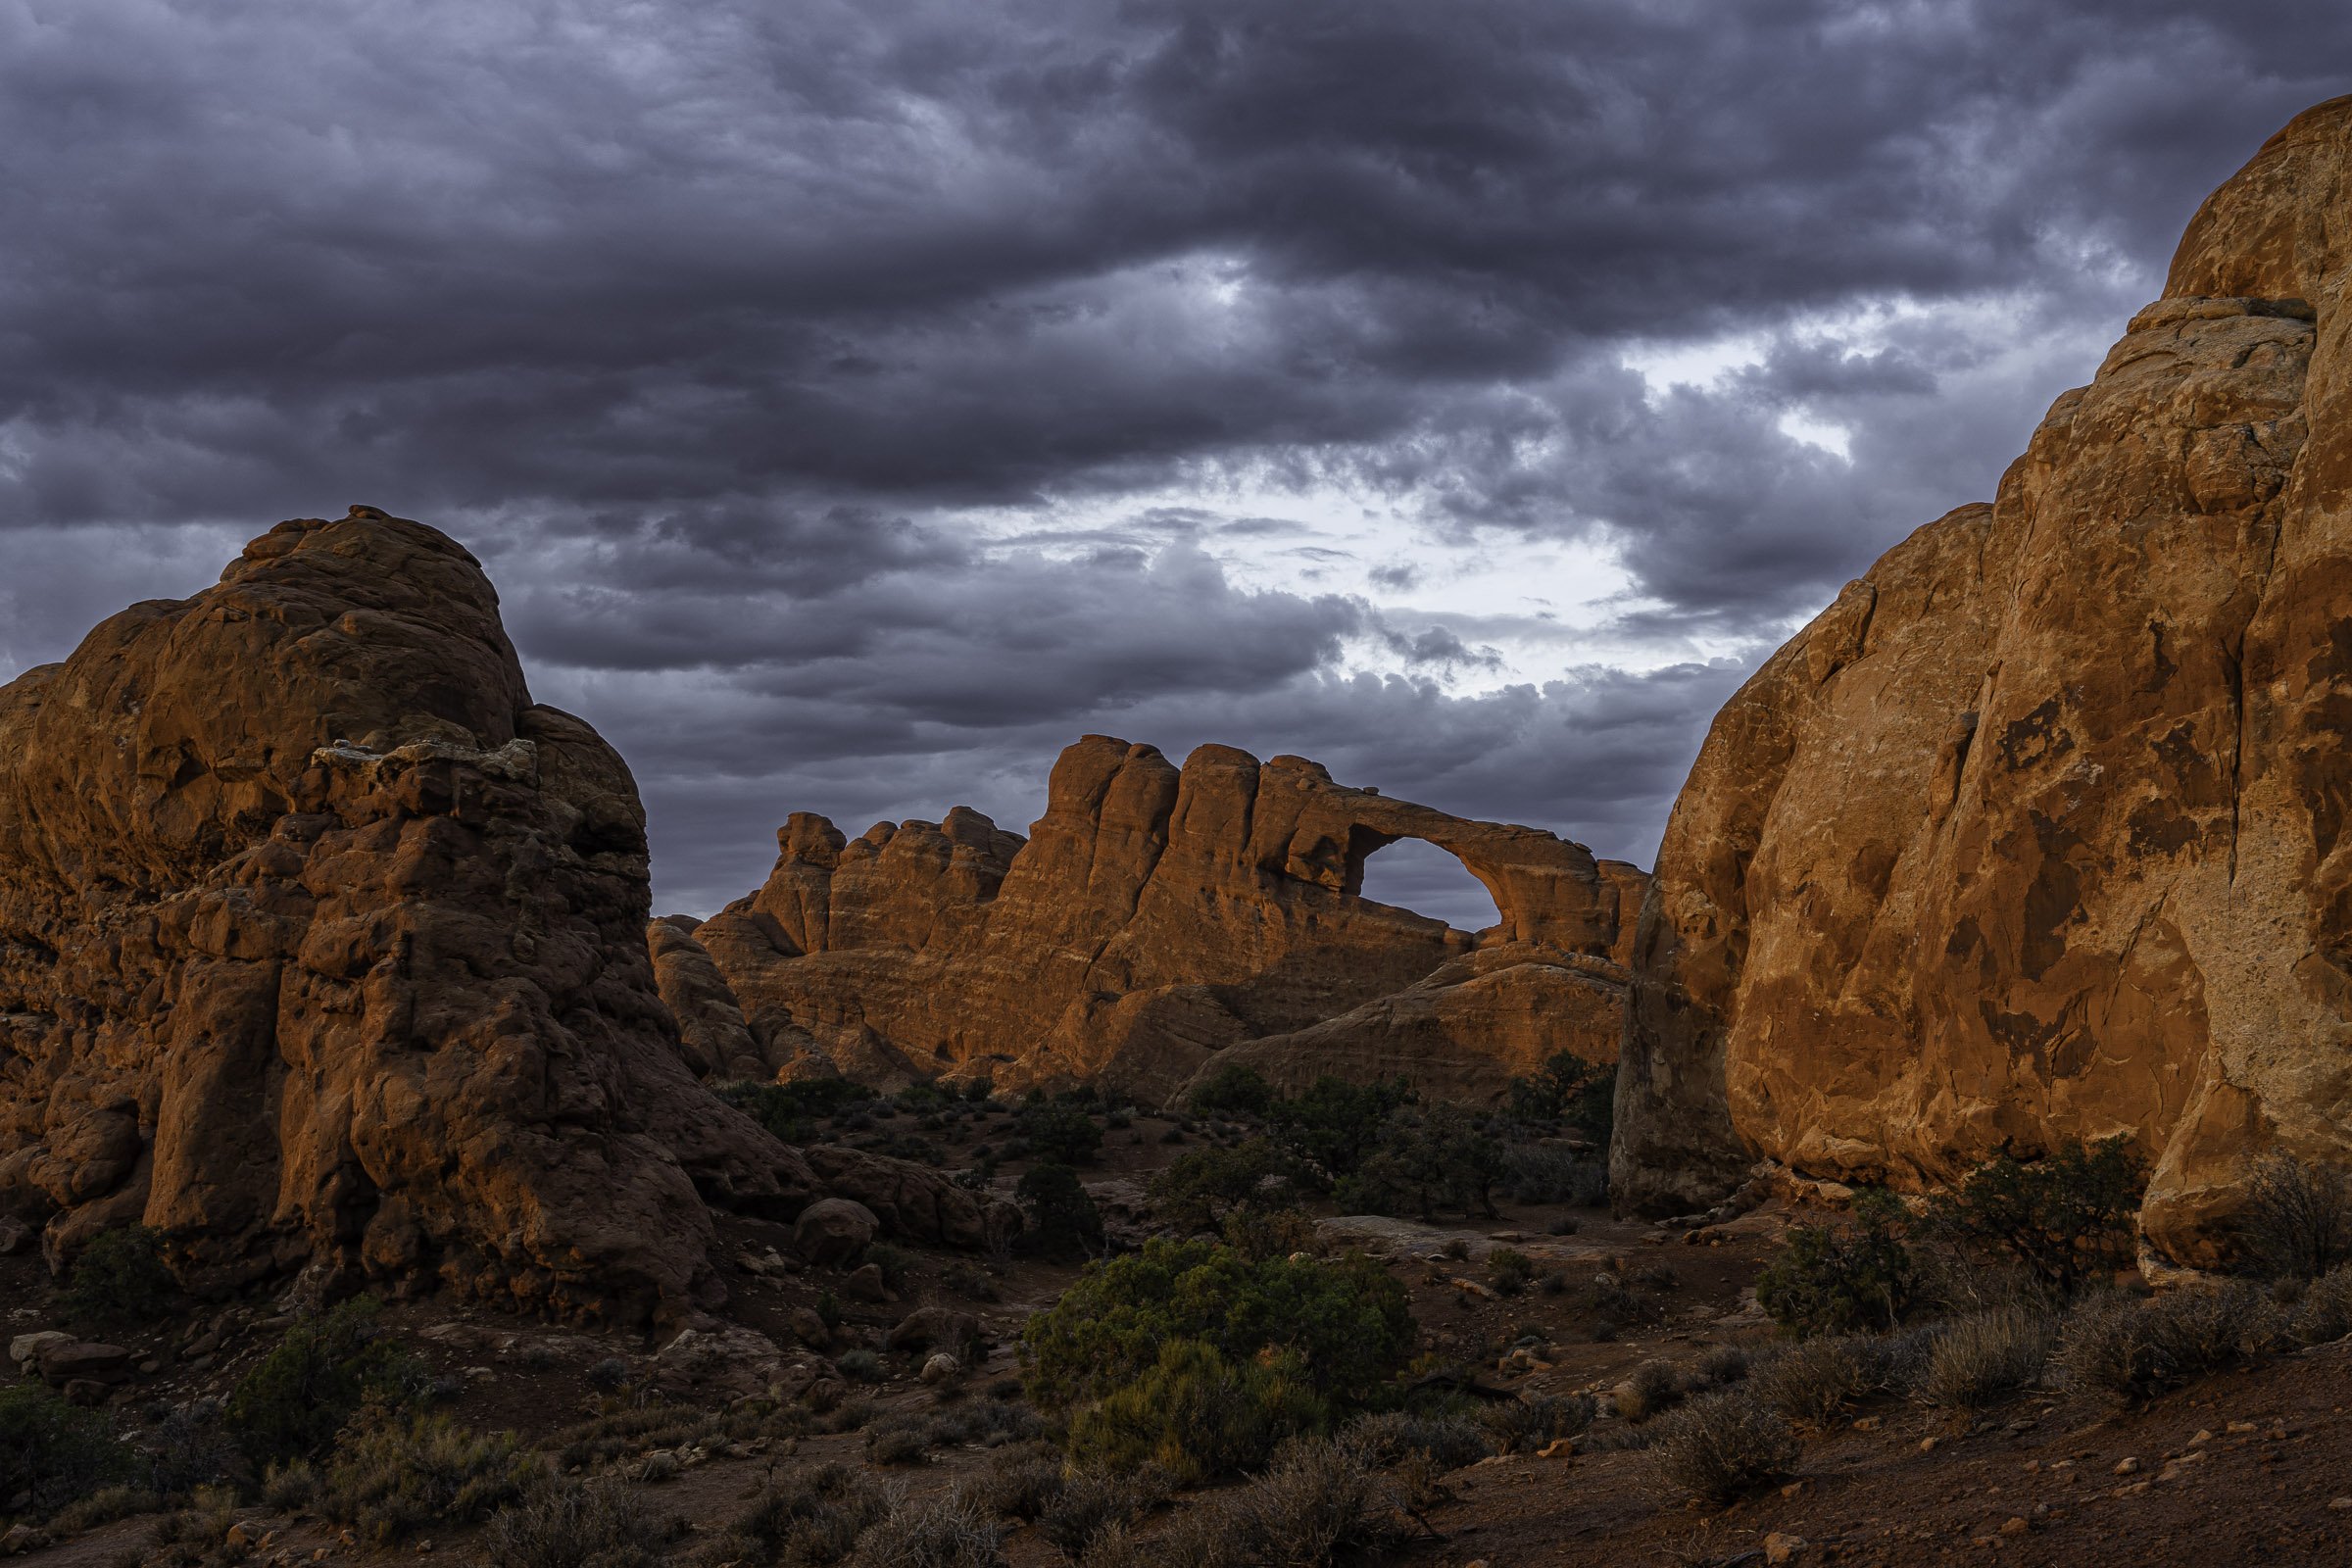
Sunset and storm light combine to create a spectacular scene at Skyline Arch in Arches National Park near Moab, Utah.

Professional landscape and adventure photographer Bret Edge shares a landscape photography tip he learned in an Arizona Highways guidebook over twenty years ago that he continues to apply today.

Read more
In Essays Tags arizona highways, galen rowell, john shaw photography, art wolfe photography, photo tips, photography how to, photography essays, photography tips, photography techniques, landscape photography essays, landscape photography tips, nature photography, nature photography guidebooks, nature photography tips, nature photography essays, outdoor photography, outdoor photography guide, outdoor photography tips
Comment

Are Blundstones the Perfect Boot for Adventure Travelers?

January 19, 2022 Bret Edge

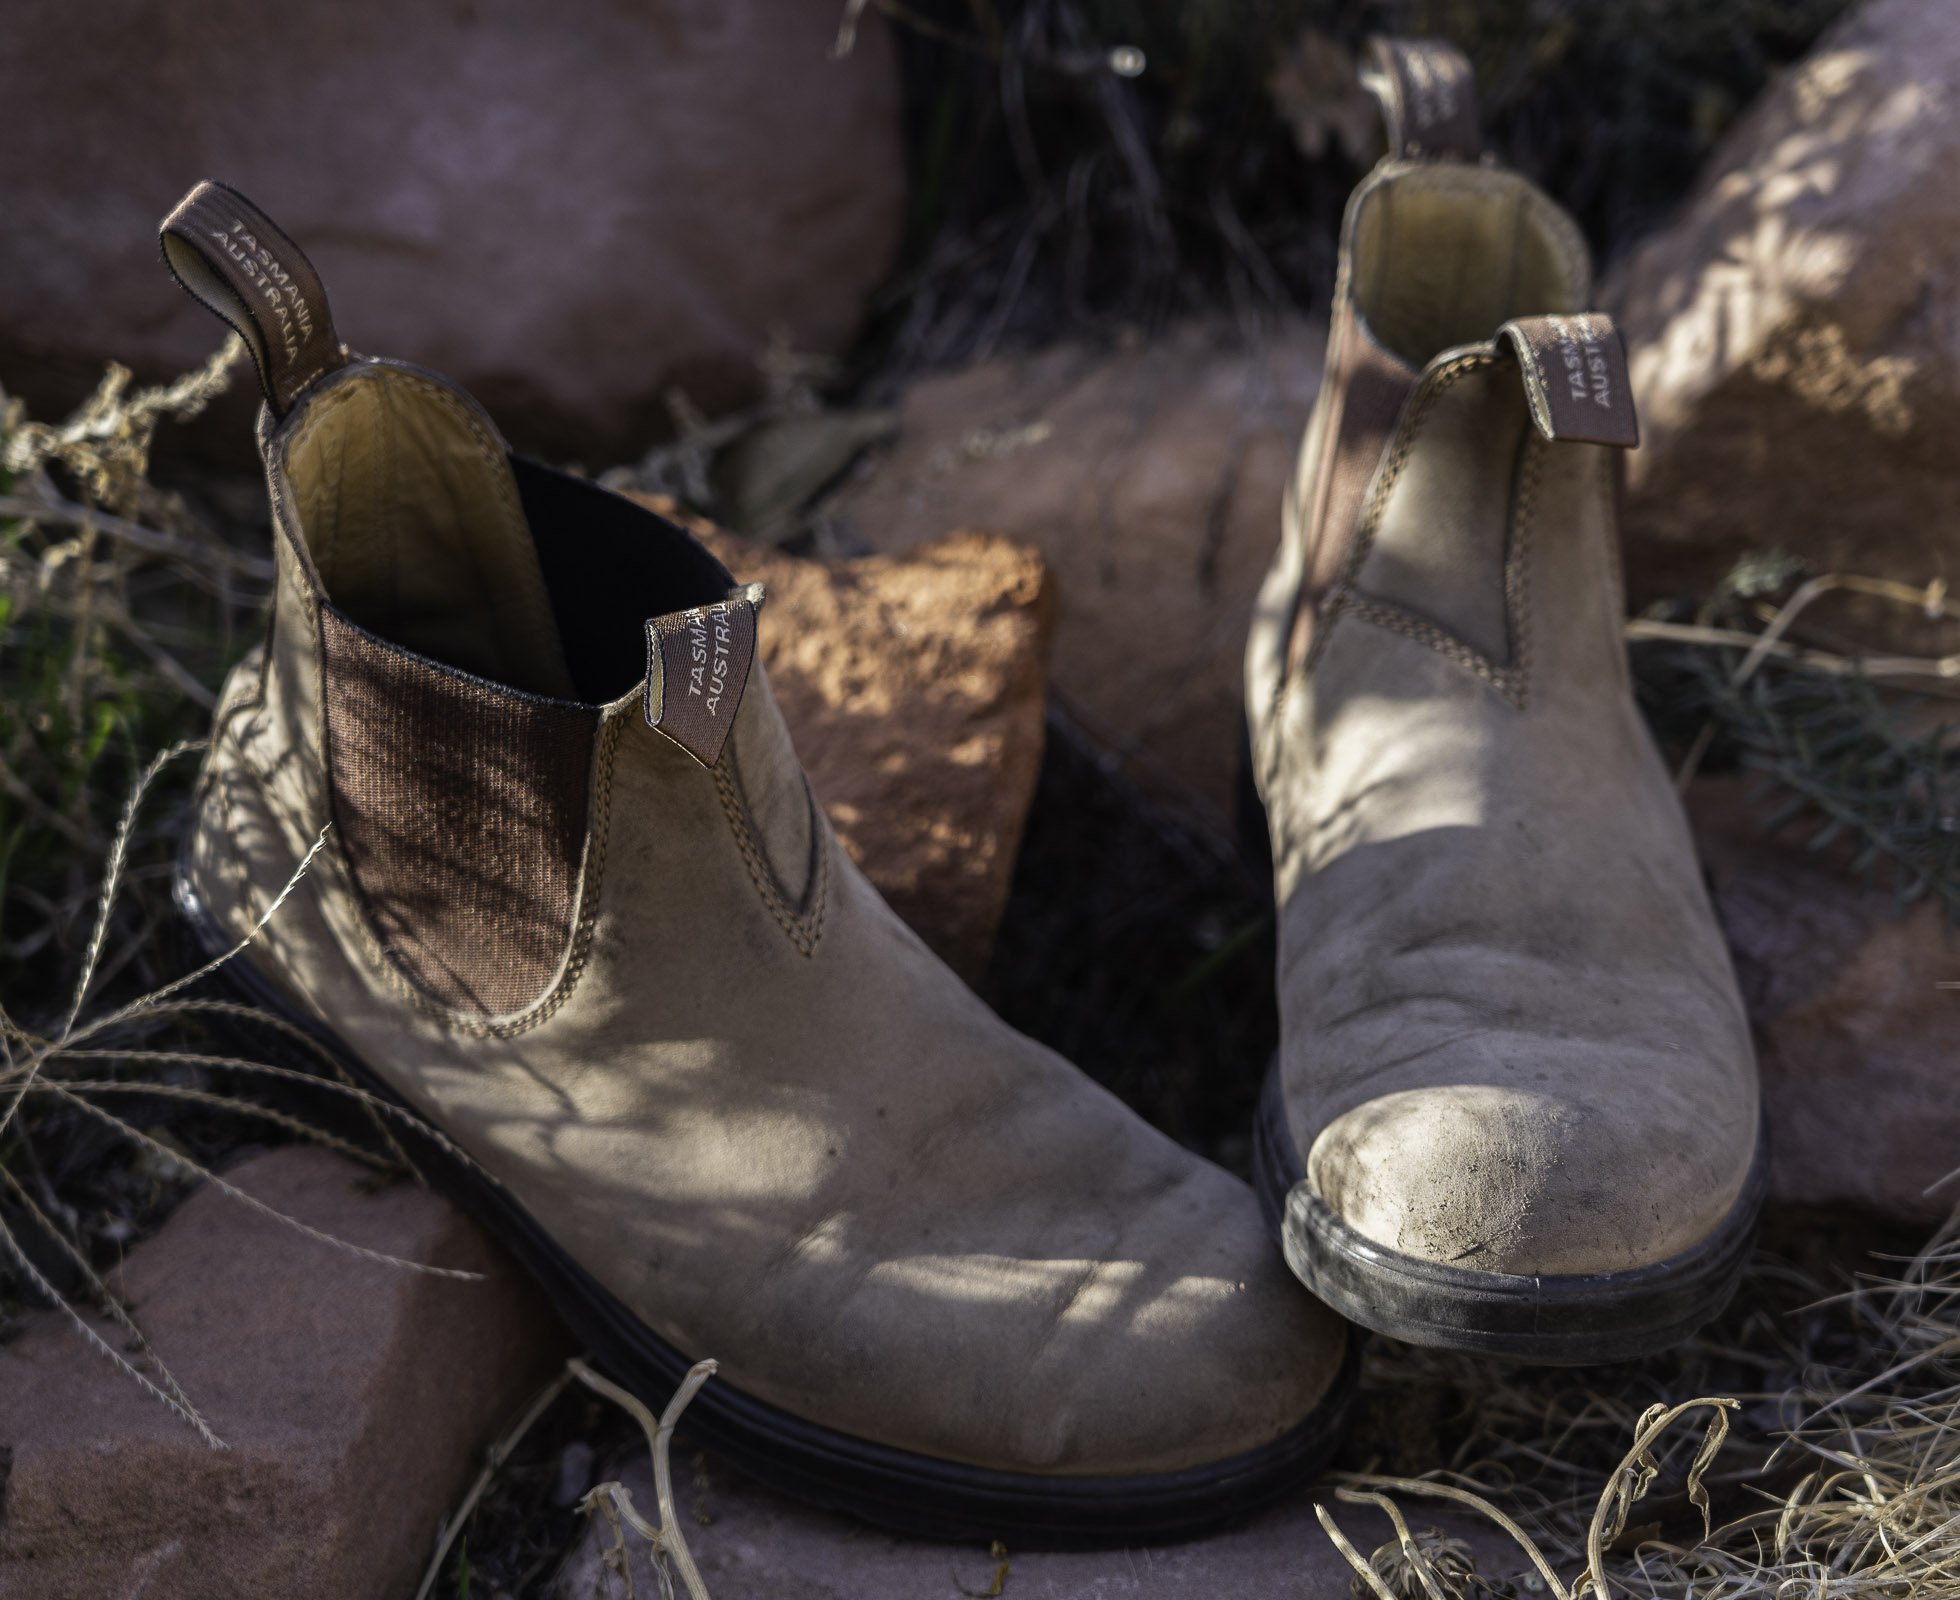
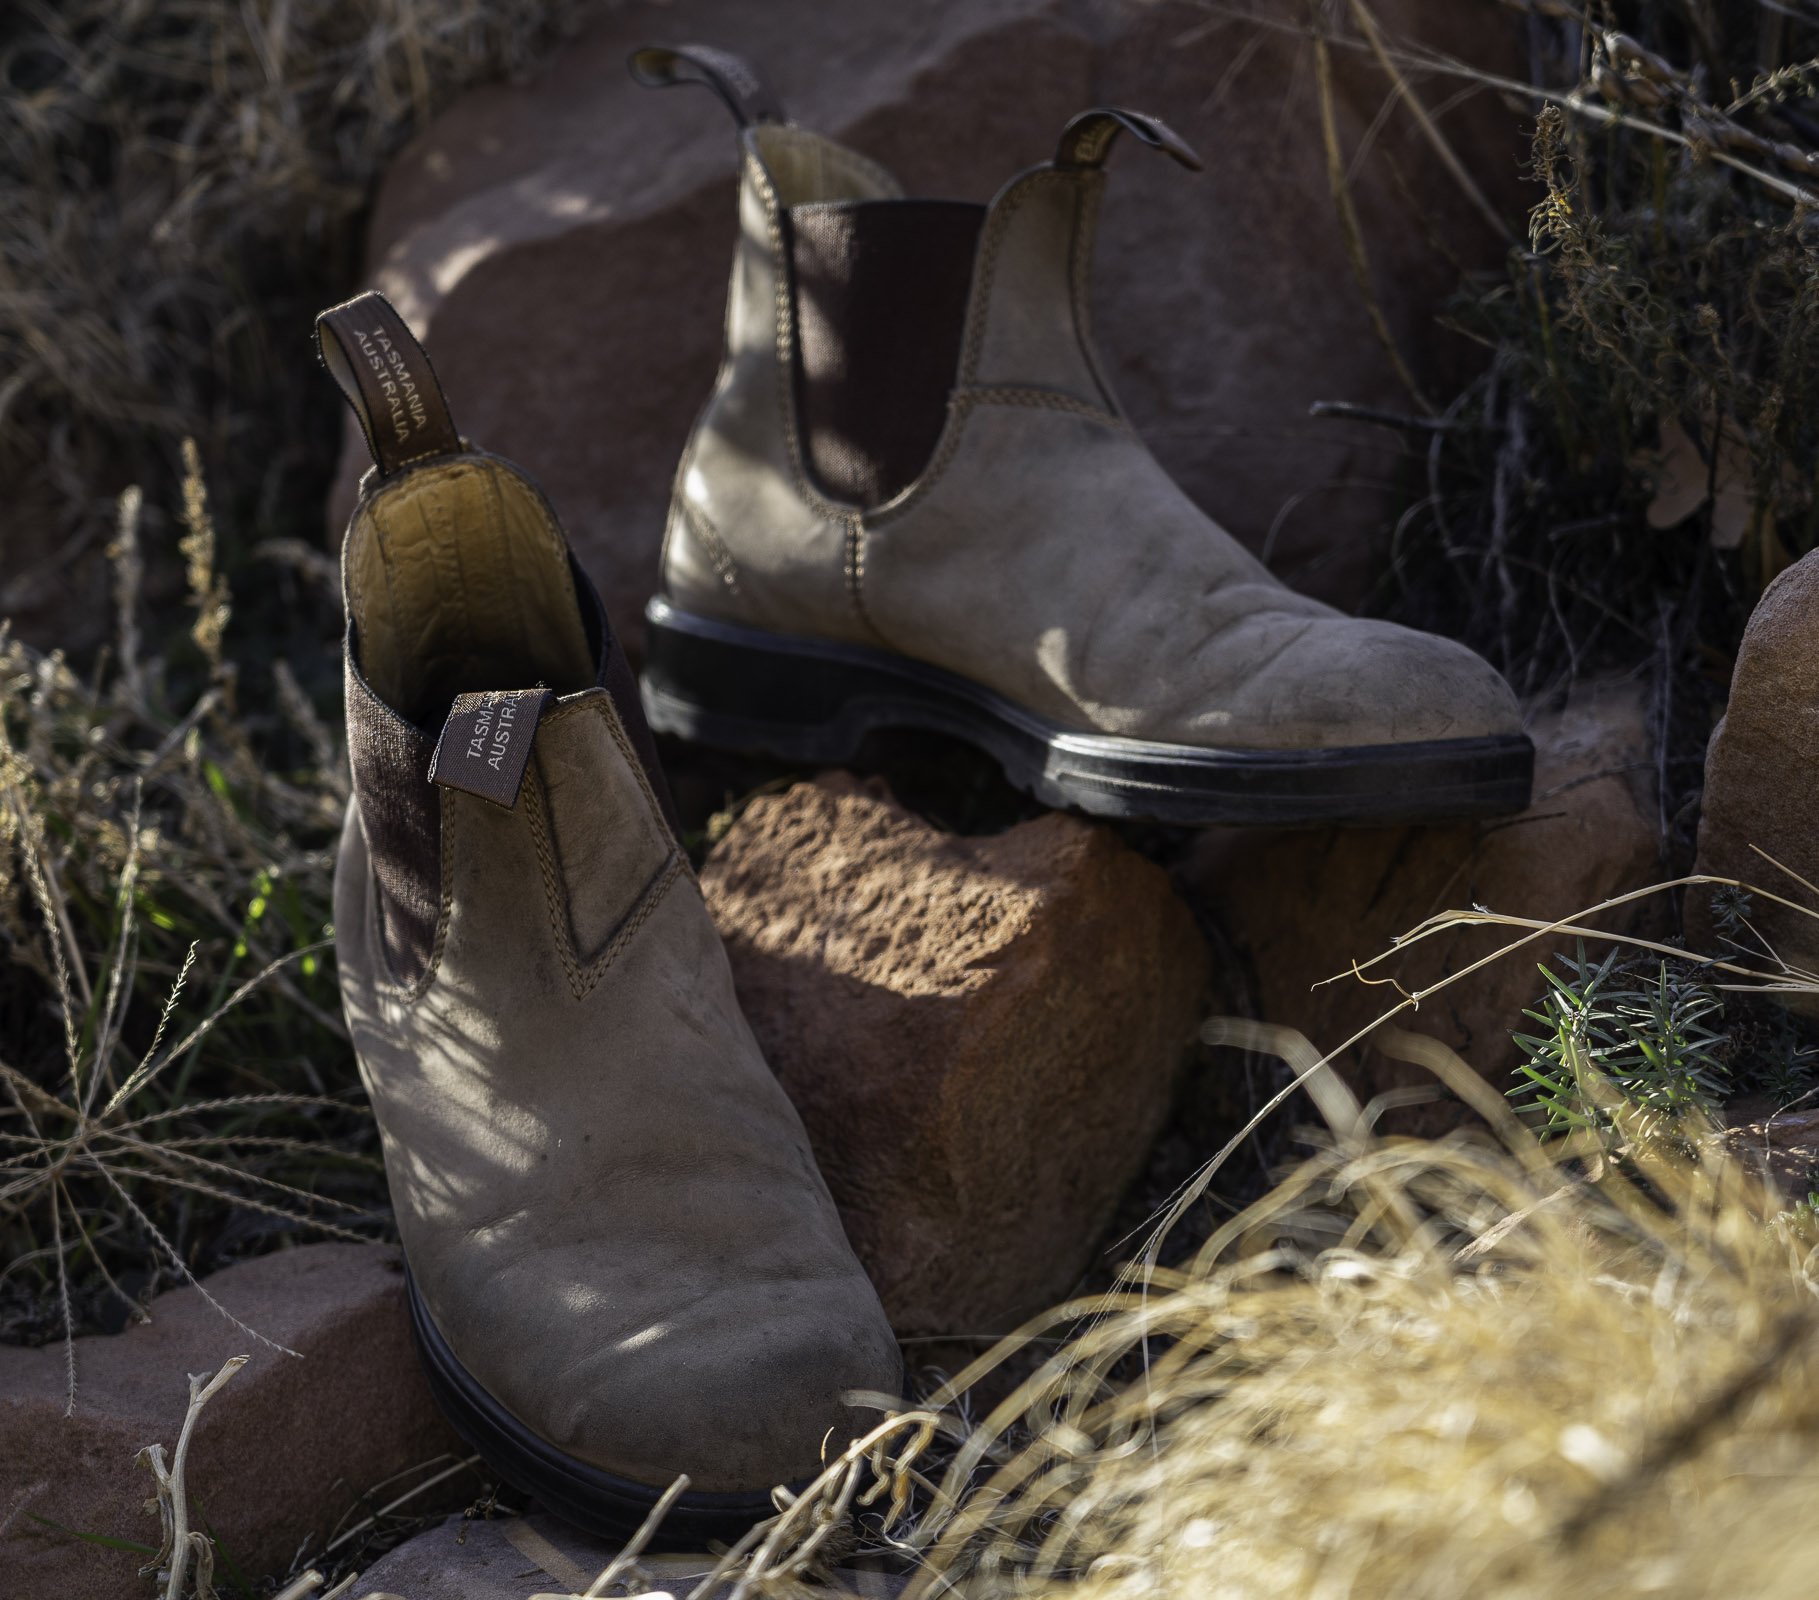
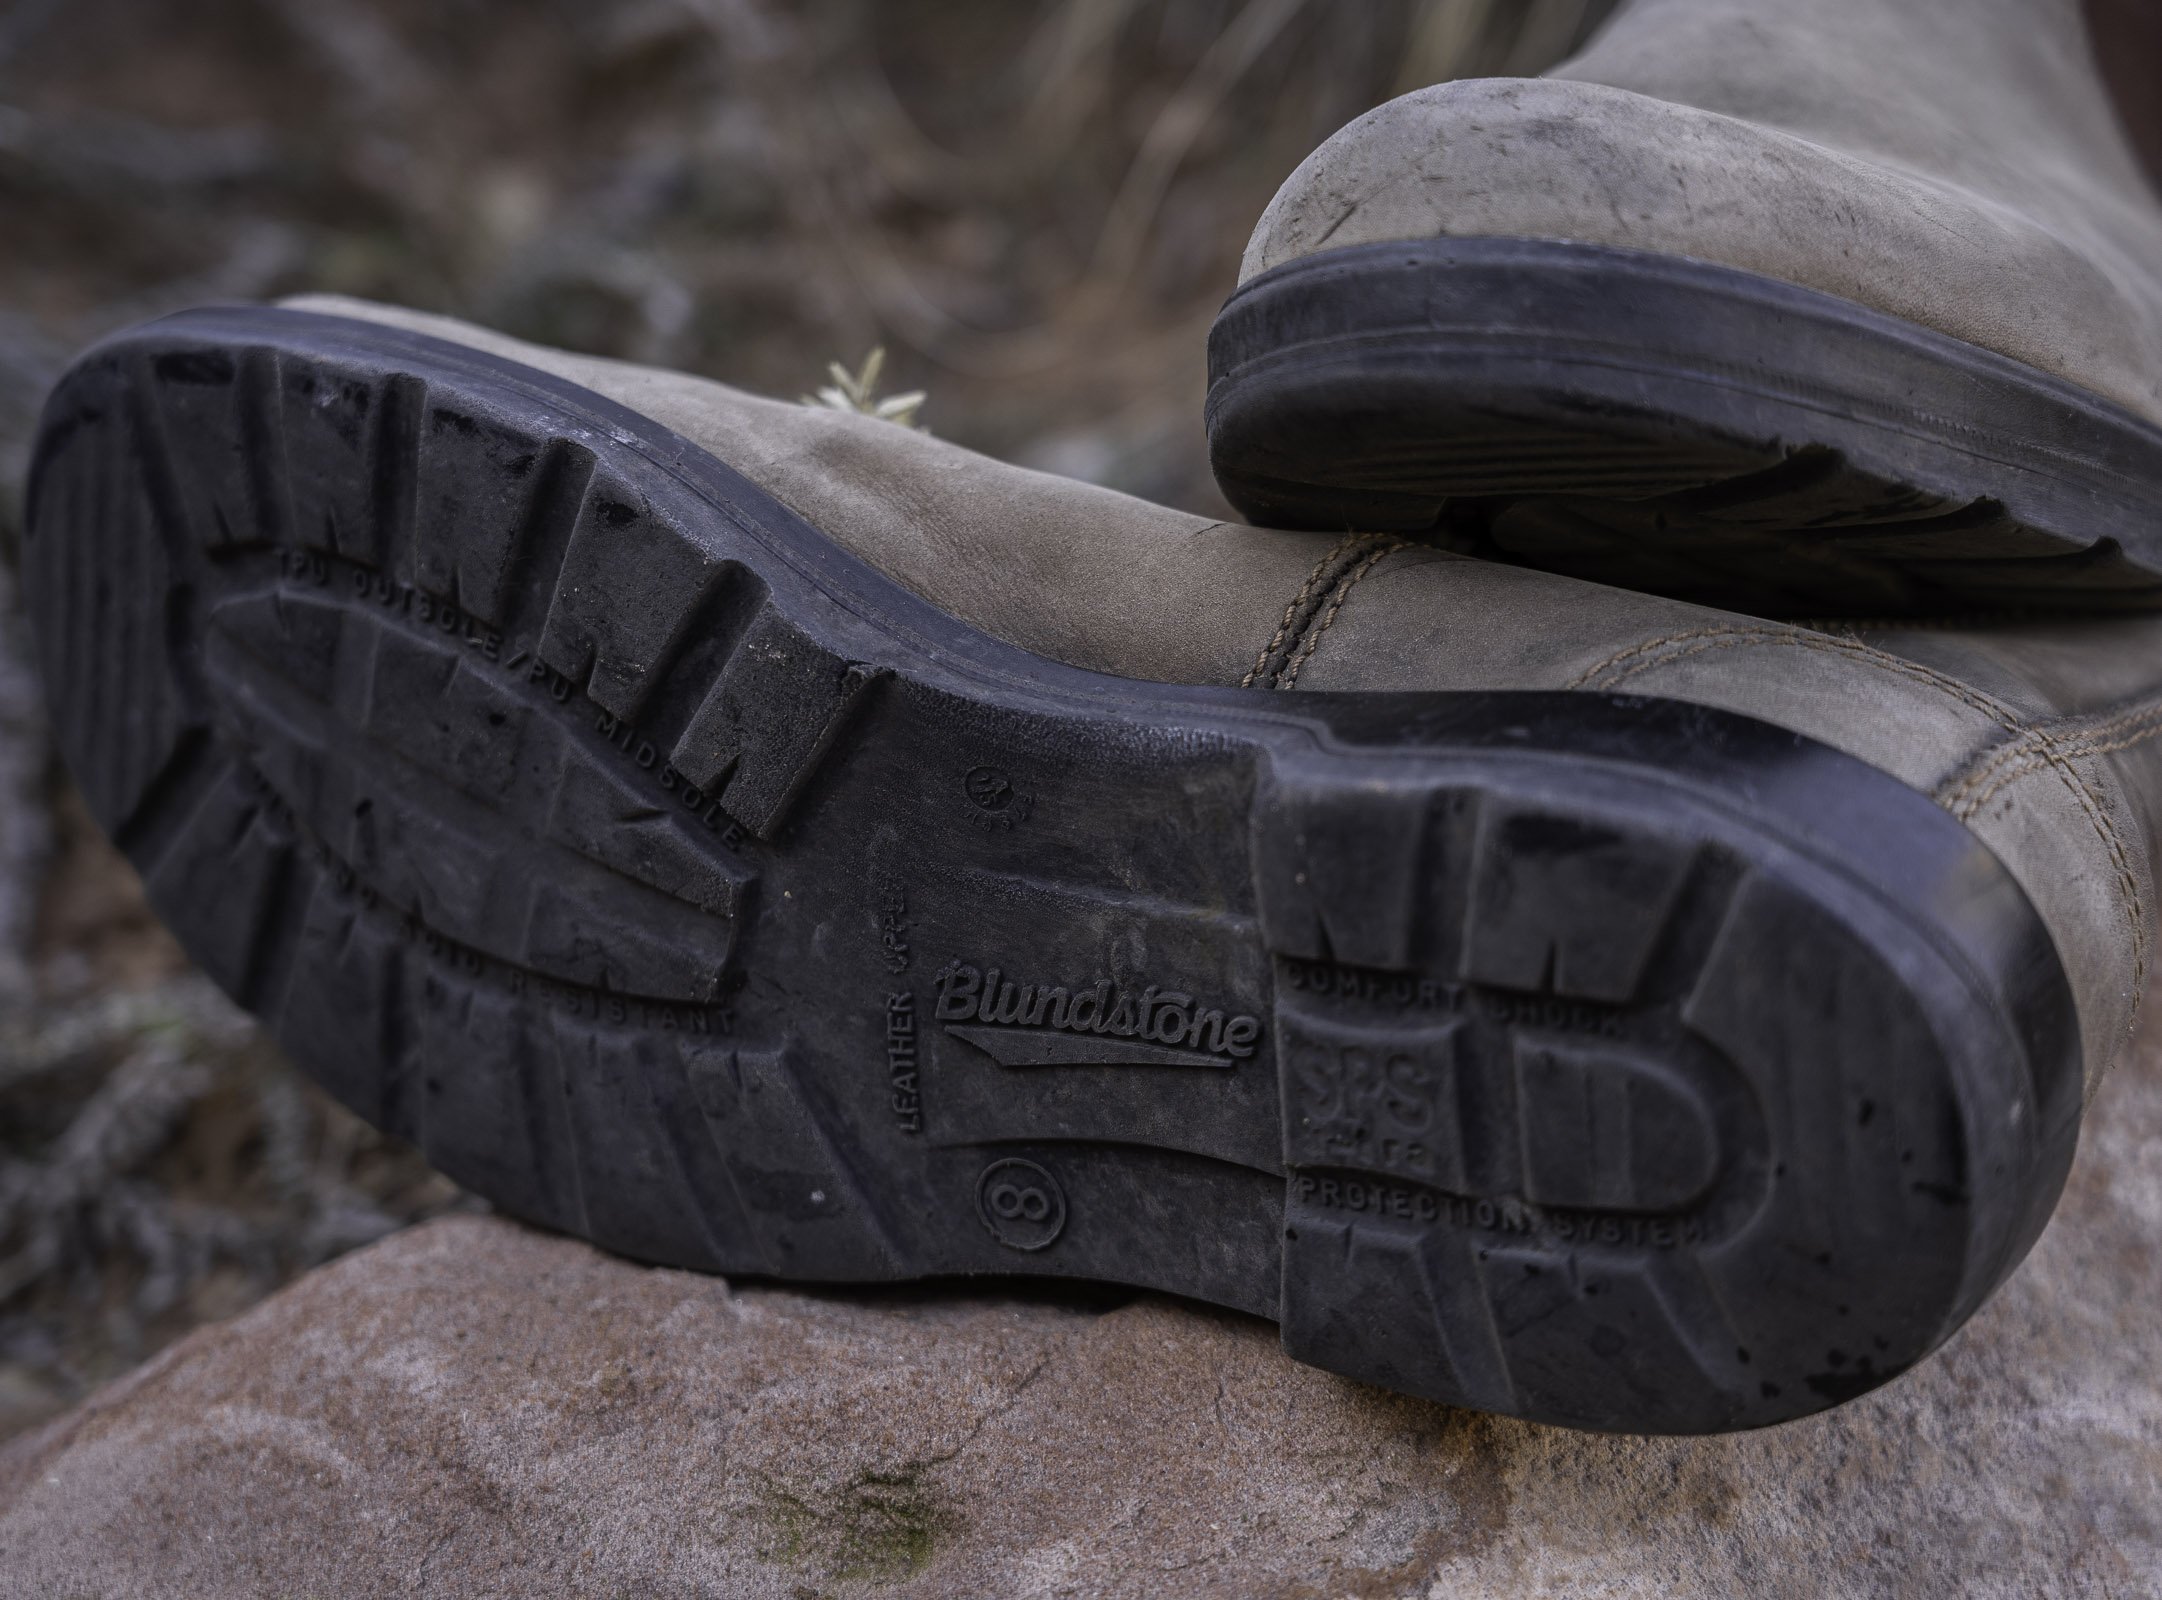
Well worn Blundstone 585 boots in rustic brown leather on rocks in Moab, Utah.

When Blundstone boots were invented the West was wild, the Civil War had just barely ended and the streets of New York City were still dirt. Born in Tasmania in 1870, where the company remains headquartered to this day, Blundies - as my family has come to call them - are legendary. I received my first pair of Blundstone boots in 2016, the #585 in rustic brown leather, after a years long obsession with the brand. For the first couple of years, I took it easy on them. Primarily worn around town, they remained in near pristine condition with nary a scuff or scratch. Then, I started wearing them on our travels to adventurous destinations near and far. Averaging over six weeks of travel each year, not including long weekends, we put a lot of miles on our rig and on our Blundstones.

It didn’t take long for me to realize that Blundstone’s could very well be the perfect boot for adventure travel. Here we have a boot that, unlike most humans, gets better looking with age. Go ahead and get them dirty. Drag the toes across dirt and rocks, prop your feet up on the campfire ring a little too close to the flames, allow them to accumulate layer upon layer of dirt and grease. Somehow, against all odds, they’ll shrug it all off while wearing each wrinkle, scuff and stain as a badge of honor, a life well-lived. The more beat up they get, the better they look and the more comfortable they become.

I used to travel with a pair of camp shoes. For years, Pakems were my go-to. Stellar product, but when space is at a premium it pays to find items that can do double or triple duty. Blundstone boots fill that requirement. They slip on easily, so they’re great for middle of the night bathroom breaks. I’ve hiked in them, sat around camp, walked around towns, driven long distances, chopped firewood, worked on bikes, vehicles and campers, and even wore them on a mountain bike ride when I forgot to pack my Five Ten’s.

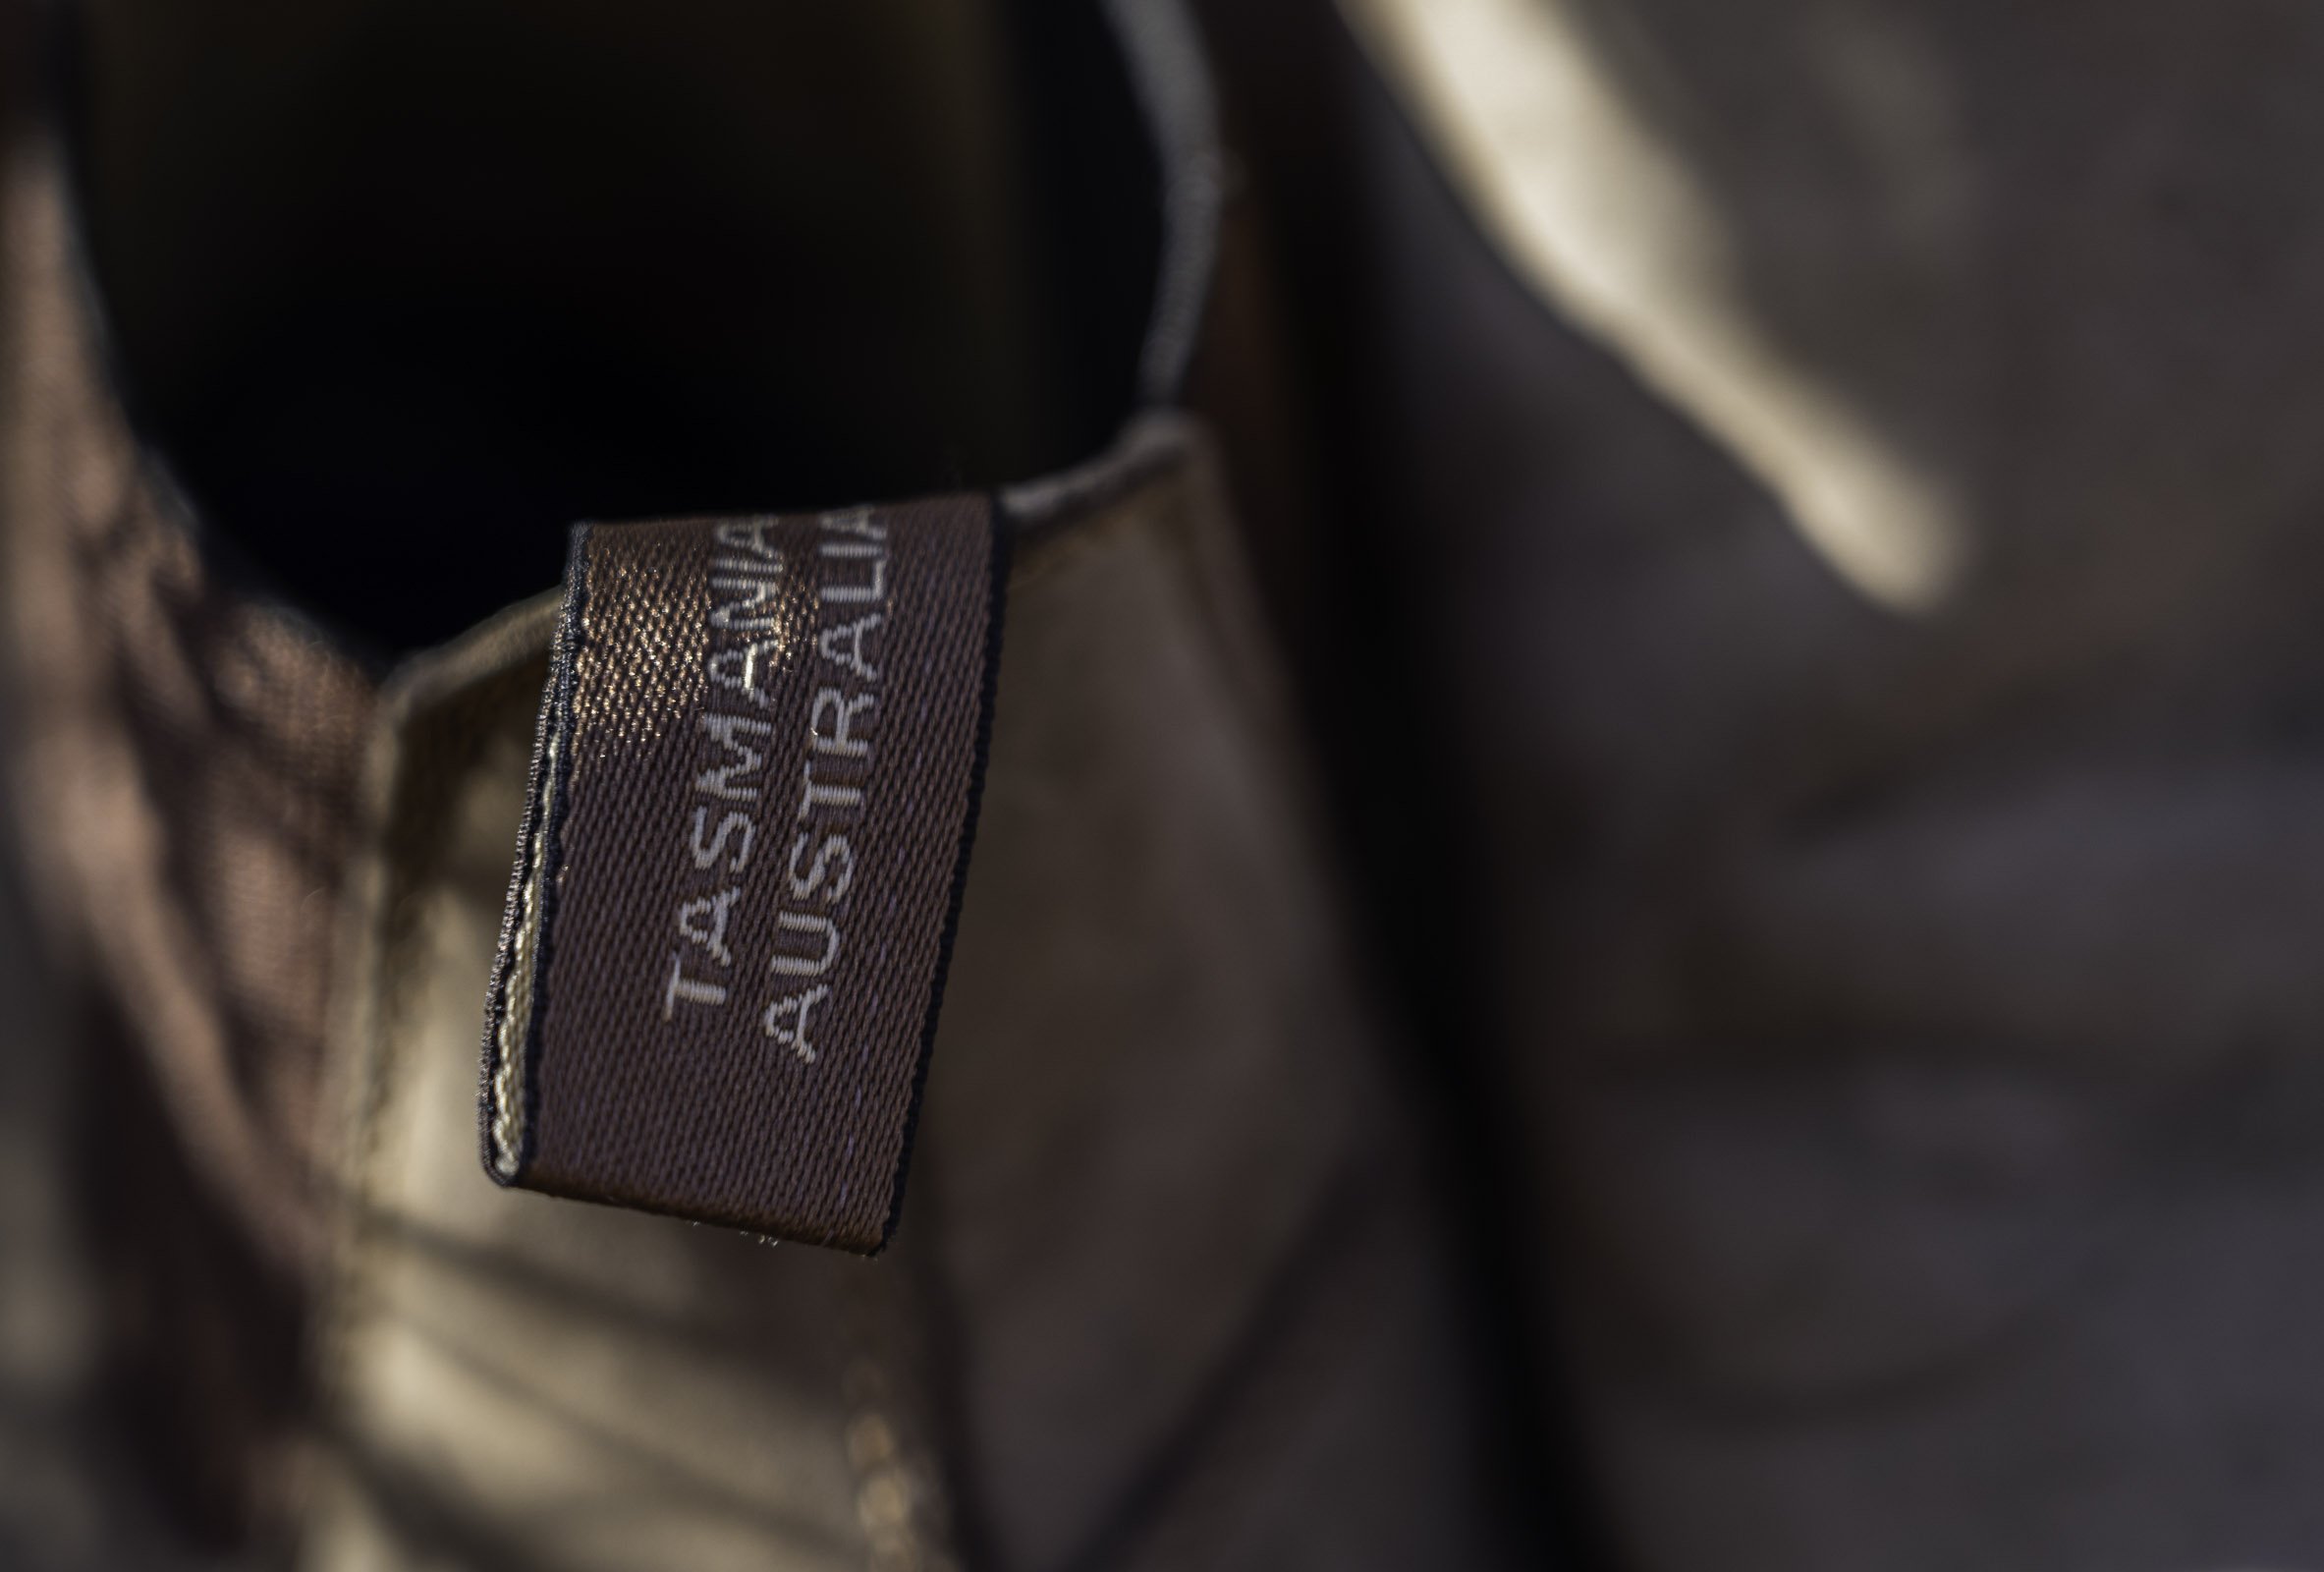
Blundstone 585 Boot Sole Blundstone 585 Boot Label Blundstone 585 Boots

Blundstone boots come out of the box ready for adventure. They require zero break-in, there are no funky pressure points, and the water resistant leather is soft and pliable, but not at the expense of durability. The interior is lined with a buttery soft leather and the midsole strikes a good balance between cushion and support. Blundstone says the outsole is made of a “durable TPU”. I don’t know what that is but in my experience, it provides very good traction on a variety of surfaces and wears better than just about any other shoe I’ve owned. Melissa teases me about my uncanny knack for destroying footwear, typically leaving the sole looking like racing slicks, but my Blundies are still going strong. In six years I’ve only occasionally wiped off the dust and mud, and the leather has been conditioned once. The leather now has a fine patina that reminds me of the good times I’ve had while adventuring with my family.

Are Blundstones the perfect adventure travel boot? They are for Melissa and me. They’re versatile, durable and comfortable - all the “ables” - and I’ll wear my 585’s until they fall off my feet. Given their solid construction and top notch materials, I suspect it’ll be a while before that happens.

In Reviews Tags adventure travel, adventure travel gear reviews, blundstone boots, blundstone boots review, blundstone #585 boots, perfect adventure travel shoes, perfect adventure travel boots, overlanding, overlanding gear review, best travel shoes, best travel boots, outdoor boots, blundstone boot reviews, camping footwear review, adventure footwear review, camp footwear, adventure travel footwear review, best camping footwear, adventure travel blog, camping blog, travel equipment review, camping equipment reviews
Comment

What You Need to Know About the 2022 Arches National Park Timed Entry Permit System

January 12, 2022 Bret Edge

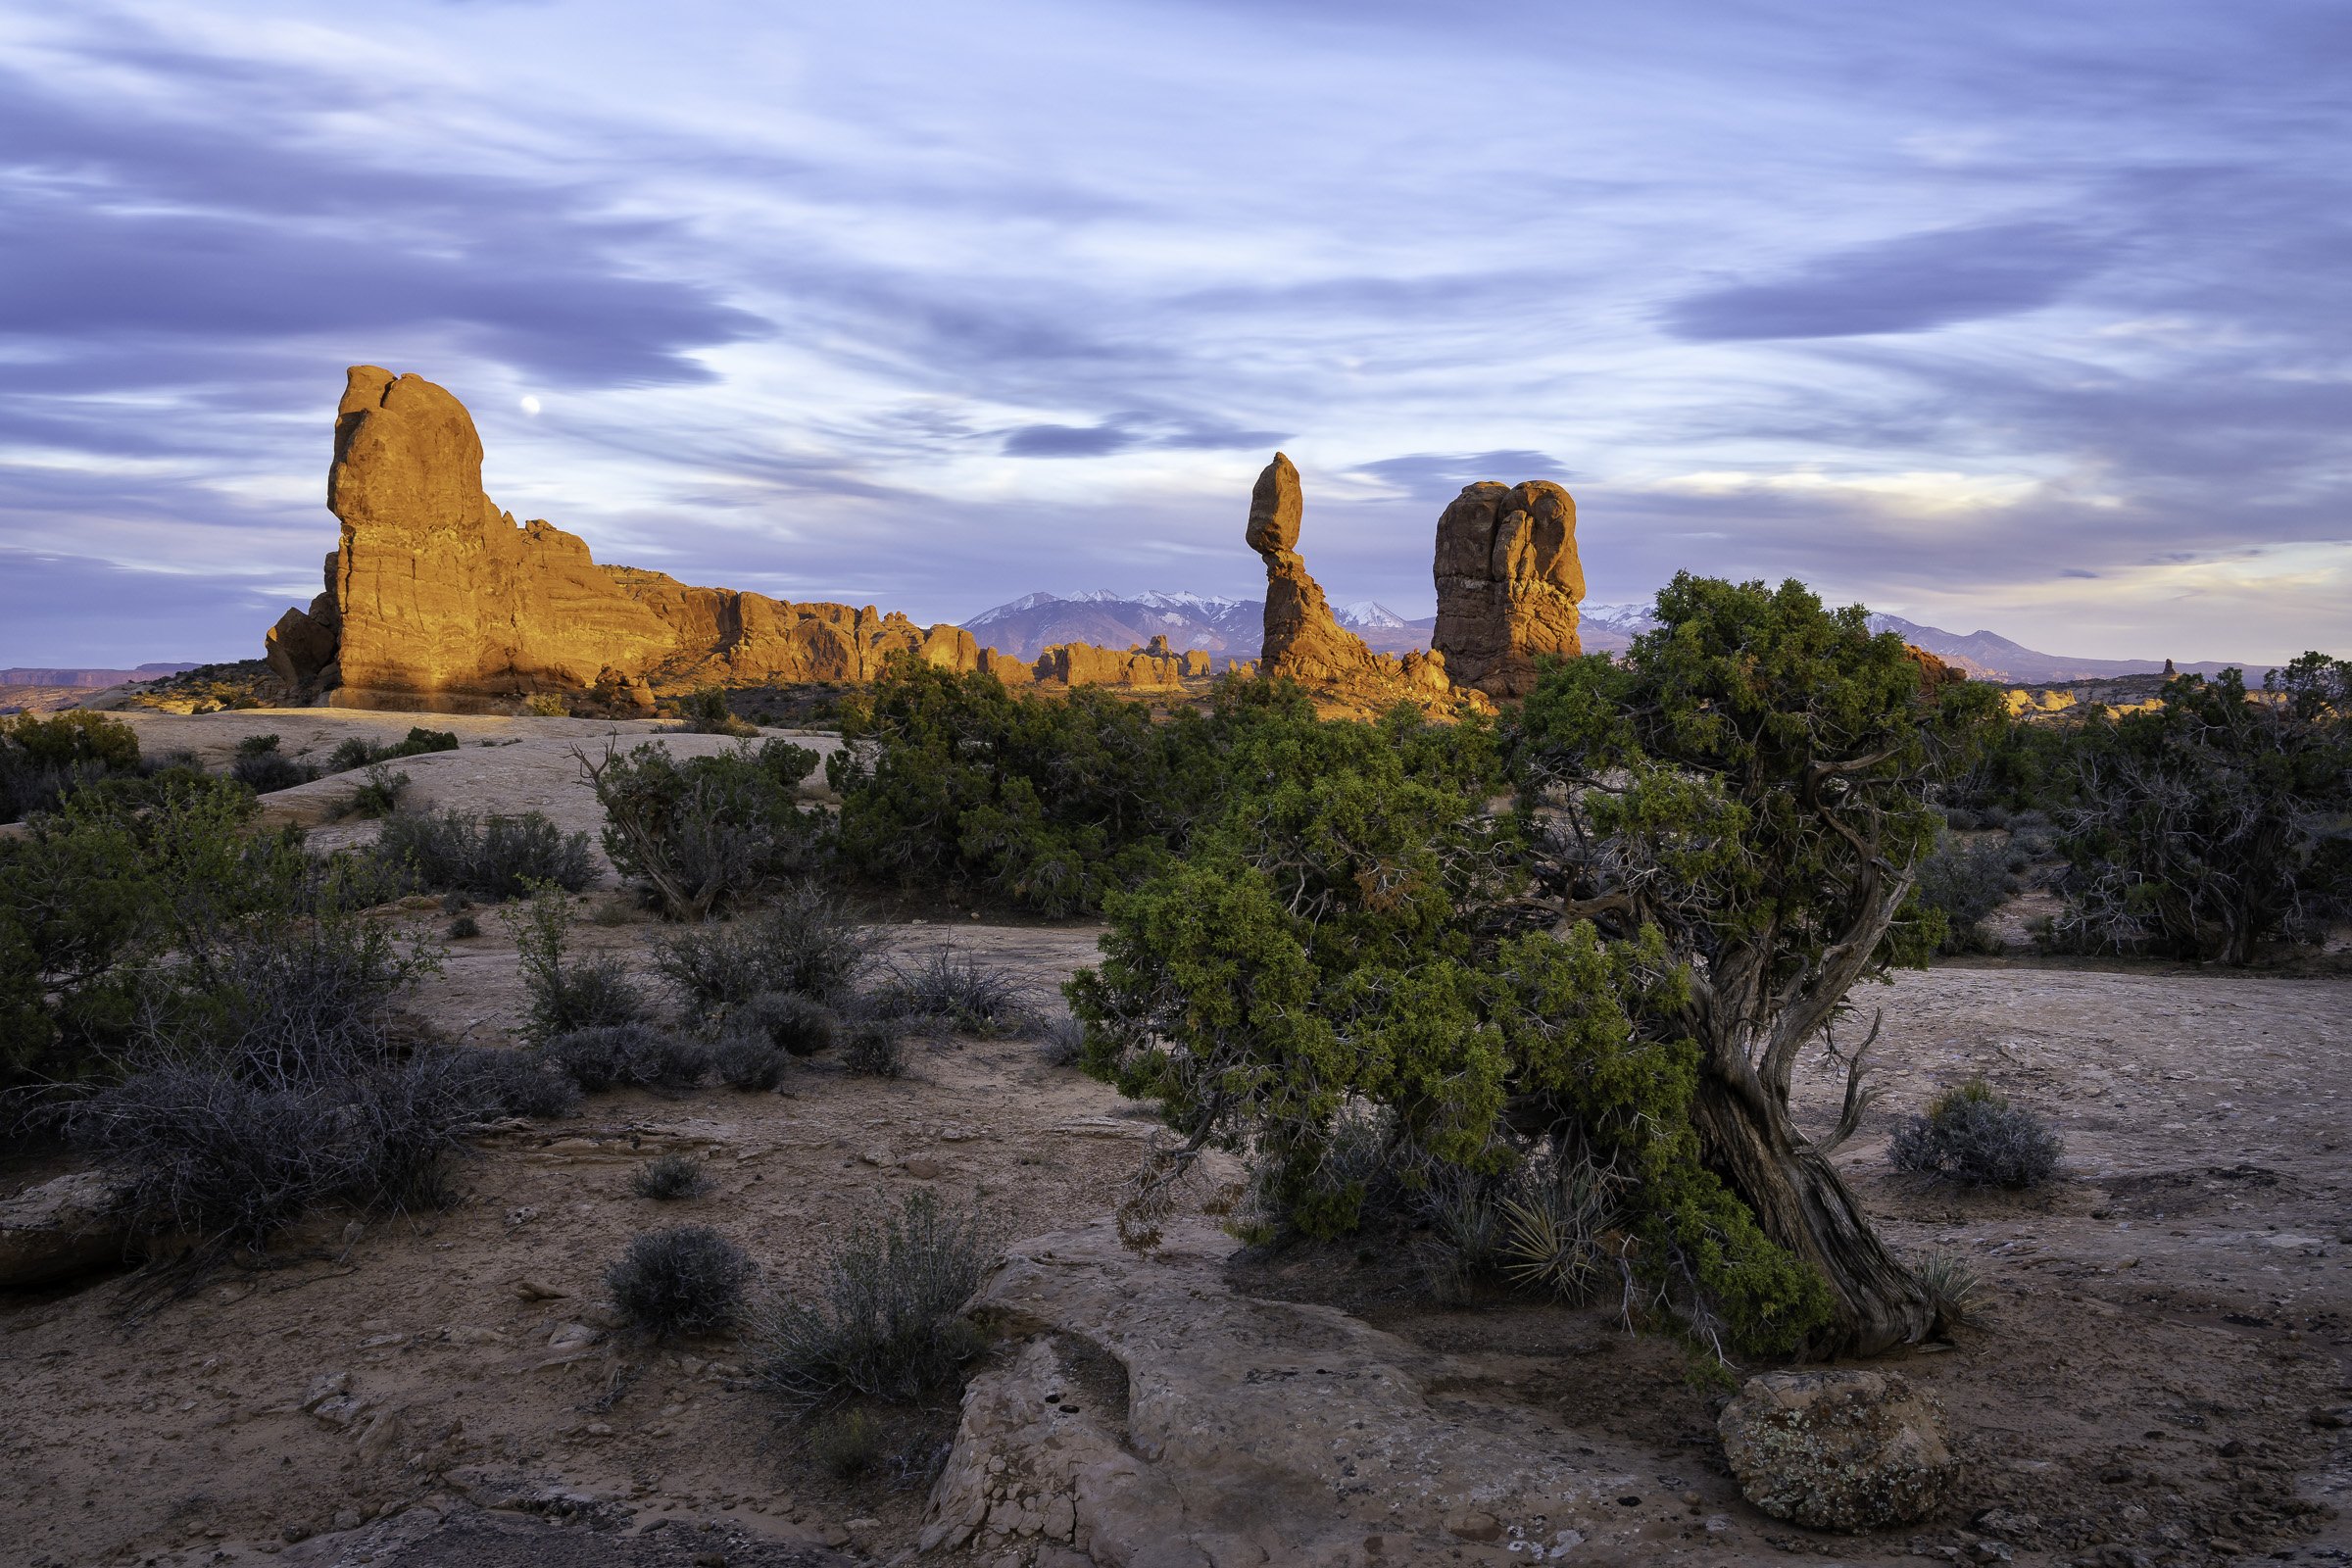
The moon rises through clouds above Balanced Rock as sunset light warms red sandstone on an autumn day in Arches National Park near Moab, Utah.

Moab nature and adventure photographer Bret Edge shares information and tips on navigating the new Arches National Park timed entry permit system that begins in April, 2022.

Read more
In Moab Photo Locations, Moab Photography Guides, Announcements Tags arches national park, arches photo tips, arches photo conditions, arches national park photography tips, arches national park photo guide, arches national park status, arches national park timed entry permits, arches national park timed entry program, moab photography, moab photography guides, moab photography tips, moab photography locations, moab photo guide, arches national park timed entry system, how to navigate arches national park timed entry system, arches national park timed entry system information, what do i need to know about arches national park timed entry system, nature photography, landscape photography, landscape photography icons, nature photography guidebooks, nature photography tips, moab photo tours, national park service permits, arches national park information, hiking arches national park, visiting arches national park, dead horse point state park photography conditions, dead horse point state park photography, canyonlands national park status, canyonlands national park, canyonlands photography guide
Comment

Product Review: Voited Cloudtouch Blanket (Plus A Discount Code!)

December 16, 2021 Bret Edge

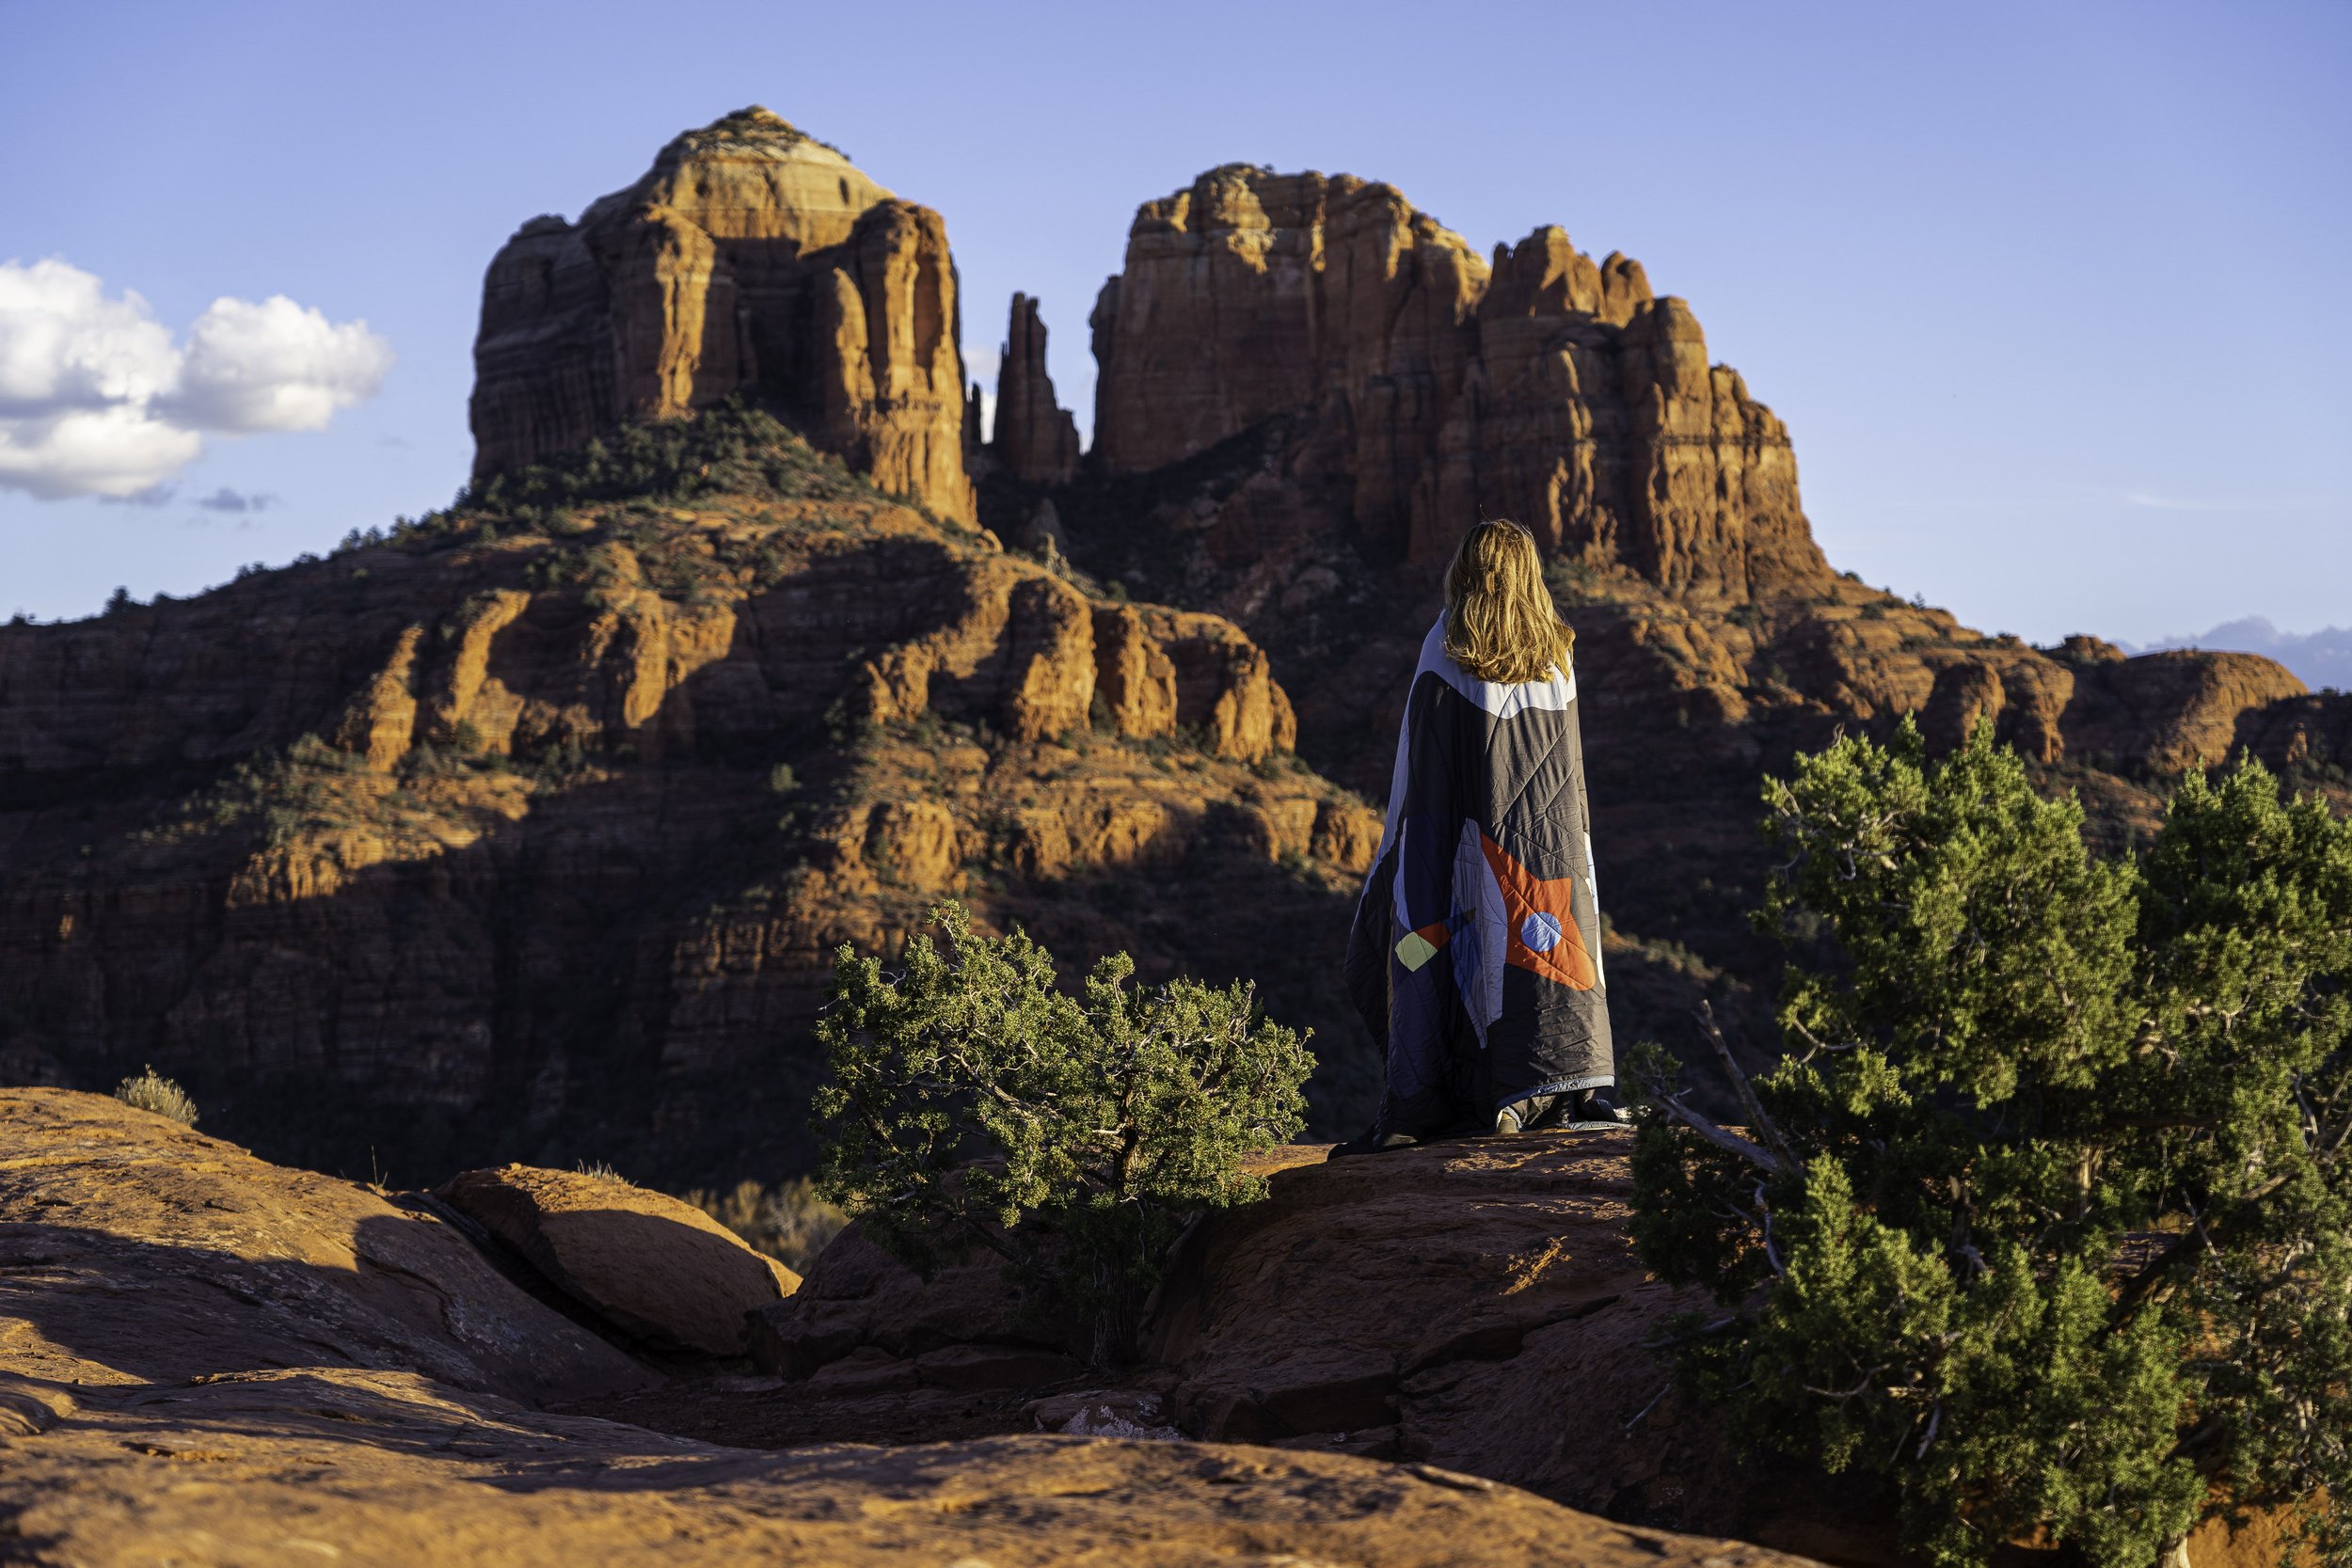
Wrapped in a Voited Cloudtouch blanket on a chilly autumn evening, Melissa Edge enjoys a sunset at Secret Slickrock in Sedona, Arizona.

Bret Edge reviews the Voited Cloudtouch blanket for overlanding, vanlife, camping and other outdoor activities, and shares a code for a 20% discount on your purchase from the Voited website.

Read more
In Reviews Tags voited discount code, voited coupon code, coupon codes, discount codes, outdoor blankets, voited cloudtouch blanket reviews, travel blankets, travel blanket reviews, overlanding, vanlife, van life, camping blankets, camping blanket reviews, overland adventure, overland lifestyle, overlanding equipment, overlanding gear, camping gear, camp life, camping equipment reviews, camping gear reviews, van life gear reviews, vanlife gear reviews
1 Comment

Why I Bought a Ford F250 Super Duty Tremor for a Four Wheel Campers Hawk UTE

December 13, 2021 Bret Edge
Ford F250 Tremor
Ford F250 Tremor

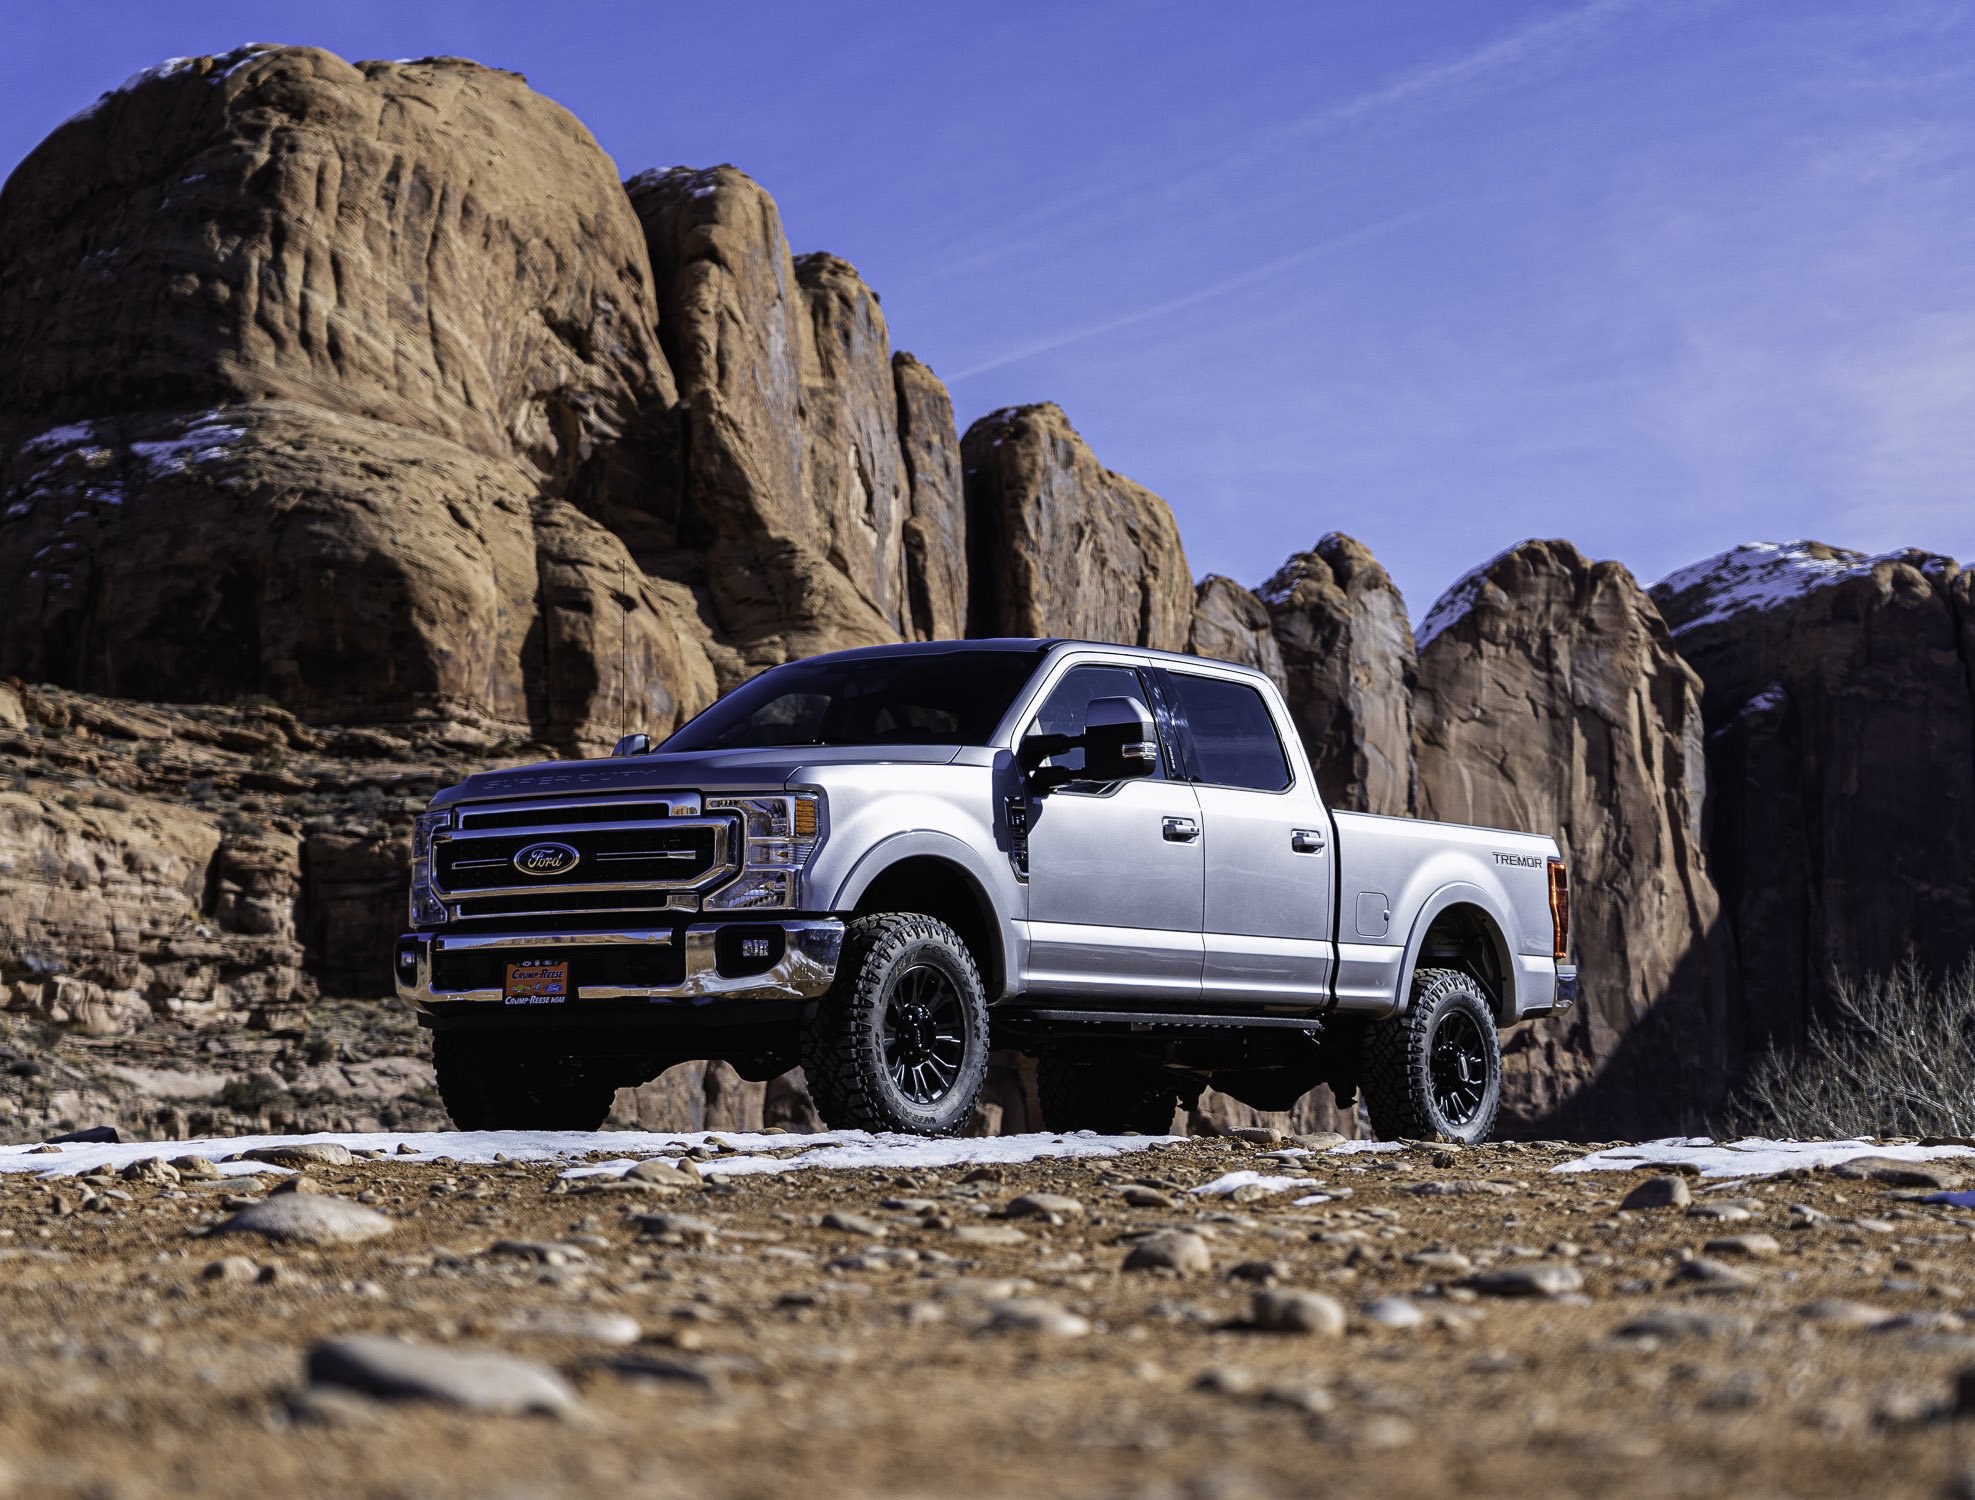
A 2021 Ford F250 Tremor parked below sandstone cliffs on Kane Creek Road in Moab, Utah

Pastel Sunset Sky at Overlanding Campsite near Sedona, Arizona

A pastel sunset sky at an overlanding campsite near Sedona, Arizona.

Ford F250 Tremor Pastel Sunset Sky at Overlanding Campsite near Sedona, Arizona

Should you buy a Ford Super Duty with the Tremor package? That depends on a few factors, all of which are personal. In this post Bret Edge discusses the reasons the Tremor package was a good fit for his intended use.

Read more
In Overlanding Tags ford tremor package, ford tremor truck, ford f250 super duty tremor, ford f350 super duty tremor, offroad suspension upgrades, offroad suspension modifications, king shocks, carli suspension, cjc offroad reviews, ford tremor package options, ford tremor package contents, overland adventure, overland travel, overlanding rig review, overlanding, overlanding truck review, method race wheels
26 Comments

A Discussion of Four Wheel Campers Options, Aftermarket Upgrades and Tips to Improve Livability

December 8, 2021 Bret Edge

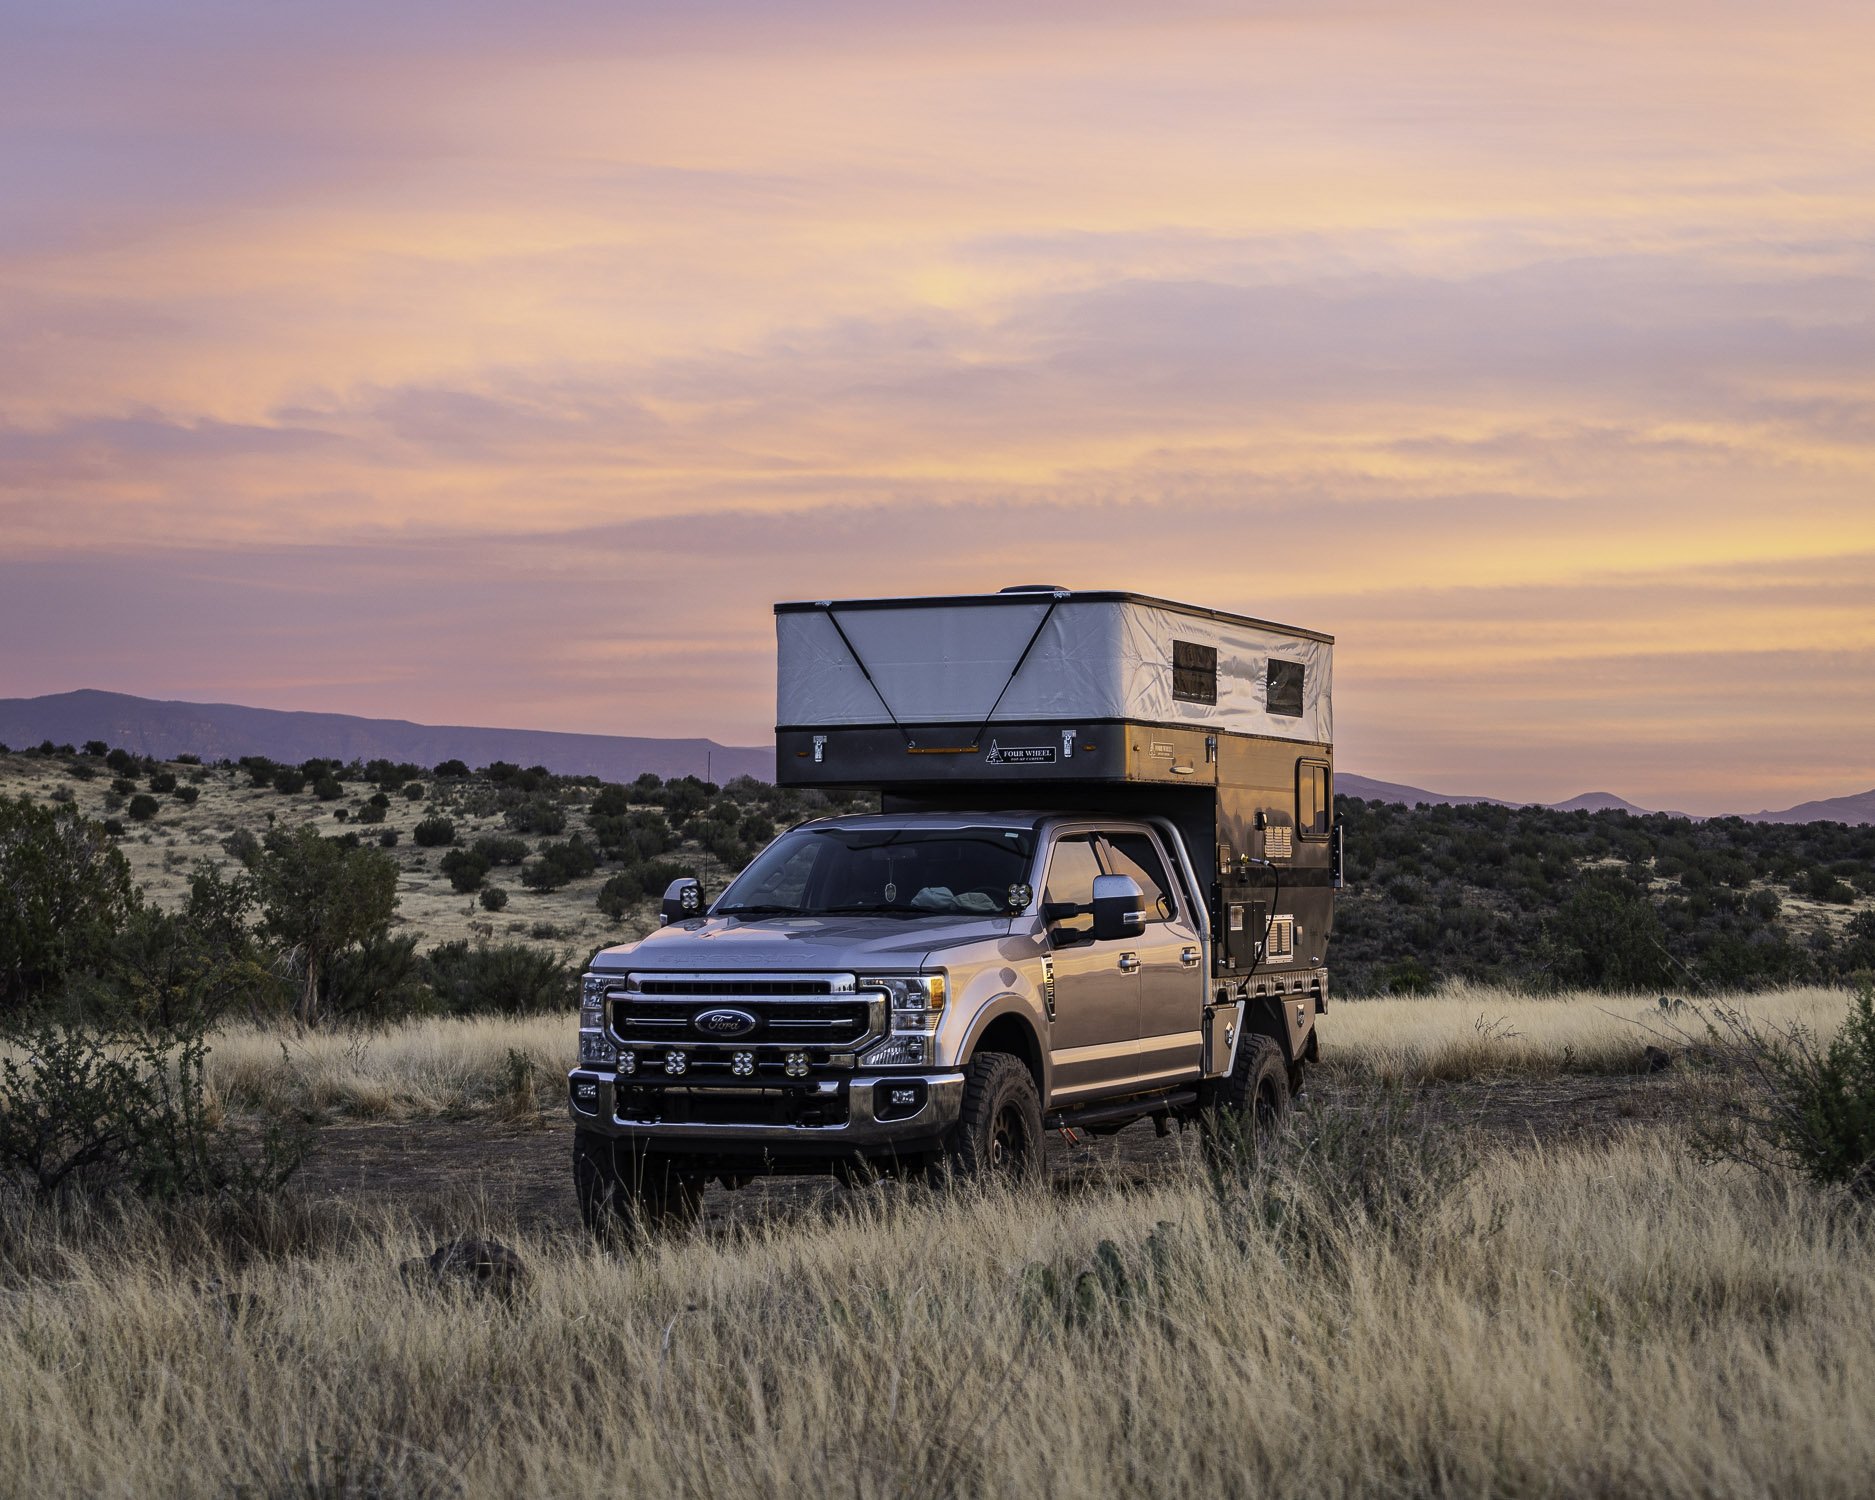
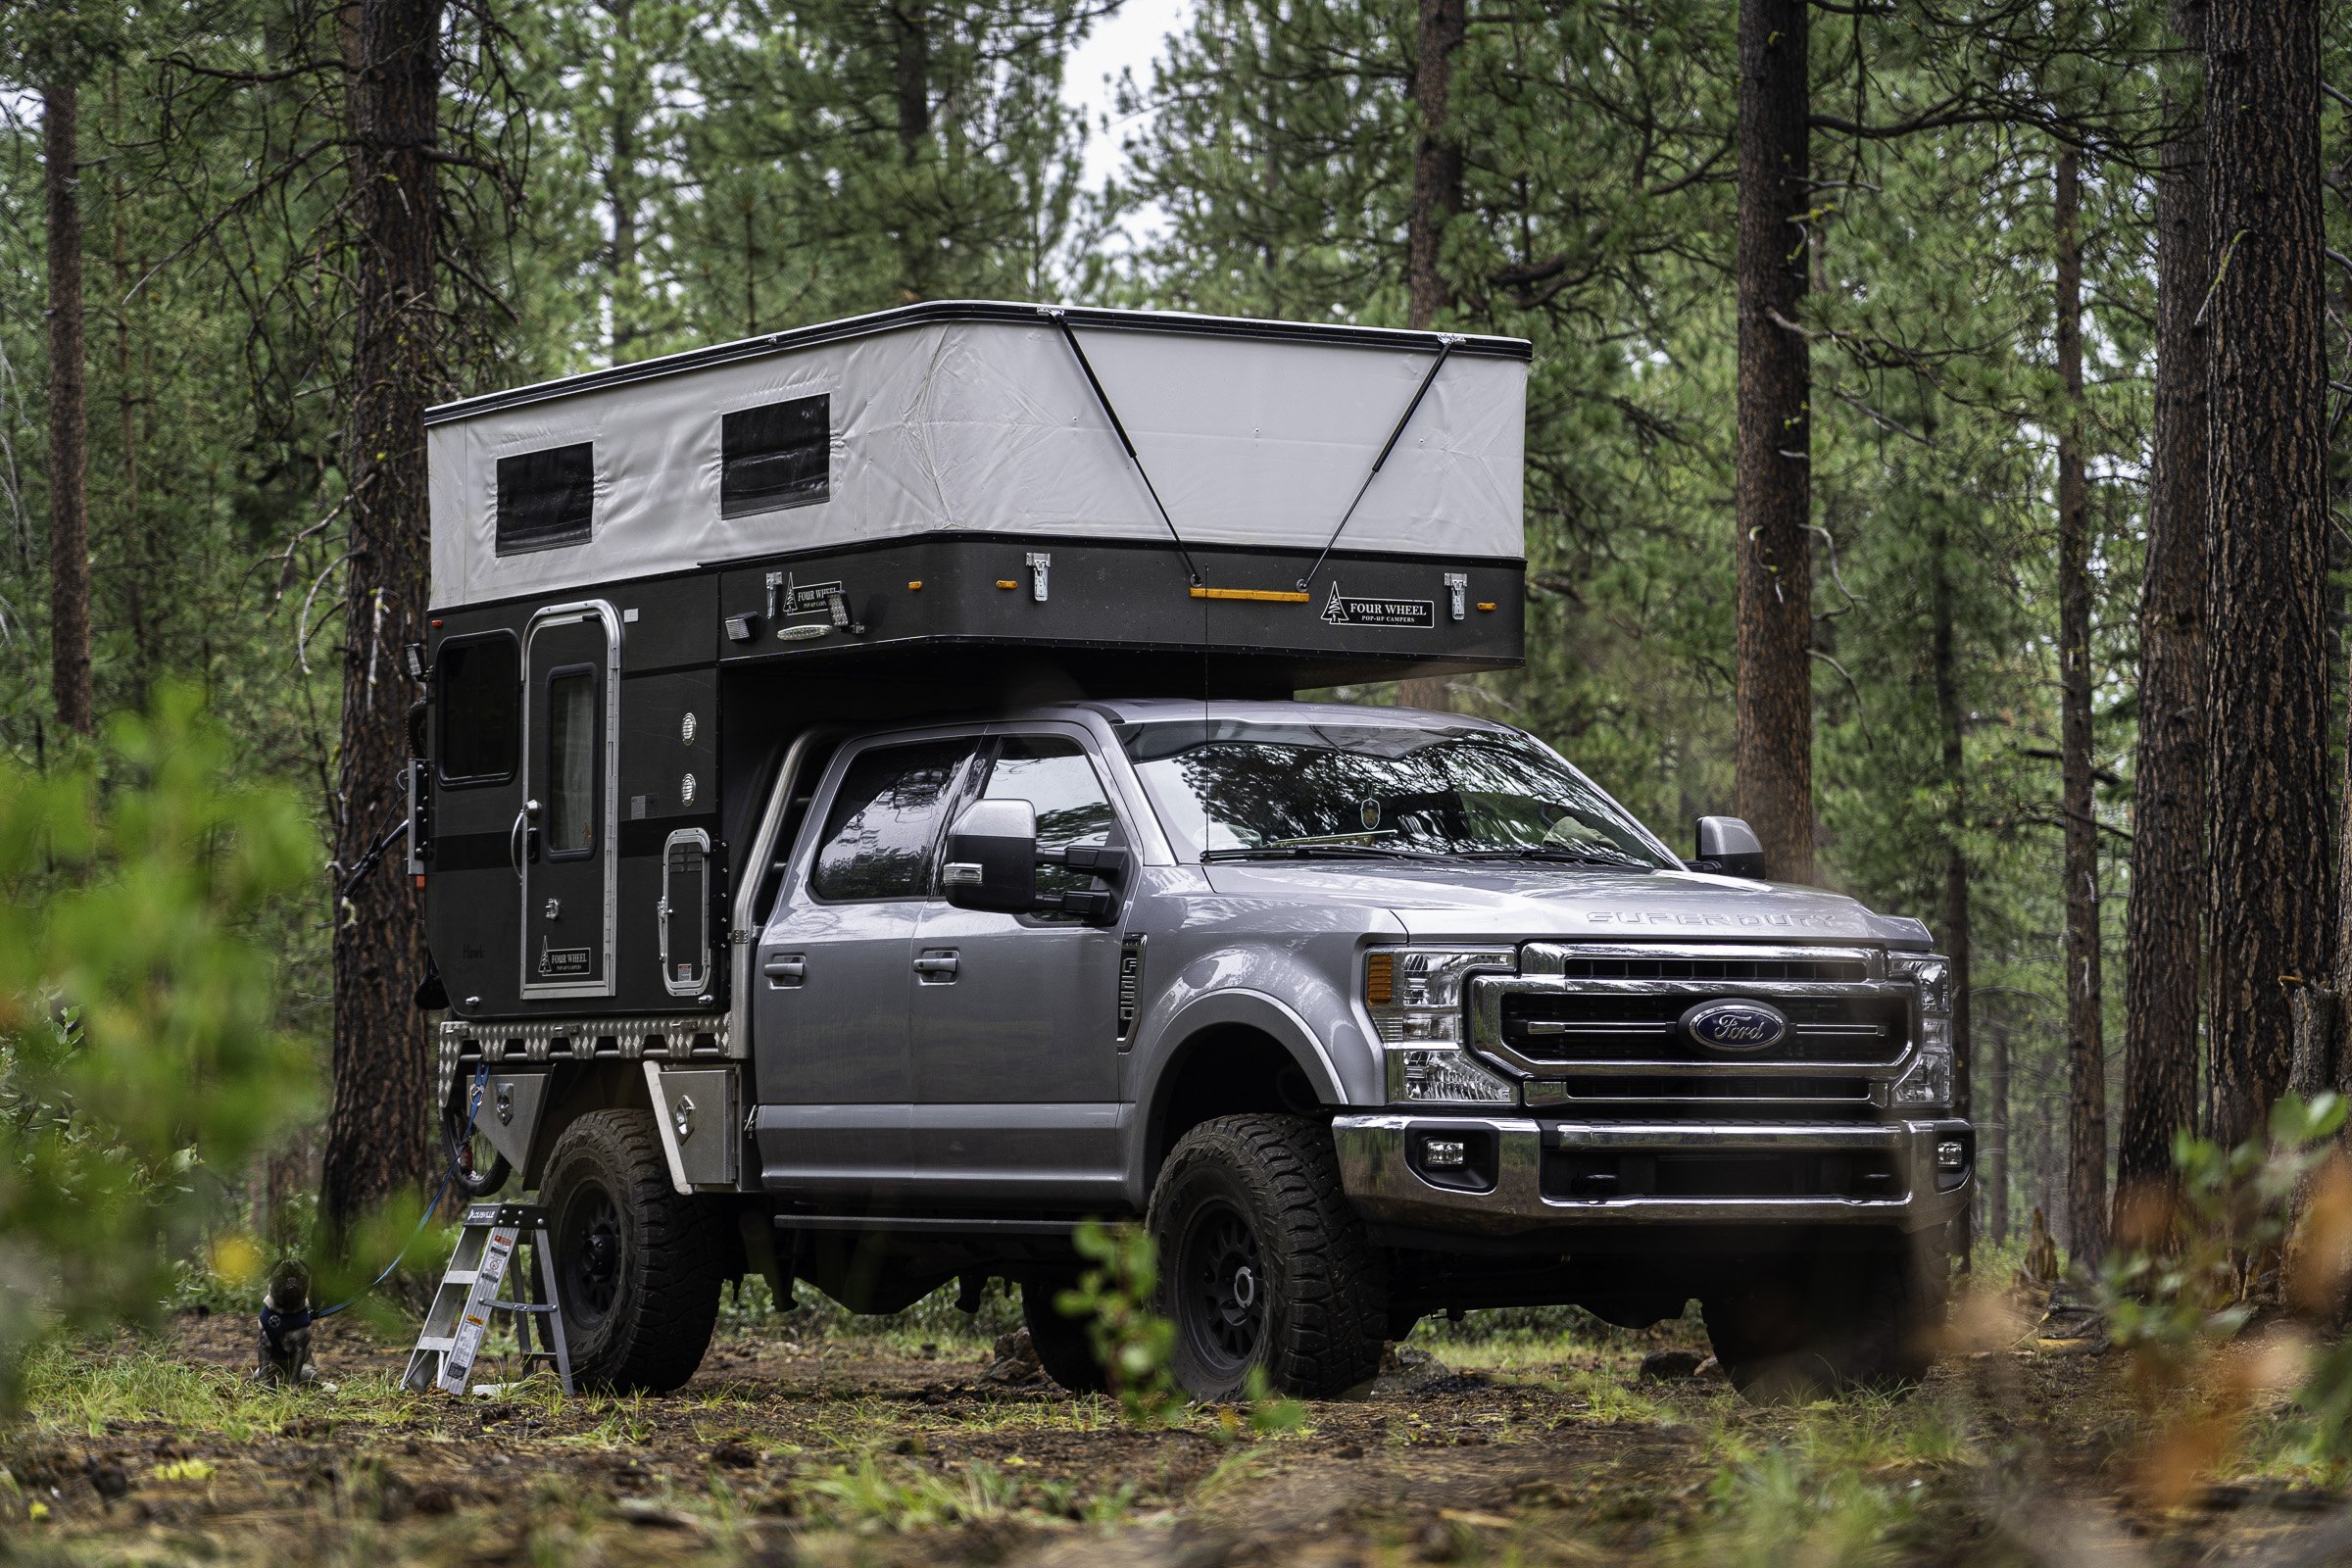
Ford F250 Tremor equipped with Four Wheel Campers Hawk UTE at a wooded campsite near Bend, Oregon.

Professional adventure photographer Bret Edge writes about the options and aftermarket upgrades he made on his 2021 Ford F250 Tremor equipped with a Four Wheel Campers Hawk UTE and Norweld Deluxe Weekender flatbed tray.

Read more
In Overlanding Tags four wheel campers flatbed hawk, four wheel campers, four wheel campers raven, four wheel campers organization tips, four wheel campers storage tips, four wheel campers options, four wheel campers upgrades, four wheel campers hawk ute reviews, overlanding usa, overland travel, overlanding rig review, overlanding truck review, propex hs2000 review, boulder vehicle outfitters review, xantrex inverter reviews, overland explorer camp-hbe, bowen customs, norweld deluxe weekender flatbed tray review, overland explorer aluma tray, mits alloy flatbed tray, 4xland4xsea pouch reviews, bison overland flatbed campers, flatbed vs slide in campers, truck camper reviews, truck camper solar power, four wheel campers solar power
6 Comments

How I Ended Up Lying in the Dirt Next to a Cactus and the Valuable Lesson It Taught Me

November 11, 2021 Bret Edge

A prickly pear cactus frames Cathedral Butte at sunset from an area in Sedona known as Secret Slickrock, Arizona.

Professional landscape photographer Bret Edge shares a tip on using creativity to salvage a sunset when the shoot didn’t quite go according to plan.

Read more
In Essays Tags nature photography stories, nature photography tips, nature photography essays, landscape photography essays, landscape photography stories, landscape photography icons, sedona photography, secret slickrock, sunset photography, creative photography, photography essays, photo tips, photo stories, photography tips, photography techniques, photography how to, arizona photography, sedona photo locations, sedona photography locations
Comment

A Morning at Marlboro Point

October 21, 2021 Bret Edge

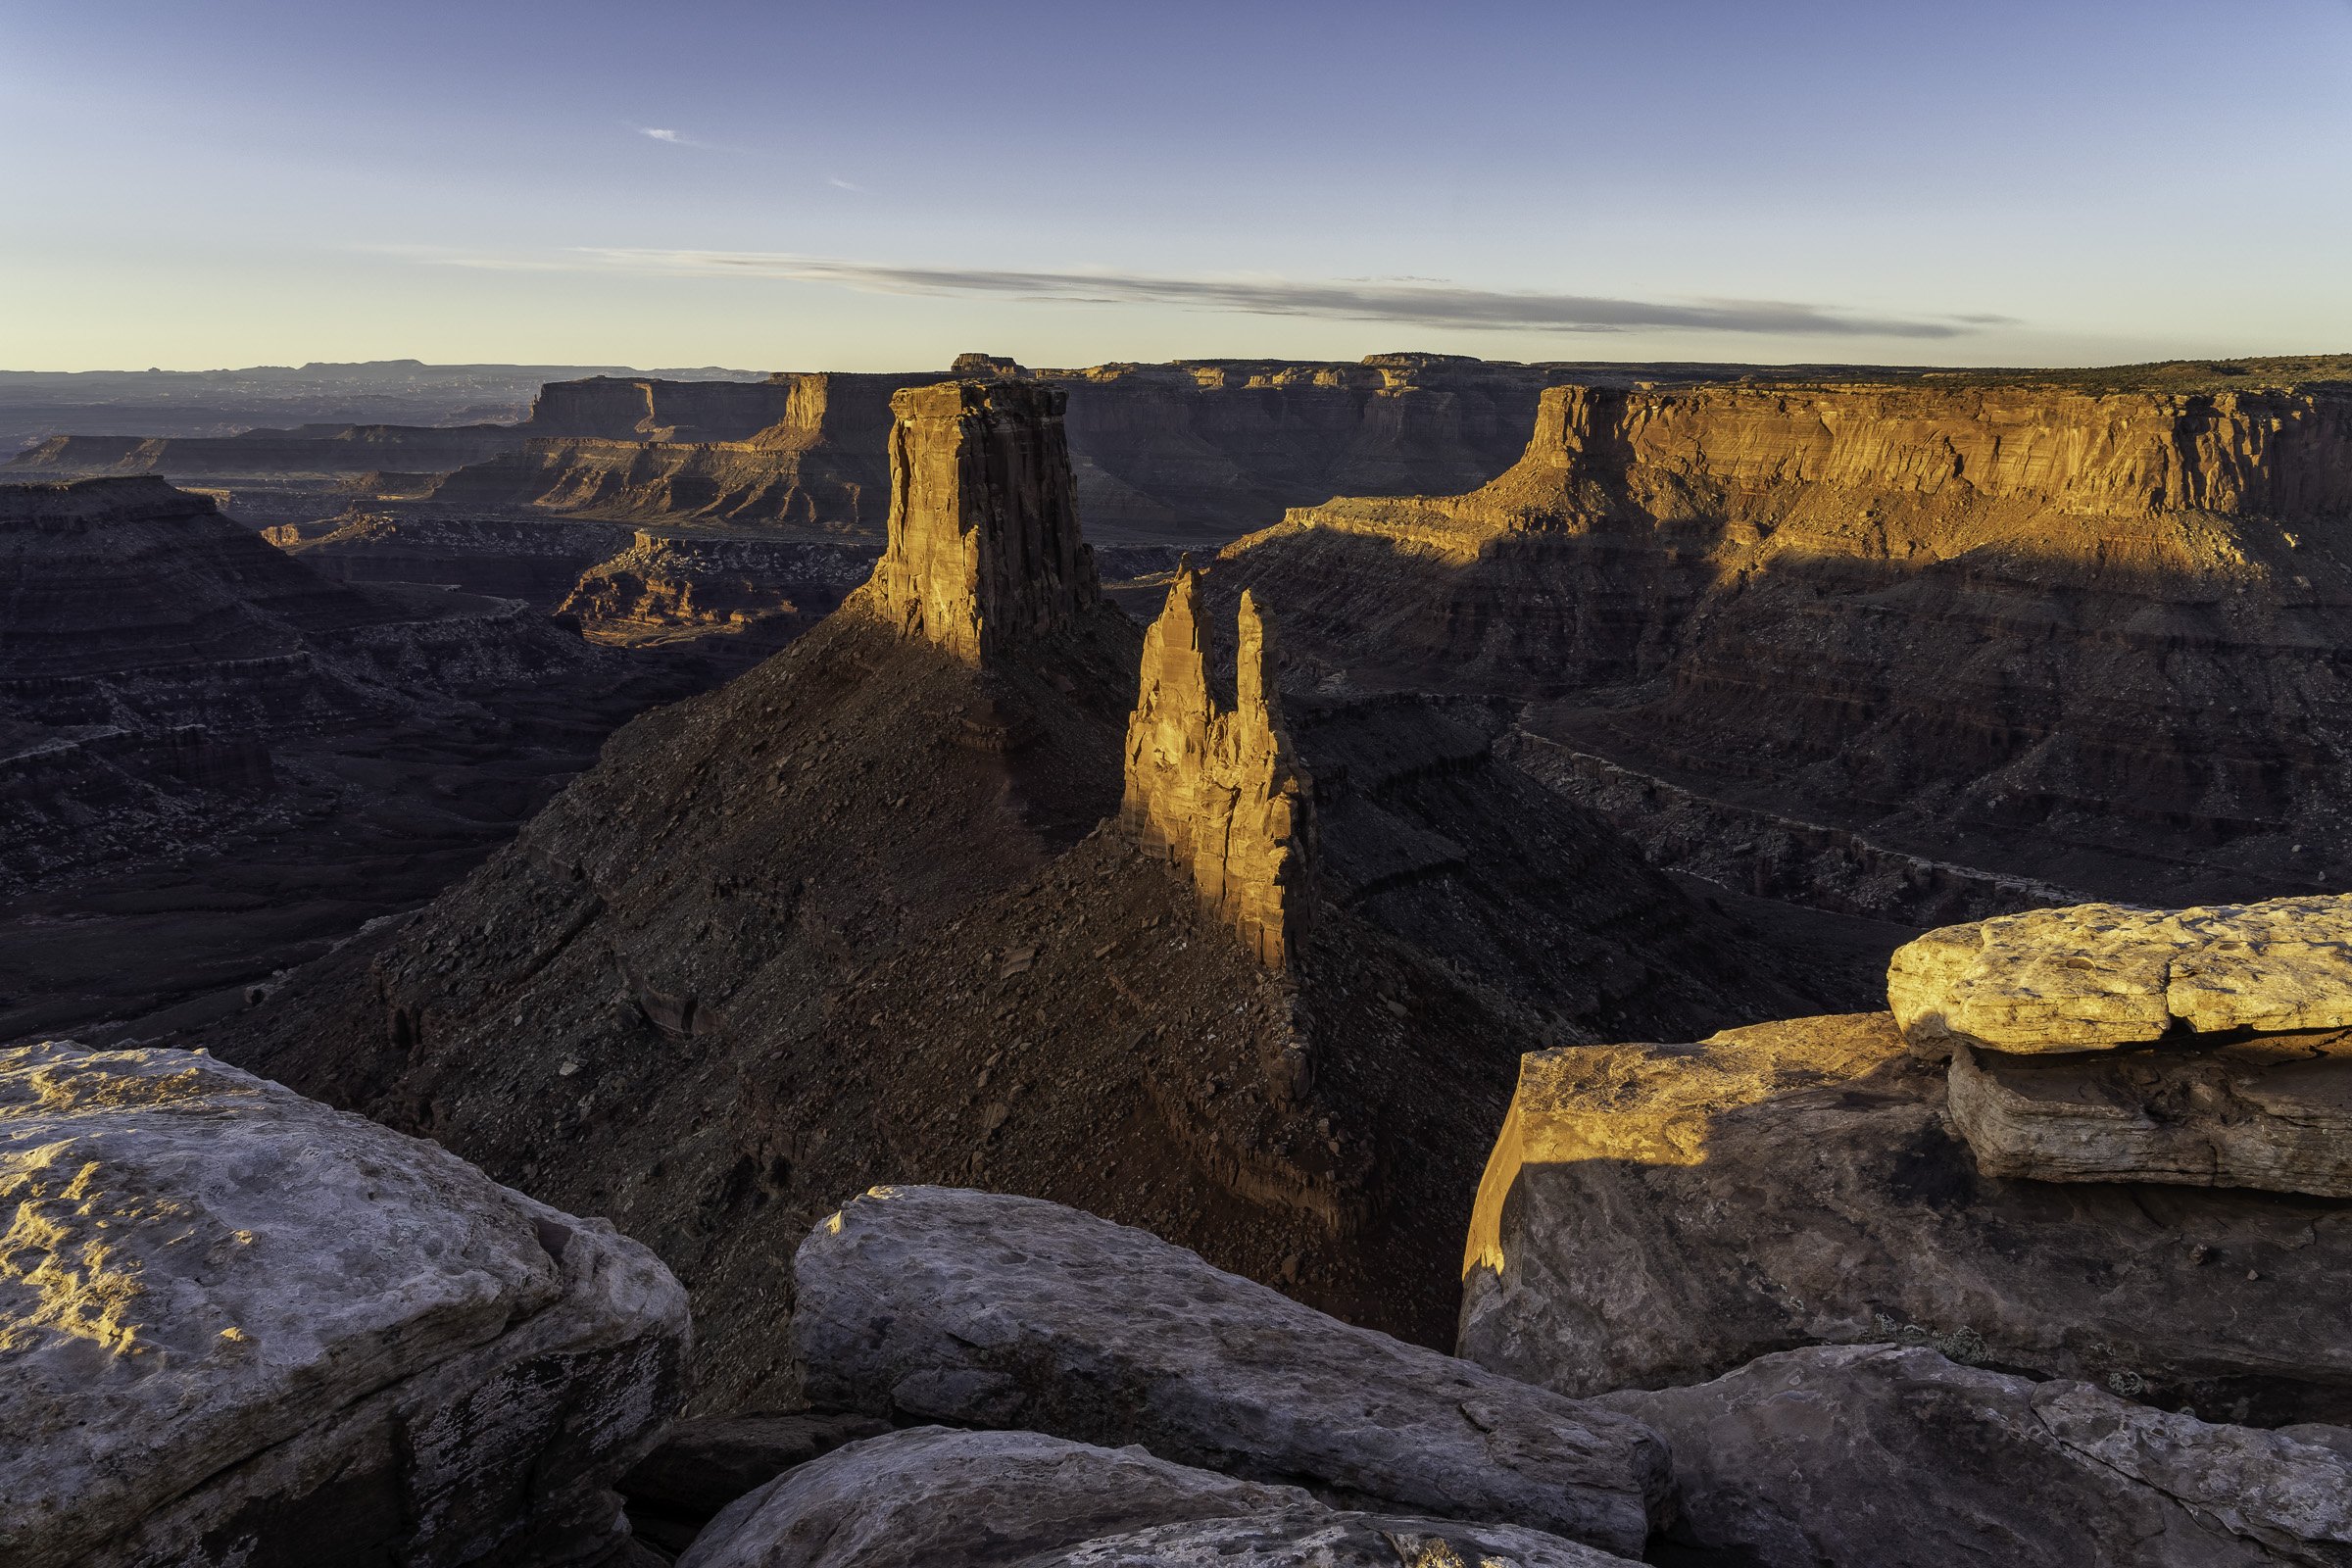
Warm sunrise light kisses giant sandstone towers below Marlboro Point near Moab, Utah.

Professional nature and adventure photographer Bret Edge shares the feelings and emotions of a sunrise photography shoot at Marlboro Point near Moab, Utah.

Read more
In Essays Tags moab photography, southwest photography, colorado plateau photography, marlboro point sunrise, nature photography stories, moab utah photography, marlboro point photography, desert southwest photography, canyon country photography, photography essays, nature photography essays, landscape photography essays, shafer canyon sunrise
Comment

Behind the Image: Moonrise Over Balanced Rock and the La Sal Mountains

October 19, 2021 Bret Edge

The moon rises over Balanced Rock and the La Sal Mountains as sunset warms the landscape with golden light in Arches National Park near Moab, Utah.

Professional landscape and adventure photographer Bret Edge takes you behind the image to discover how he created his latest image of the moon rising over Balanced Rock and the La Sal Mountains at sunset in Arches National Park near Moab, Utah.

Read more
In Behind the Image Tags balanced rock, arches national park, behind the image, fine art landscape photography, fine art photography prints, moab photography, moab photography locations, utah photography, utah photos, national park photography, national parks, breakthrough filters, neutral density filters, moab photos, southwest, colorado plateau photography
Comment

Using Personalized Default Camera Settings to Avoid Photographic Catastrophes

April 27, 2021 Bret Edge
Mother and Son Enjoy a Laugh at Overlanding Campsite in Capitol Reef National Park.jpg

Professional adventure and nature photographer Bret Edge discusses using personalized default camera settings to minimize lost opportunities to produce dynamic, successful images.

Read more
In Beginners Guides Tags camera settings, photography tips, landscape photography tips, adventure photography tips, default camera settings, beginners guide to photography, beginner landscape photography, nature photography tips, beginner nature photography tips, beginner adventure photography tips, photo tips, national park photo tips
Comment

Behind the Image: Sunrise at Horseshoe Bend

March 23, 2021 Bret Edge
Vibrantly hued clouds fill the sky above the Colorado River at Horseshoe Bend near Page, Arizona.

Vibrantly hued clouds fill the sky above the Colorado River at Horseshoe Bend near Page, Arizona.

Professional landscape and adventure photographer Bret Edge discusses the process behind the making of his image of a dramatic sky over the Colorado River at Horseshoe Bend near Page, Arizona.

Read more
In Behind the Image Tags arizona, arizona photography, page photography, horseshoe bend photography, behind the image, behind the photograph, nature photography, landscape photography, landscape photography icons, southwest, desert southwest photography, photo stories, landscape photography stories, nature photography stories
2 Comments
Older Posts →
Donate

375 South Main Street #130 - Moab, Utah 84532 - (602) 571-4170

© Bret Edge Photography