Moab, Utah, is a landscape photographer’s paradise. With its soaring red rock fins, gravity-defying arches, and deep canyon overlooks, you could easily spend weeks exploring the area with your camera. Hell, I’ve spent twenty years wandering all over this landscape and have barely scratched the surface. But what if you only have one single day to capture the magic of Moab?
If I only had 24 hours to shoot the Moab area, this is the exact, fast-paced itinerary I would follow to maximize every ounce of golden hour, glowing rock, and dramatic desert light.
(Want to skip the guesswork and get exact GPS coordinates, seasonal light angles, and camera settings for these locations? Check out our premium eFotoGuides available right here on our website!)

Using a strong foreground element can turn a vast, overwhelming landscape into an intimate story. By positioning this iconic twisted juniper on the right third of the frame, it gives the eye a natural anchor before wandering down into the massive, sun-drenched canyon layers of Dead Horse Point.
1. Sunrise: Dead Horse Point State Park
Gear of Choice: Sony 24-105mm lens
Your day starts early. Skip Arches for sunrise and head straight to Dead Horse Point State Park. Standing 2,000 feet above a gooseneck pinch in the Colorado River, the panoramic views here are unmatched. This is, hands down, my favorite place in all of Moab.
As the sun breaks over the horizon, the vast canyon layers light up in brilliant shades of purple, orange, and gold. I prefer using my Sony 24-105mm lens here. The zoom range allows you to shoot wide landscape vistas, but also zoom in to compress the dramatic canyon layers and isolate the winding river below.
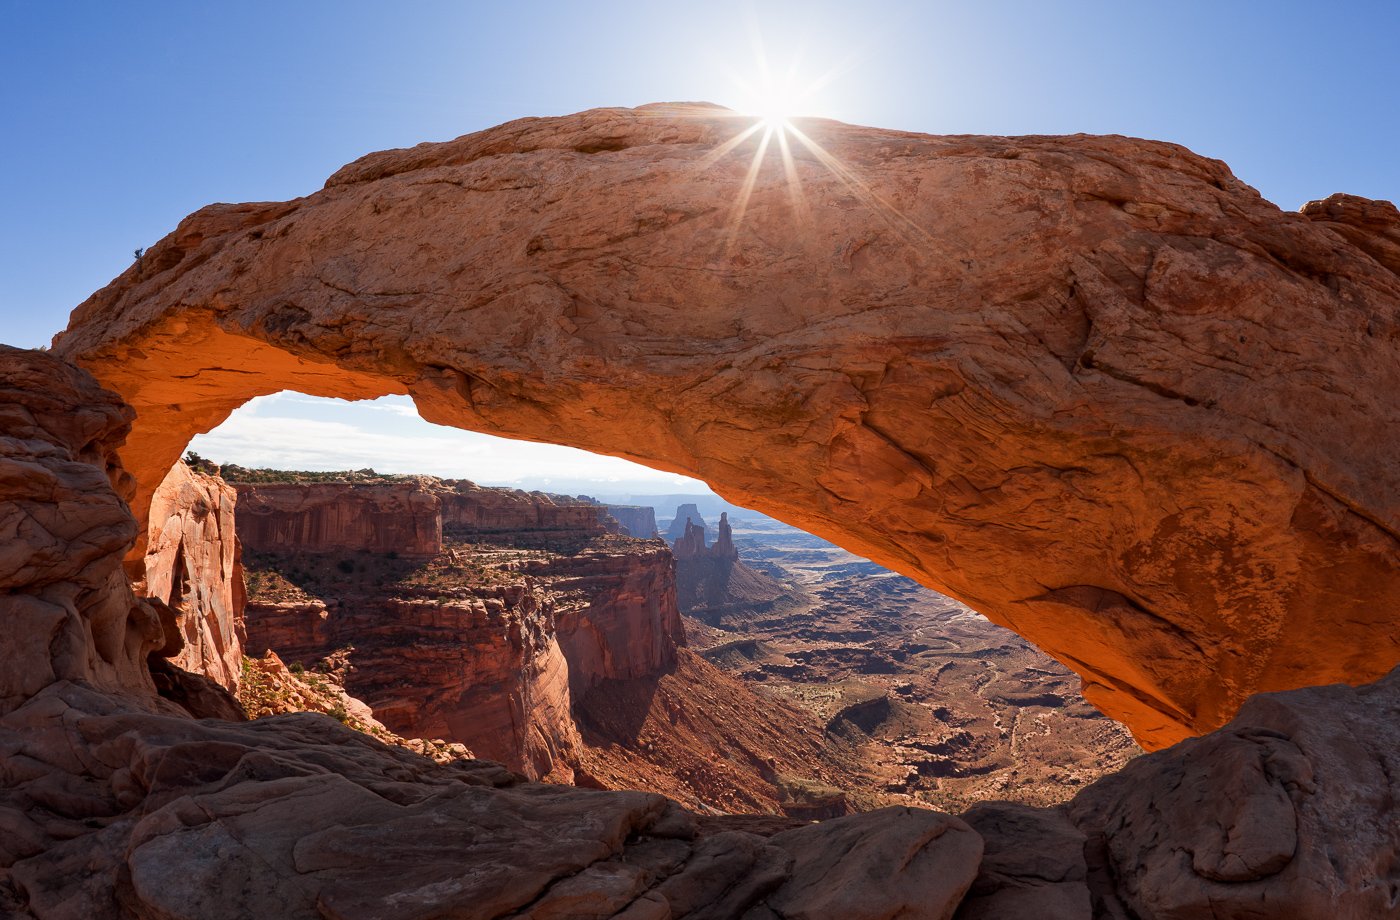
Timing and aperture are the secrets to capturing the perfect sunburst at Mesa Arch. By waiting for the exact moment the sun kisses the top edge of the stone and stepping down to a narrow aperture like f/11 or f/16, you can transform a harsh morning light source into a beautifully sharp, multi-pointed star that adds instant drama to the composition.
2. Early Morning: Mesa Arch (Canyonlands National Park)
Gear of Choice: Sigma 14-24mm
When the light begins to fade at Dead Horse Point, hop in the car and make the short drive into the Island in the Sky district of Canyonlands National Park. Your destination? Mesa Arch.
While most photographers choose to cross tripod legs with other photographers at sunrise, you can capture similar conditions up to two hours later with far fewer crowds. The sun still hits the sheer cliff face below the arch, reflecting a fiery orange glow onto the underside of the stone structure. Pack a wide-angle lens like the Sigma 14-24mm so you can get close, frame the glowing underbelly of the arch, and still capture the distant Washer Woman feature through the opening.
3. Mid-Morning Fuel: Breakfast & Photo Processing in Town
After an intense morning of shooting, it’s time to head off the plateau and back to Moab to refuel and review your images.
The Food: Head straight to the iconic Moab Diner for a classic, hearty breakfast. You’re going to need the calories for the hiking ahead.
The Workflow: Afterward, grab your laptop and head over to Dos Mas Coffee Shop on Center Street. Order a hot chai tea, grab a table, and spend a couple of hours reviewing and processing images from your morning shoot in Lightroom. This mid-day break keeps you off the trails during the harsh midday sun and lets you dial in your sunrise edits while the memory is fresh.
4. Lunch to Go: Sweet Cravings
Before you head out for your afternoon adventure, stop by Sweet Cravings Bakery + Bistro to pick up a trail lunch. My absolute favorite is The Capone sandwich, ordered "Rich’s Way." Throw it in your camera pack—you’ll thank me later when your stomach starts to growl.

When shooting towering giants like Park Avenue, getting down low with a wide-angle lens allows you to tell a much deeper story. By placing these bright yellow Mule's Ear wildflowers right in the foreground, we create a powerful sense of scale and a beautiful color contrast against the warm, red sandstone cliffs behind them.
5. Early Afternoon: Hiking Park Avenue (Arches National Park)
The Objective: Intimate scenes and reflected light
Enter Arches National Park and make your first stop at Park Avenue. Instead of looking for grand, sweeping vistas in the high afternoon sun, look for smaller, intimate nature scenes.
As you hike between the massive, skyscraper-like sandstone walls, look up. The harsh overhead sun bounces off the opposite canyon walls, casting a beautiful, warm, soft reflected light into the shadows. Look for patterns in the rock, hardy desert plants, or abstract sandstone textures illuminated by this golden bounce-light.

Framing within a frame is a timeless technique to create a sense of place and depth. By stepping completely inside the shadow of Eye of the Whale Arch, the massive stone opening acts as a natural vignette. A small aperture brings out that sharp, multi-pointed sunburst at the top edge, perfectly balancing the dark foreground sandstone with the brightly lit desert expanse beyond.
6. Late Afternoon: Eye of the Whale Arch
Gear of Choice: Sigma 14-24mm lens
As the afternoon begins to wane, drive out the dirt road toward Eye of the Whale Arch. This is a lesser-visited gem that shines in the late afternoon. Note: You will need a four wheel drive vehicle to navigate this road as the deep sand and small rock ledges will trap or damage anything else.
As the sun gets low, the light hits the sandy ground and red sandstone in front of the arch and reflects upward. This creates an incredible, subtle glow on the underside of the arch not unlike what you photographed earlier in the day at Mesa Arch. Put your ultra-wide lens back on your camera and experiment with different compositions, all the while shooting in the direction of the sun. This allows you to capture the immense scale and unique lighting of this hidden structure.
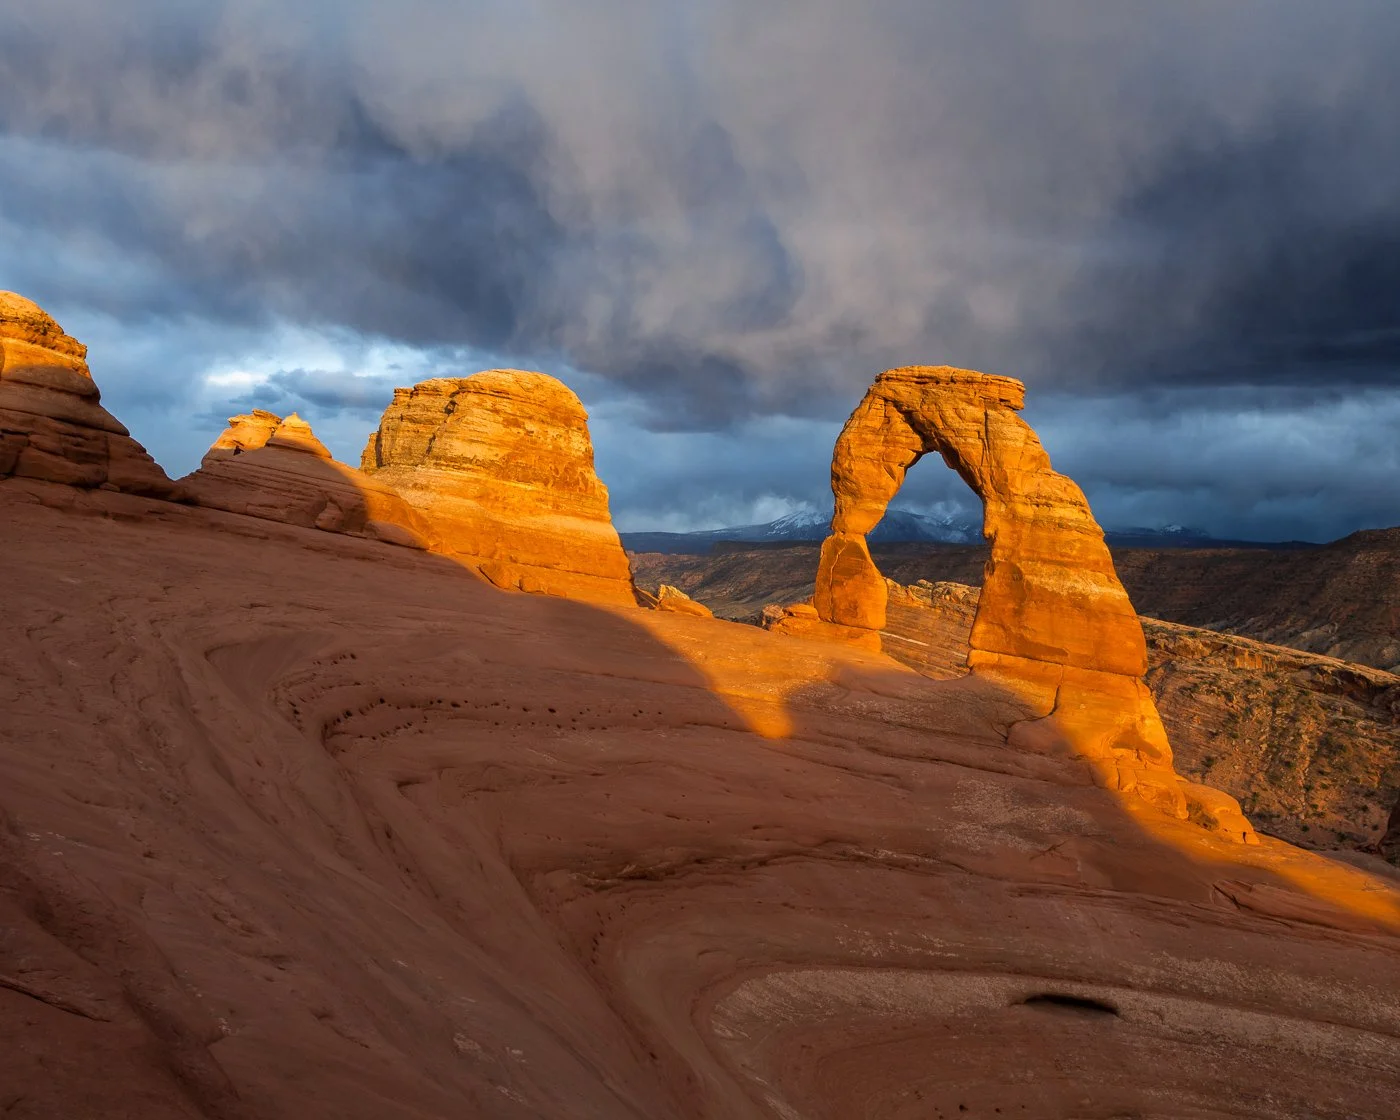
When high-contrast conditions hit, exposing for the highlights is key. By letting the storm clouds fall into deep shadow, the glowing sandstone of Delicate Arch truly pops from the frame. Weather like this is exactly why we tell our workshop participants never to pack up early when it rains—stormy clearing skies offer the highest dramatic payout in landscape photography."
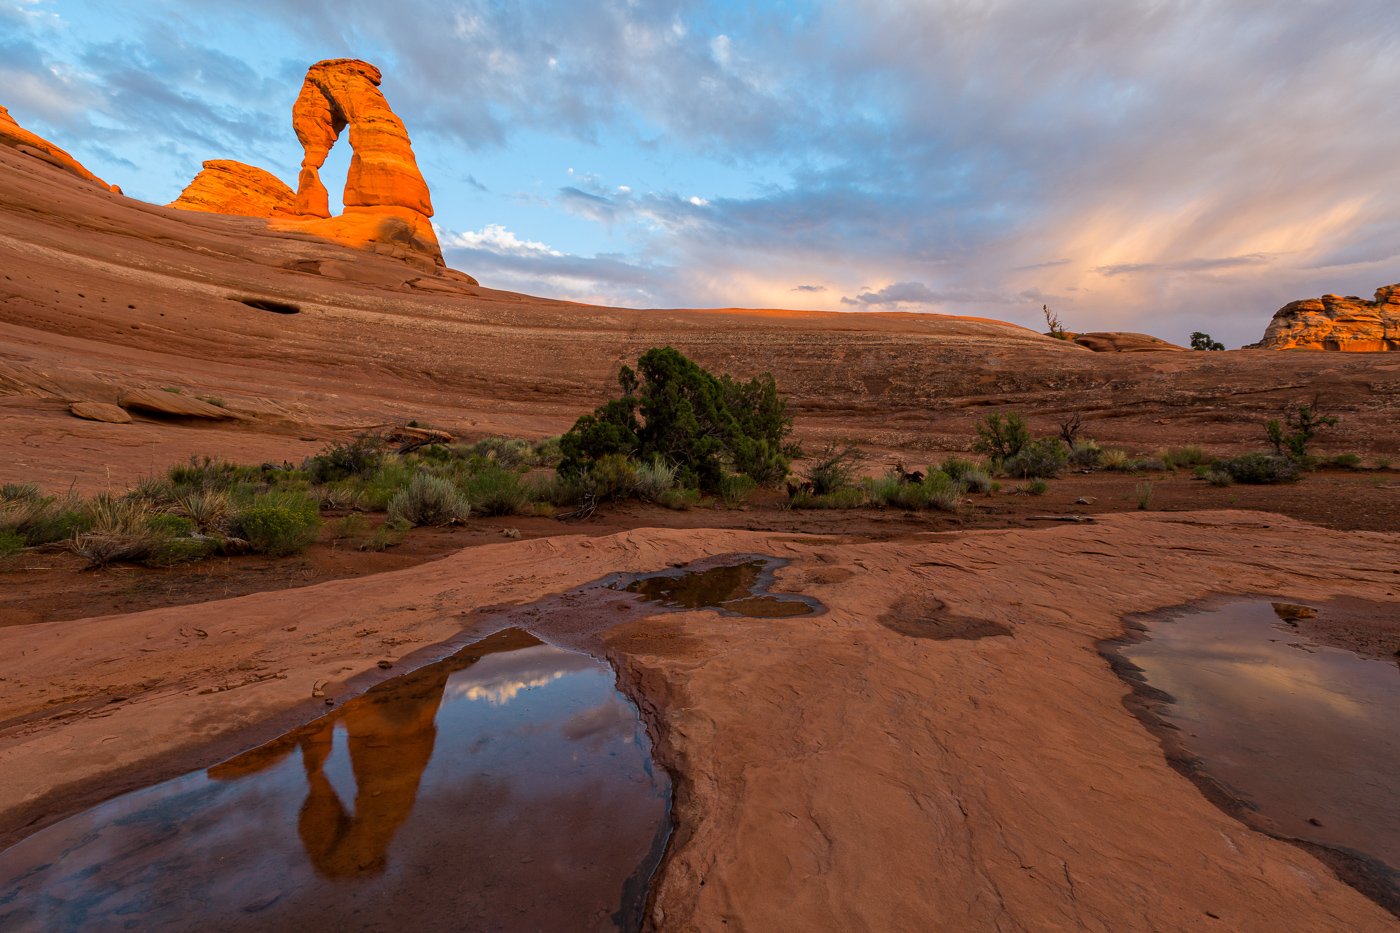
7. Sunset: The Grand Finale at Delicate Arch
Gear of Choice: 24-105mm lens + a trusty headlamp
There is only one way to finish a perfect day in Moab: Delicate Arch.
Fair warning: it will be crowded. Photographers and tourists from all over the world gather here, but there is a reason for it—there is absolutely nothing else like this view at sunset. As the sun dips toward the horizon, the free-standing arch turns a deep, fiery crimson against the backdrop of the La Sal Mountains. If you happen to catch the mountains crested with snow, this scene is even more impressive!
I use the 24-105mm lens here to give myself composition flexibility, allowing me to frame the arch tightly or pull back to include the slickrock bowl below the arch.
Pro Tip: Once the sun dips below the horizon, don't rush off. Enjoy the blue hour, pack up slowly, and make sure you brought a headlamp for the 1.5-mile hike back down the dark slickrock trail to your car. Or, if you still have enough energy, stick around for some astrophotography. Just remember: light painting is not allowed in the national parks near Moab.
Maximize Your Moab Photo Trip
This 24-hour itinerary is designed to keep you in the right places, with the right lenses, at the exact moments the light is doing something spectacular.
If you want to take your Moab photography trip to the next level, don’t leave your shots to chance. We have created comprehensive, field-tested eFotoGuides for the Moab area. Our guides give you exact GPS coordinates, trail information, best times of day for photography, suggested camera settings, and even composition tips for all of these locations and many more.