

Ultimate Guide to Moab Fall Color Photography: My 5 Favorite Spots
Think Moab is just red rock? Think again. Discover 5 prime spots for capturing vibrant autumn foliage—from the alpine peaks of the La Sal Mountains down to deep desert canyons like Courthouse Wash and Grandstaff Canyon—complete with composition strategies and field tips.
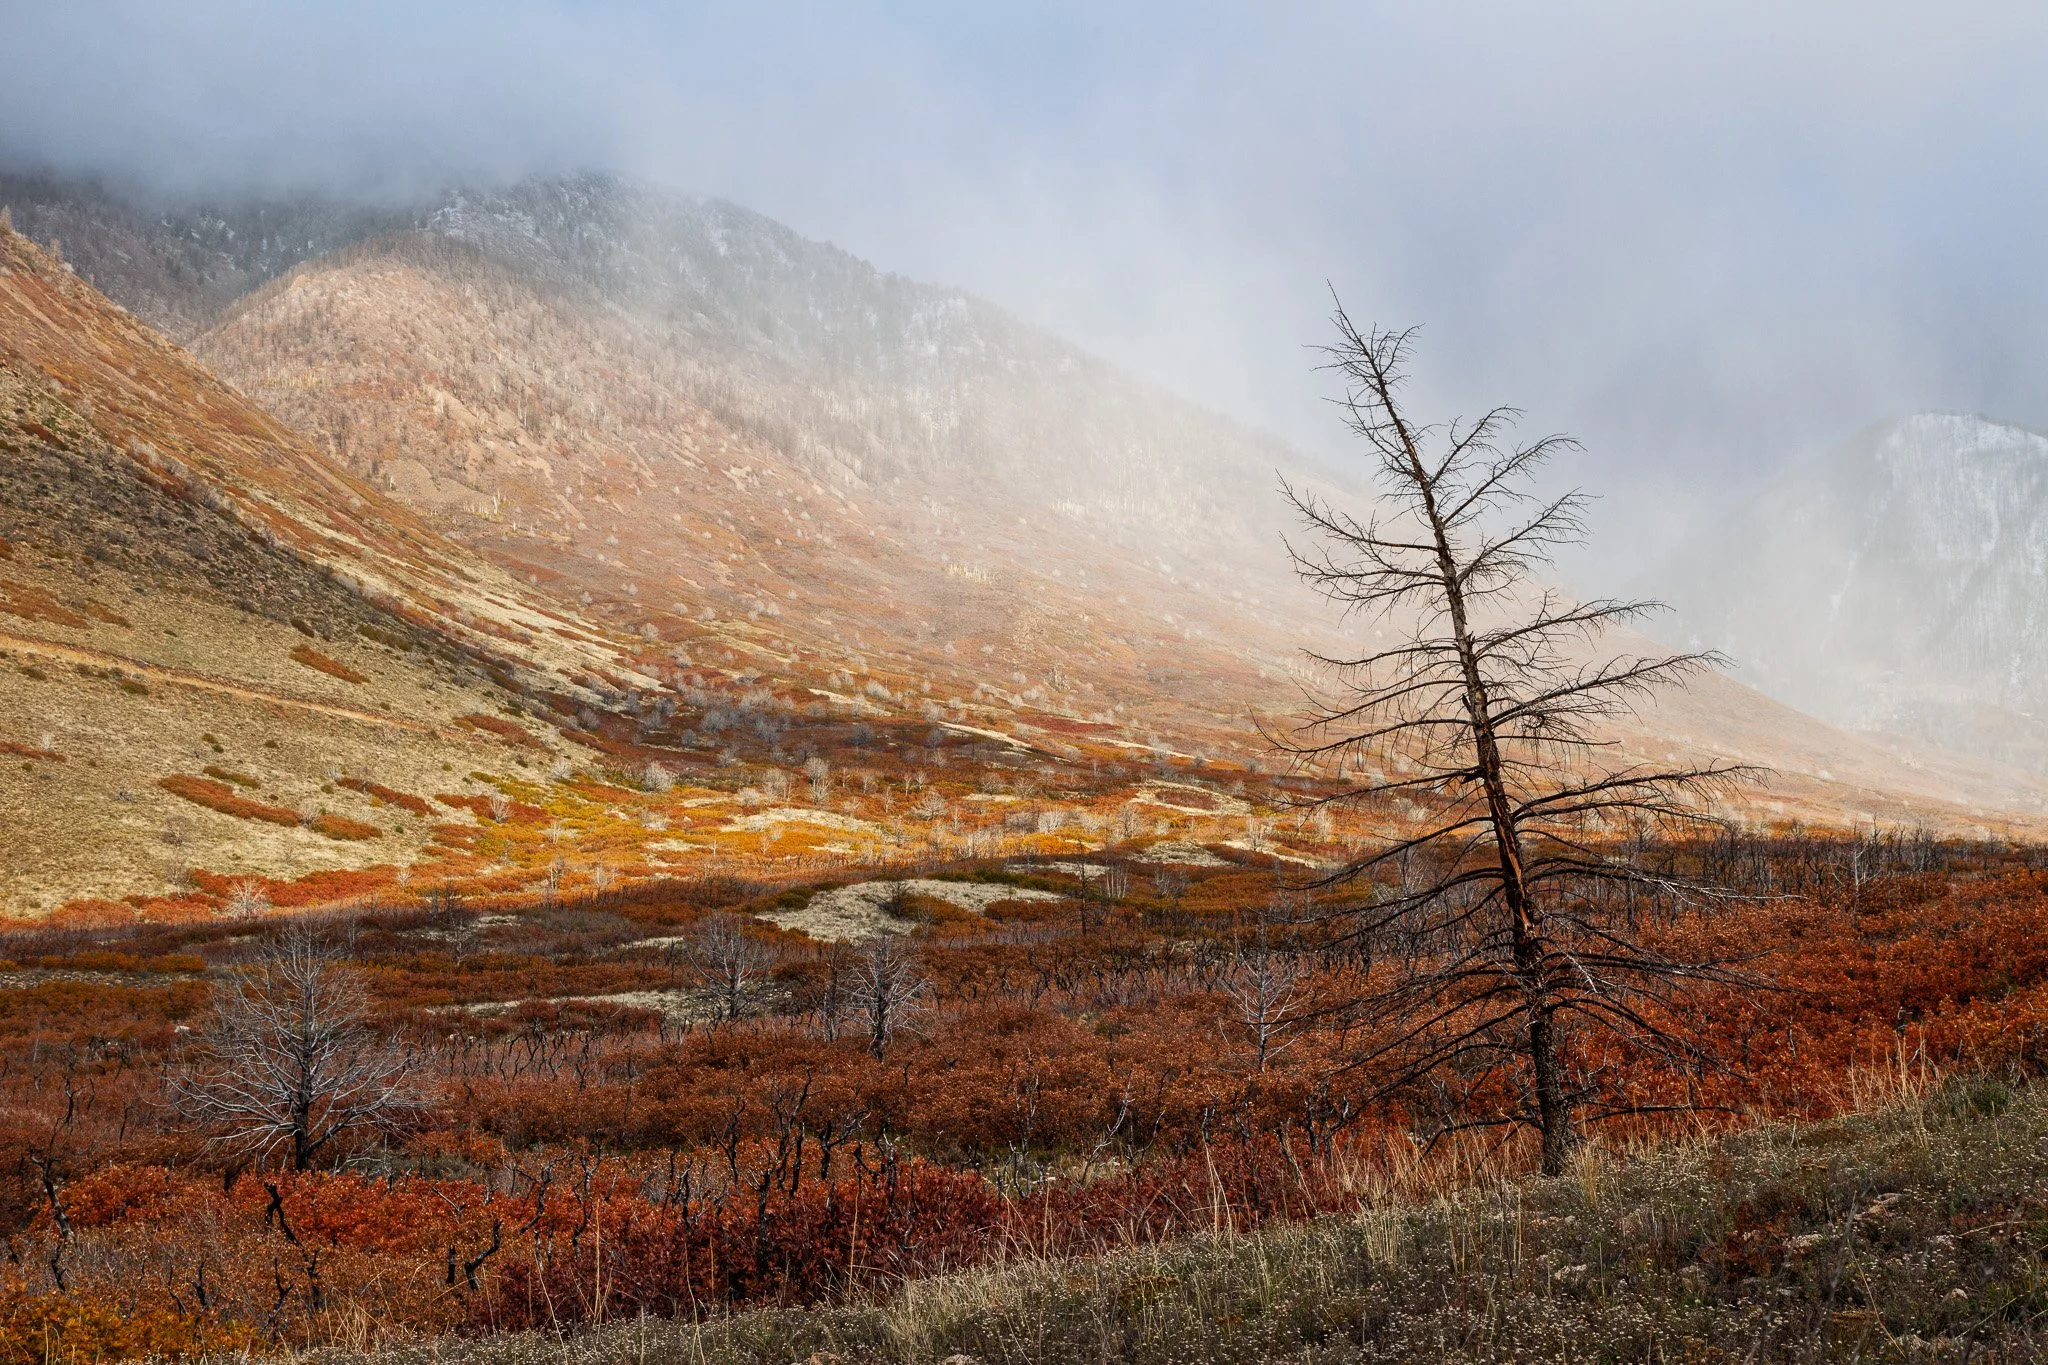
Moab may not be the first place that comes to mind for fall color photography, but I’m here to tell you: it should be. From desert to mountains, our season starts near the end of September, continues through the beginning of November, and the kaleidoscope of colorful leaves is guaranteed to give your shutter finger a good workout.
In this post, I’ll guide you to five of my favorite spots around Moab for fall color photography, starting in the La Sal Mountains and working our way down to the high desert.
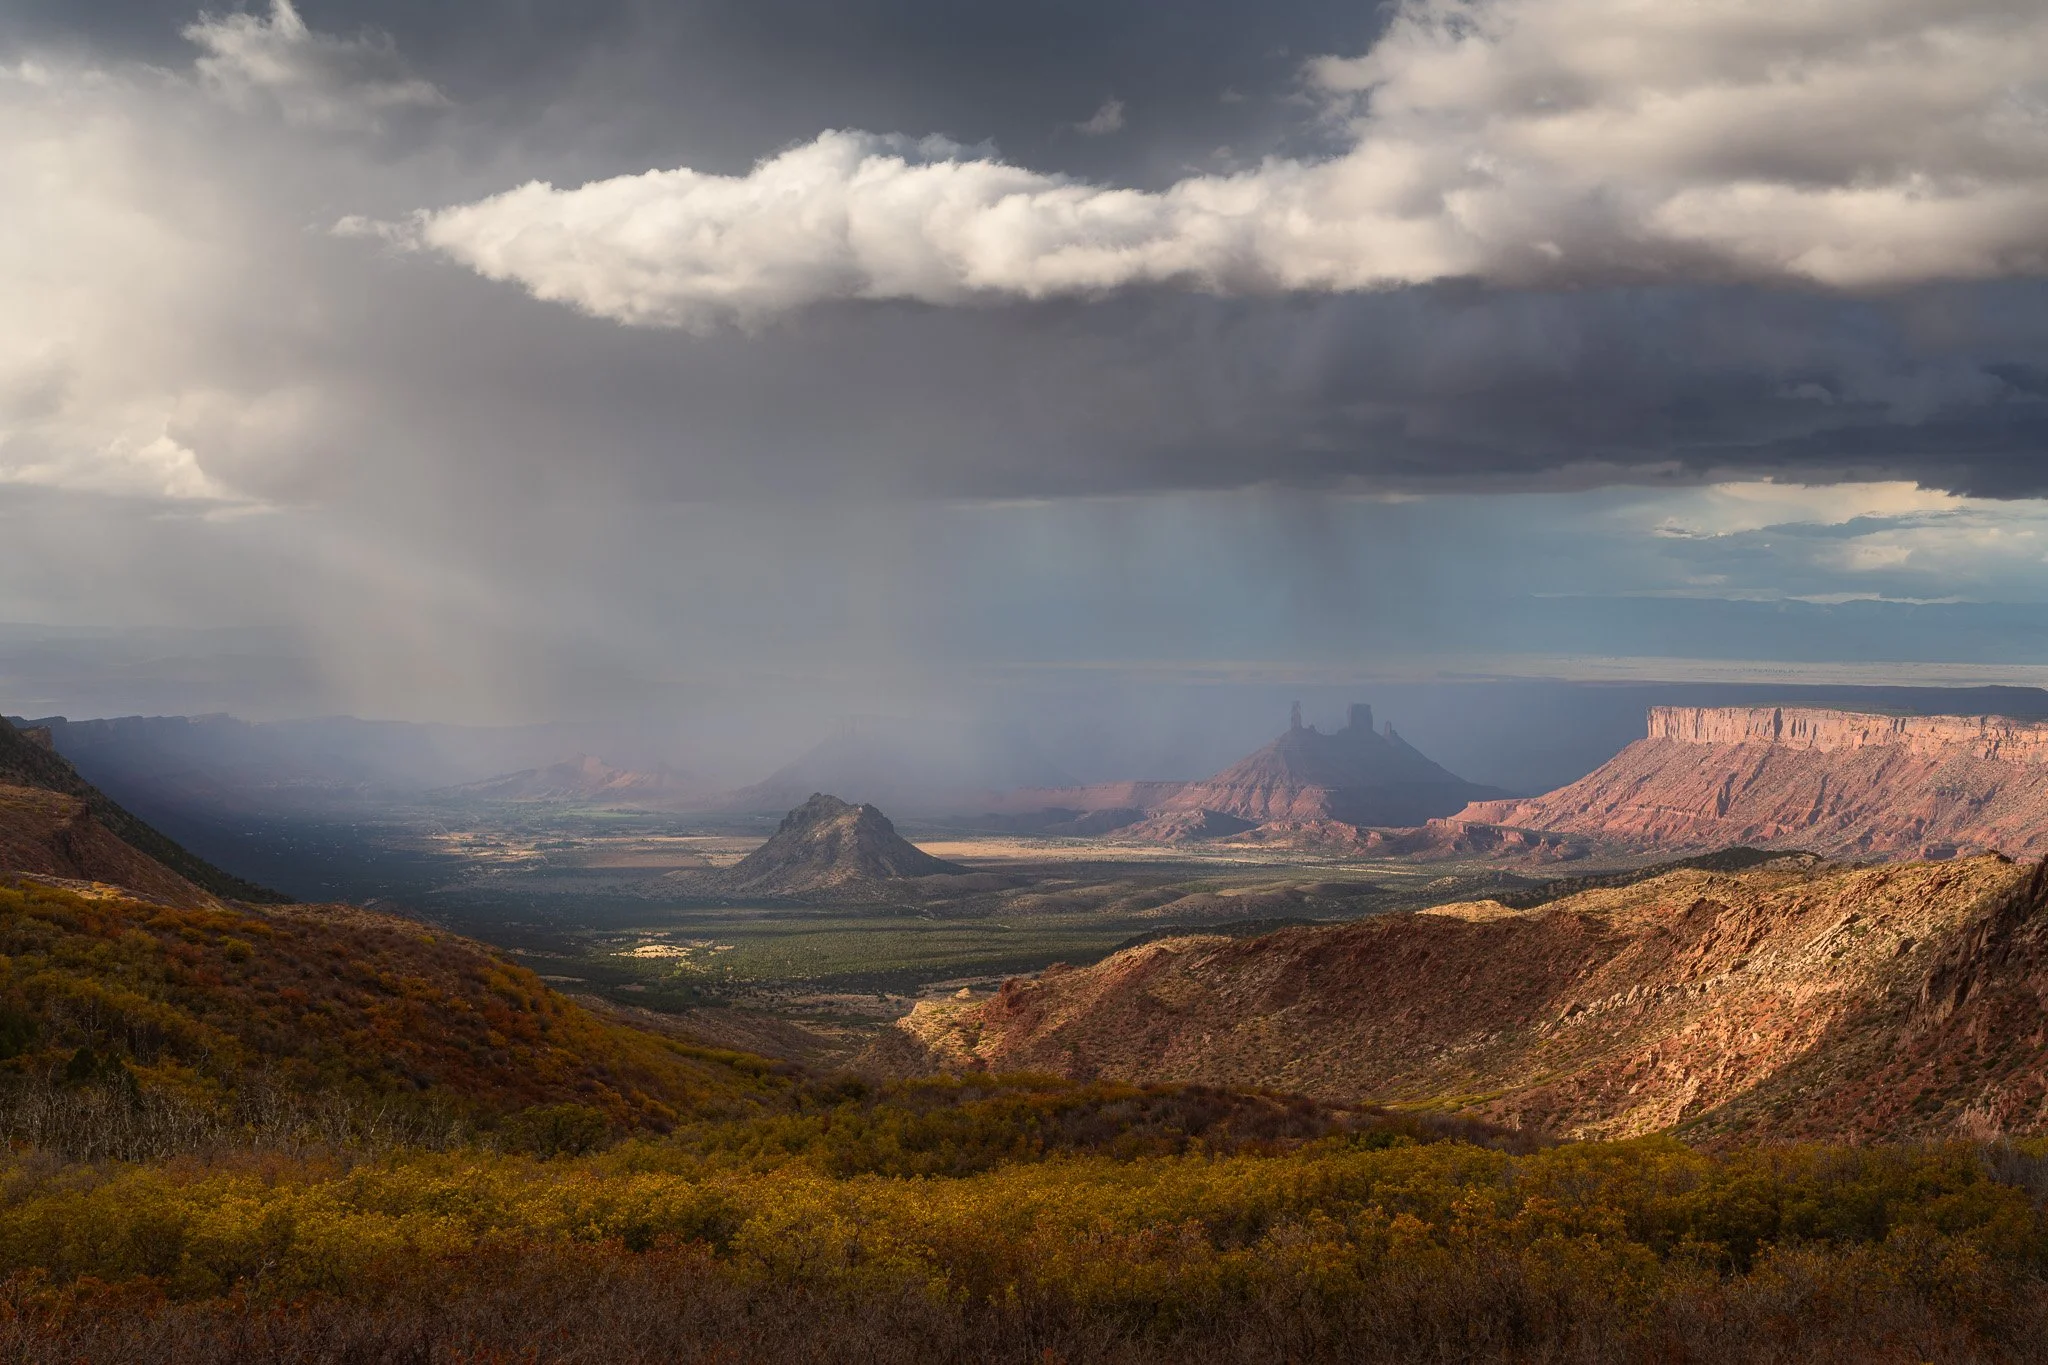
1. La Sal Mountain Loop Road
The “Loop Road,” as locals call it, passes through large stands of aspen trees and hillsides covered with Gambel oak—a colorful combination of foliage that commonly displays vibrant yellows, oranges, reds, and greens all at the same time.
Best Direction: Though the Loop Road can be driven in either direction, I strongly recommend driving counterclockwise from Moab, as some of the best views are found near the end as you descend into Castle Valley.
Gear Tip: Bring your long lens! Using a telephoto lens to extract small scenes from the grand landscape is my favorite tactic to deploy every autumn. My preferred lens for this type of photography is the Sigma 60–600mm. The huge range of focal lengths and razor-sharp optics allow for endless creative opportunities.
Essential Filter: A circular polarizing filter is essential to cut through glare and reflections on leaves, dramatically improving contrast and saturation.
2. Geyser Pass Road
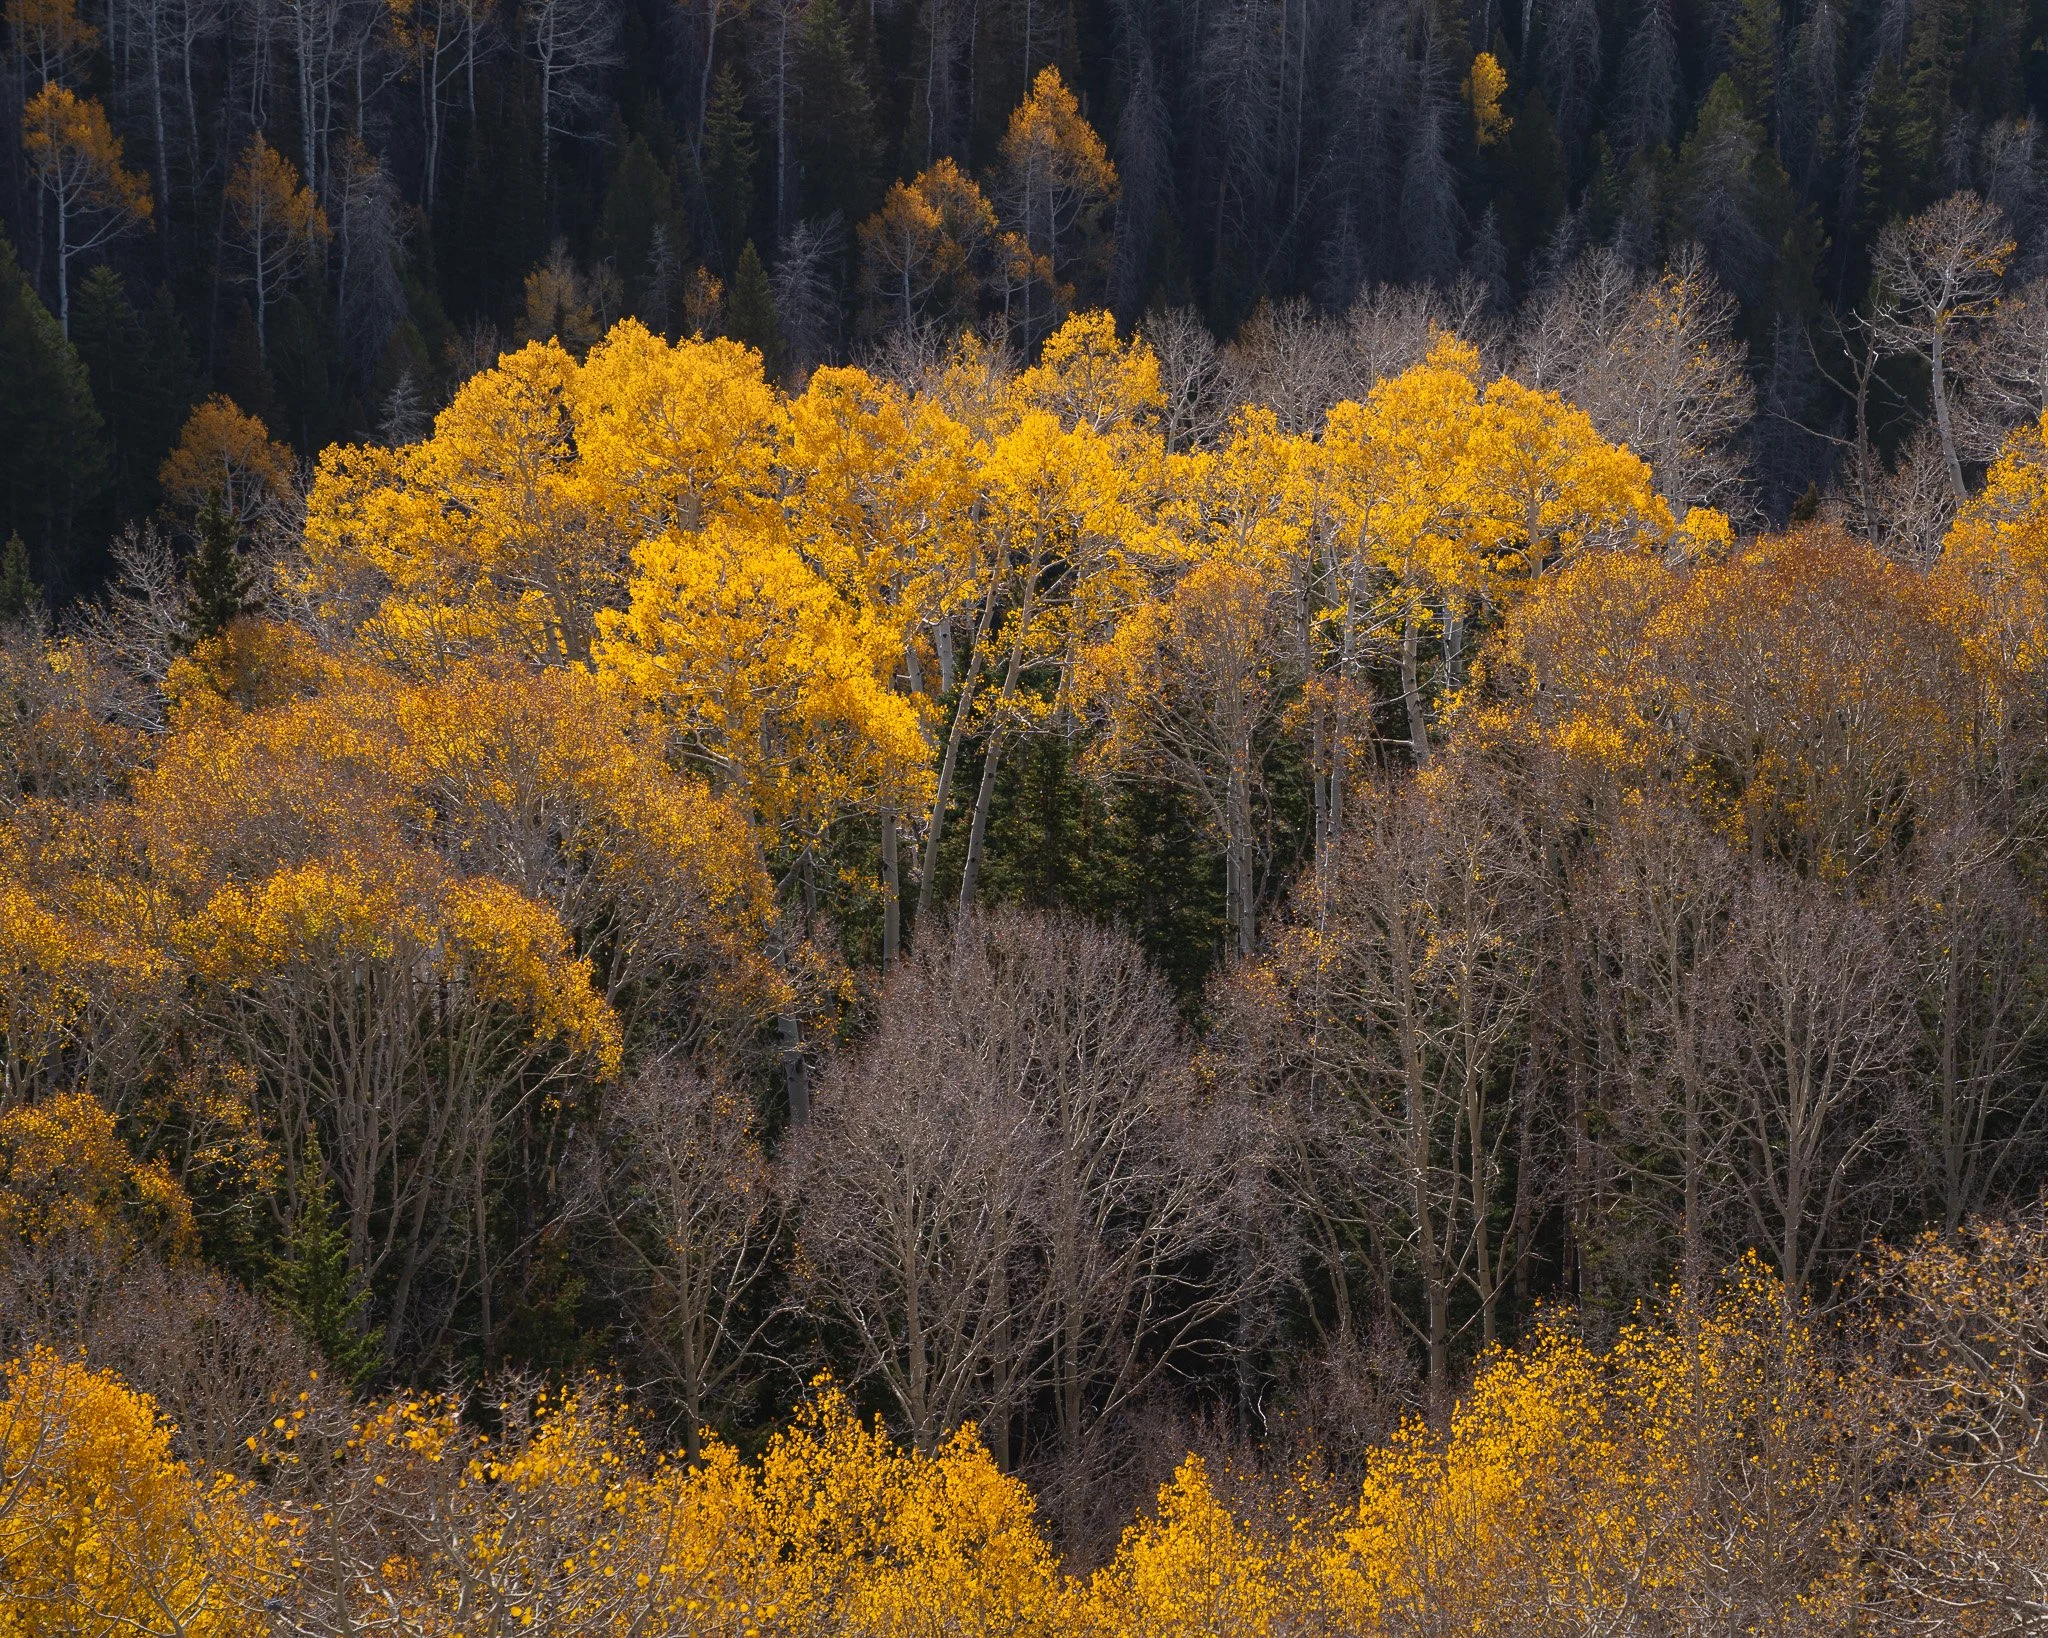
Geyser Pass is a graded dirt road passable by almost any vehicle, accessible off the Loop Road. It ascends through massive stands of aspen trees, providing spectacular views of the high peaks above and Spanish Valley below, presided over by the Moab Rim.
Unique Compositions: Some areas were impacted by a wildfire a few years ago and have since begun the recovery process. Bright yellow leaves mingle with charred tree trunks, creating endless opportunities for interesting, intimate landscapes.
Don’t Forget to Look Down! I discovered some of my favorite autumn images on the forest floor, where fallen leaves arrange themselves in beautiful patterns.
3. Courthouse Wash (Arches National Park)
Leaving the mountains behind and heading into the heart of the desert, let’s go for a hike through Courthouse Wash in Arches National Park. Here you’ll find a perennial stream winding through a deep, narrow canyon supporting a healthy population of cottonwood trees.
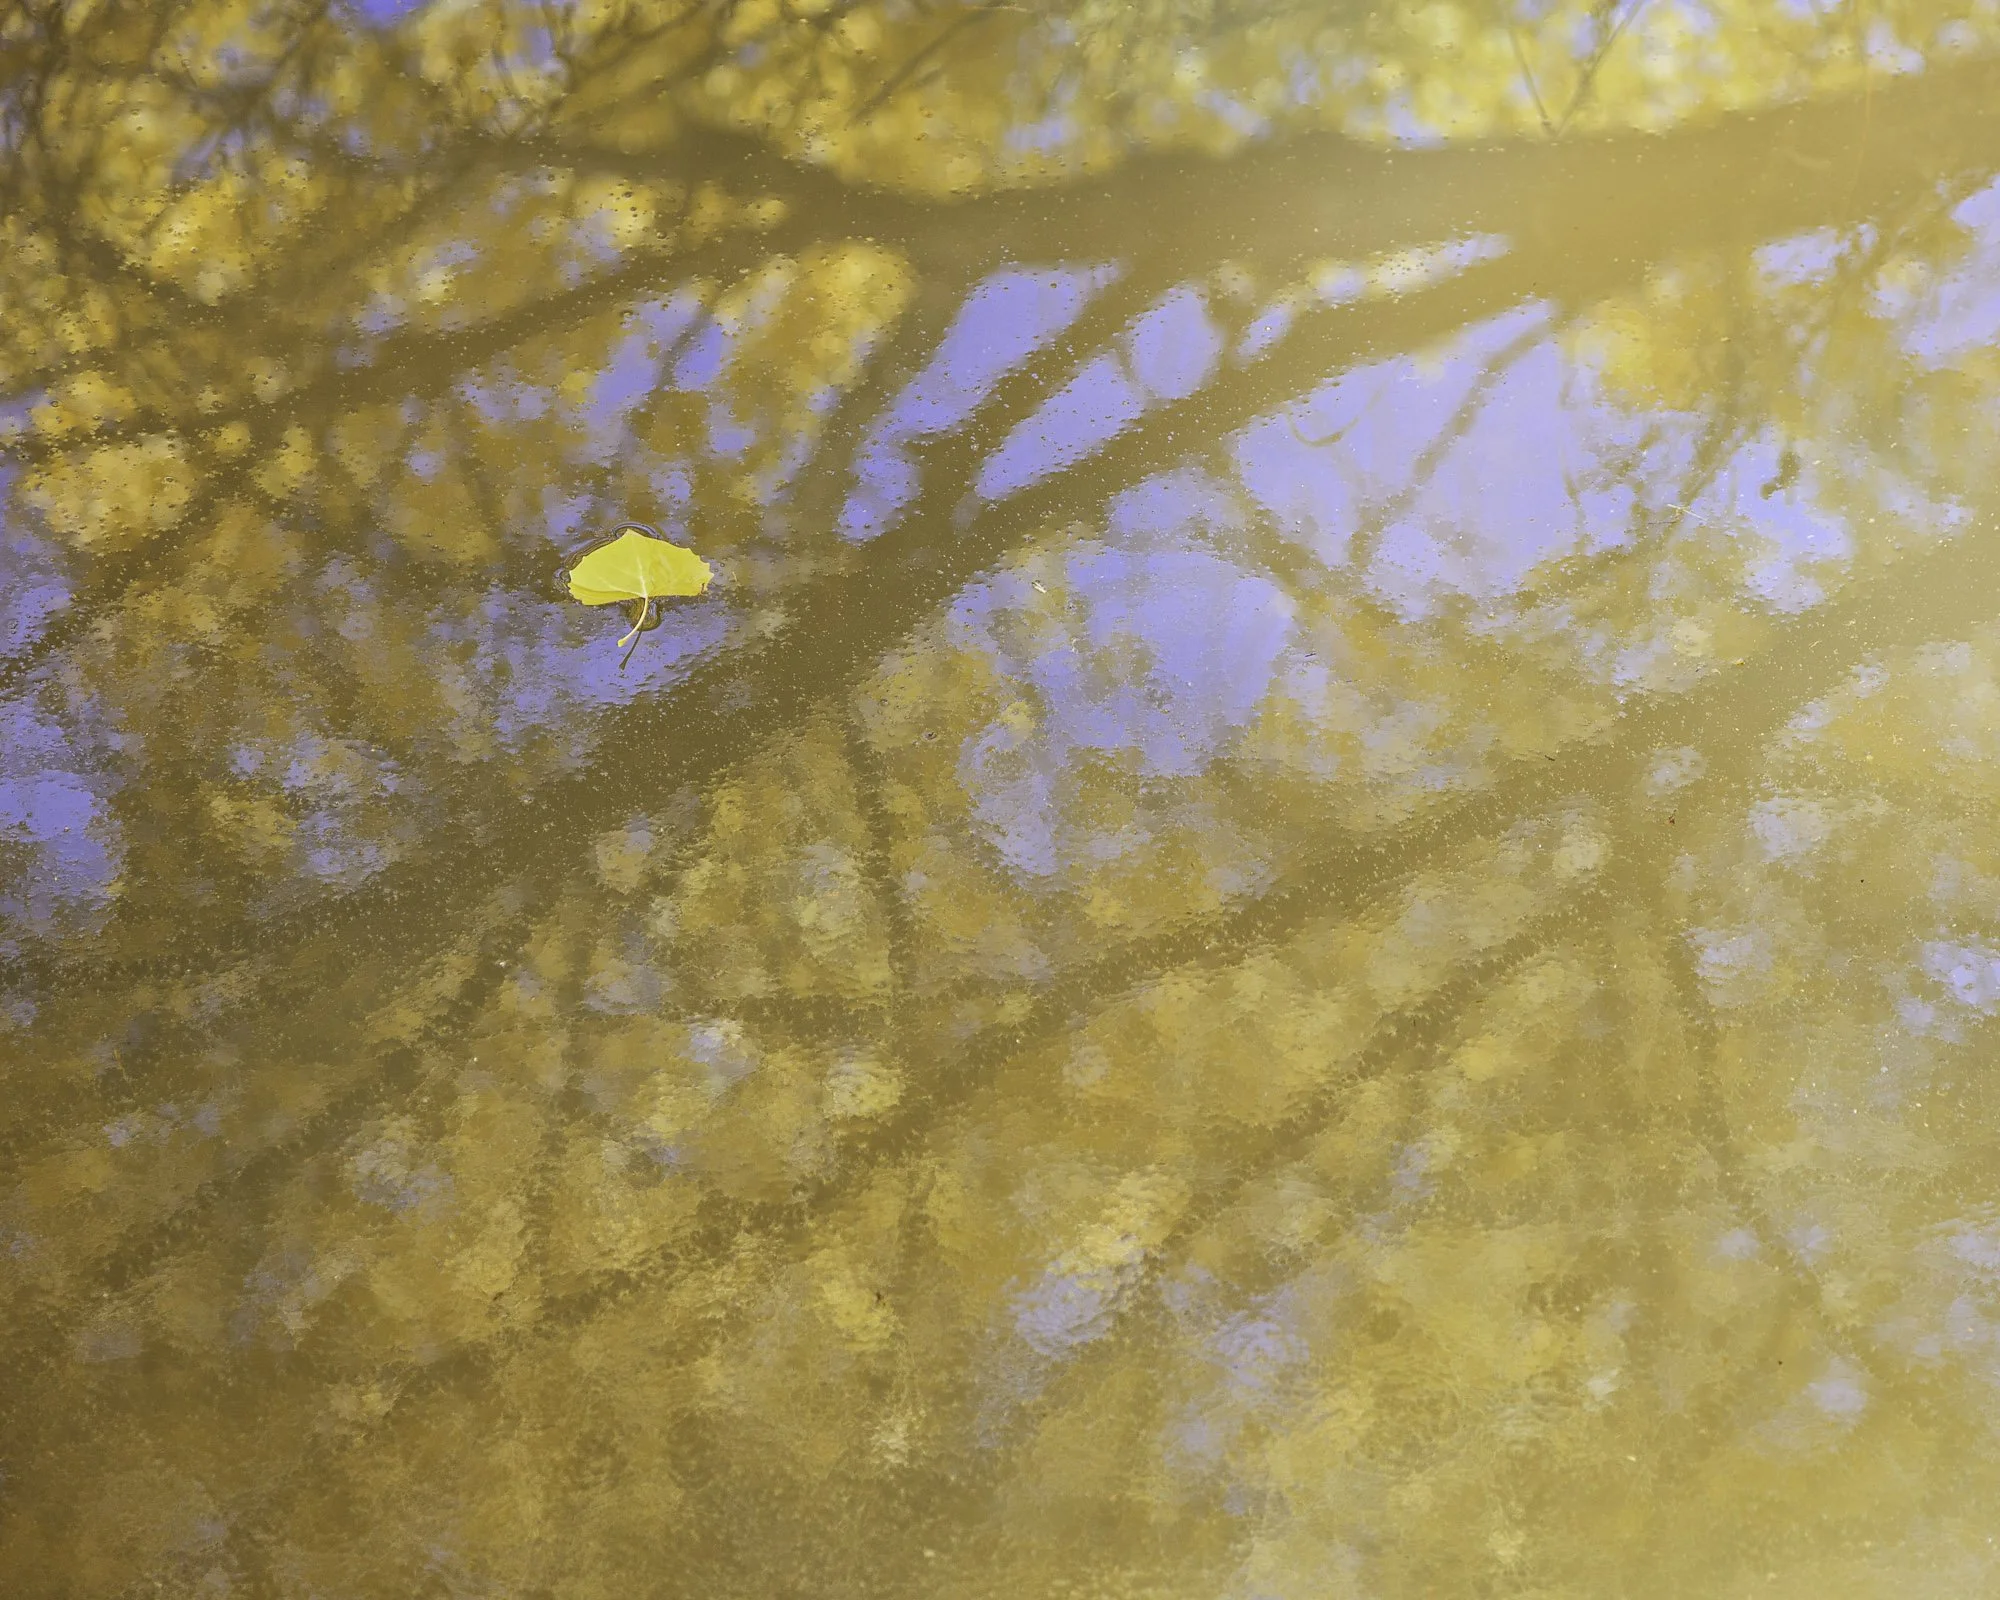
Reflections & Cascades: In areas, the stream collects in calm pools that catch reflections of grand old cottonwoods exploding with yellow leaves against the reddish-orange sandstone canyon walls. You’ll also find small cascades that you can include in the foreground of images with colorful trees dancing along the stream bank.
Lens Selection: Pack lenses ranging from wide-angle to telephoto, as there are opportunities to use all of them.
Mastering Reflected Light: If you are unfamiliar with Canyon Country, you may not be familiar with reflected light. Courthouse Wash is a great place to photograph this phenomenon, as sandstone walls act like giant reflectors, bouncing rich, warm light into the canyon. This light causes the sandstone onto which it is reflected to glow, and camera sensors are especially sensitive to it (if you’ve ever seen a photo of a slot canyon, that is reflected light).
⚠️ Safety Note: Courthouse Wash is known to have areas of quicksand, and hikers have become trapped in it. Watch your step!

4. Grandstaff Canyon
This is one of the most popular hikes in Moab, and for good reason. The trail follows a perennial creek below sandstone walls and dead-ends at an idyllic grotto, above which sits a massive natural bridge.
Autumn Colors: From start to end, the canyon is filled with trees and bushes that display vivid colors in autumn. Even the poison ivy gets in on the action, often turning a deep red color that contrasts beautifully with the predominantly yellow cottonwood and birch trees.
Composition Strategy: I don’t usually enjoy out-and-back hikes, but this one is an exception because the canyon looks vastly different once you turn around and head back toward the trailhead. Focus on intimate landscapes here—look for contrasting colors, interesting patterns, and textures you can isolate from the greater landscape with a longer focal length.
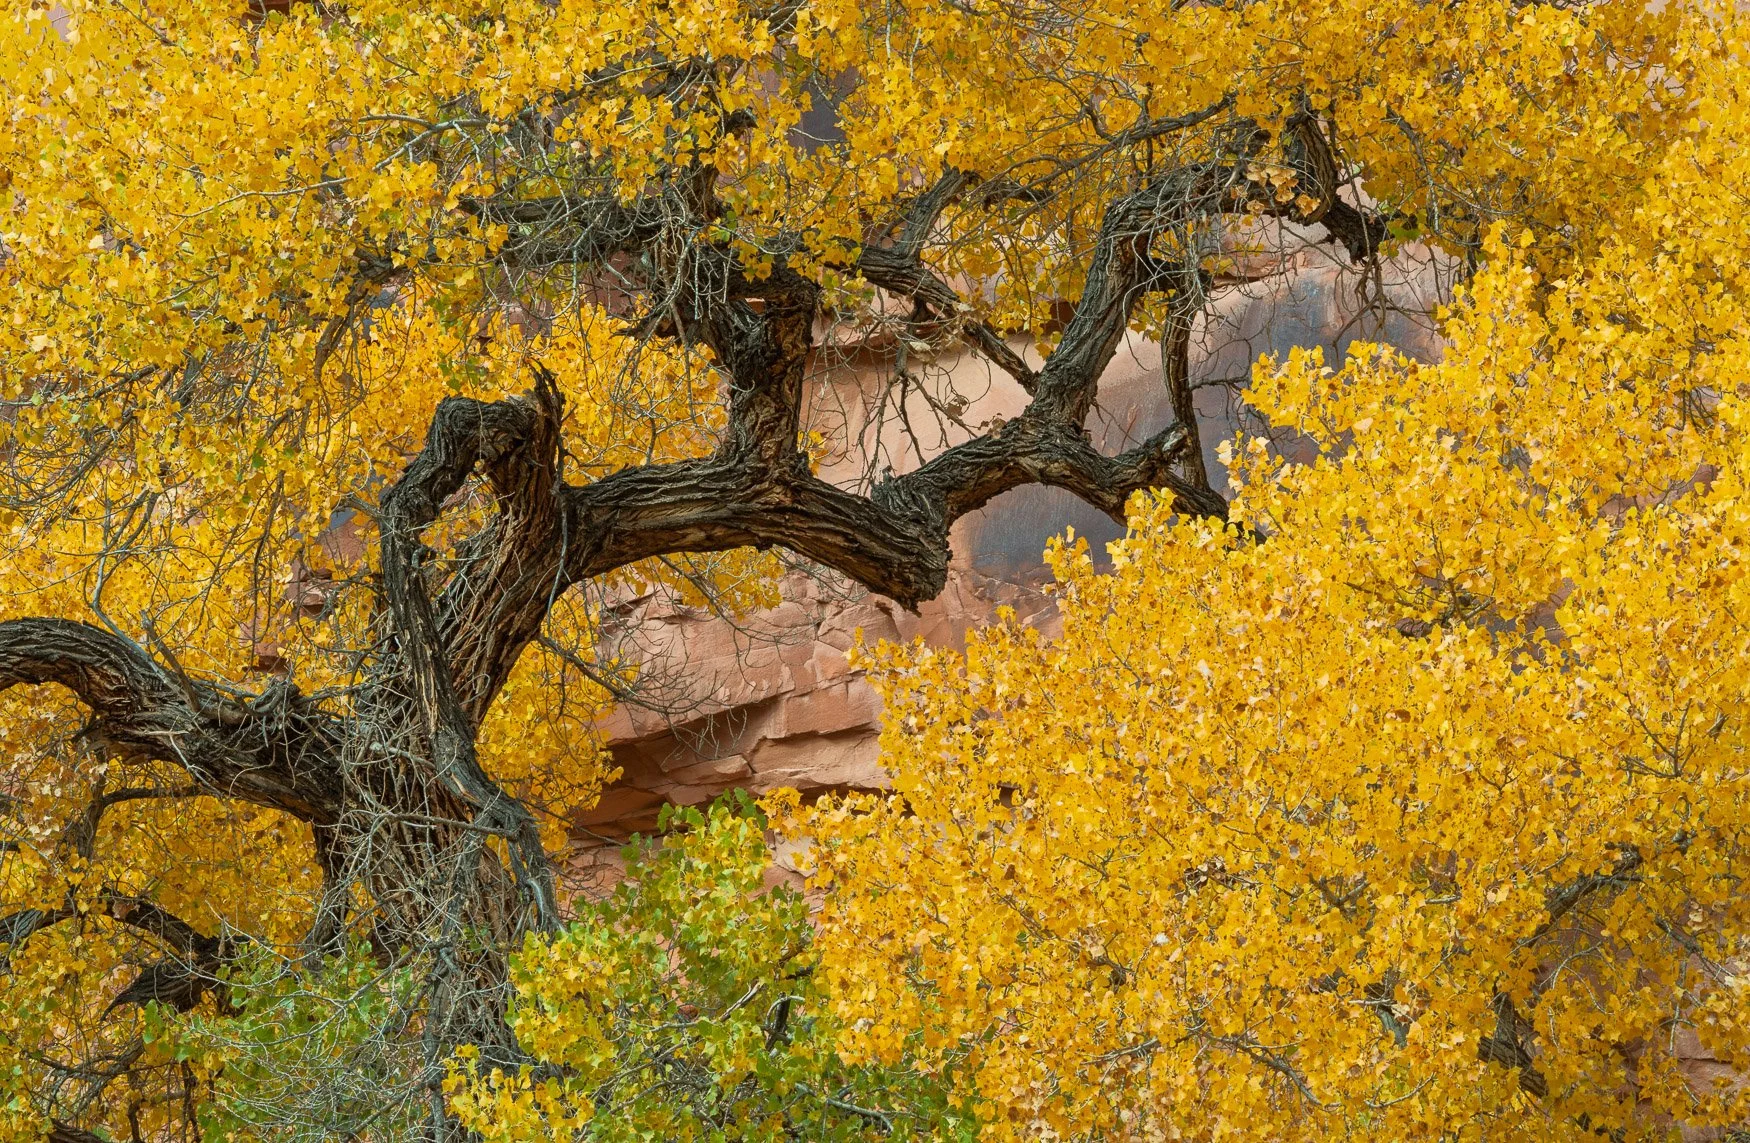
5. Kane Creek Road
If you’re unable to do the hikes in Courthouse Wash or Grandstaff Canyon, you can still have a wonderful desert fall color experience by driving Kane Creek Road. As a bonus, there are several unique petroglyph panels viewable directly from the road or within a five-minute walk.
Driving Conditions: The road is paved for the first few miles before transitioning to graded dirt. If you continue past the point at which the canyon opens into a broad valley, the road becomes much rougher and is no longer navigable by passenger cars.
Moonflower Canyon: If you can manage a short hike, Moonflower Canyon is a great stop. You’ll find a petroglyph panel next to the parking area, and the canyon itself is filled with vibrant cottonwood trees.
Where to Shoot: When the pavement ends, Kane Creek flows intermittently in the small canyon on your right. The foliage within this canyon will be your primary target for the duration of your drive.
Pro Tips for Photographing Moab in Autumn
Dress in Layers: Temperatures in the La Sal Mountains can be 20–30 degrees cooler than down in town. If you’re headed into the mountains, dress in layers and pack warm clothes.
Prepare for Desert Hiking: Hiking in desert canyons is more difficult than you might anticipate. Be prepared to cross the creek multiple times and climb over or under fallen trees. Also, expect rapid changes in temperature—shaded canyon areas are often substantially cooler than spots in direct sunlight just a few feet away.
Work the Lighting: Overcast skies or shaded areas reduce dynamic range, making it easier to showcase subtle textures, patterns, and colors without dark shadows or blown highlights. However, when working in direct sunlight, look for backlit leaves—they glow brilliantly!
Don't Ditch the Tripod: Tripods seem to be falling out of favor, but I still regularly use my Peak Design Carbon Fiber Travel Tripod, especially in autumn. It makes fine-tuning compositions much easier, and when photographing intimate landscapes, securing your framing is essential.
Plan Your Moab Autumn Photo Trip with eFotoGuides
Want precise locations, timing recommendations, and insider field notes for capturing Utah's red rock country? Take the guesswork out of your next photo run with our digital eFotoGuides.
Each guide delivers exact GPS coordinates, detailed sunrise and sunset strategies, seasonal foliage advice, and gear breakdowns for iconic locations across Moab, Arches, Canyonlands, and beyond.
👉 Explore the eFotoGuides Store Today and get ready to shoot portfolio-worthy images on your next adventure!

Chasing Storms: My 5 Favorite Spots to Photograph Moab’s Summer Monsoons
Most tourists pack up and run for cover when a summer monsoon hits Moab—but landscape photographers grab their tripods. From hidden reflection pools in Arches to sweeping storm light over the vast rims of Canyonlands, discover the top 5 spots (plus a bonus backcountry drive) to safely chase and capture the raw drama of a desert storm.
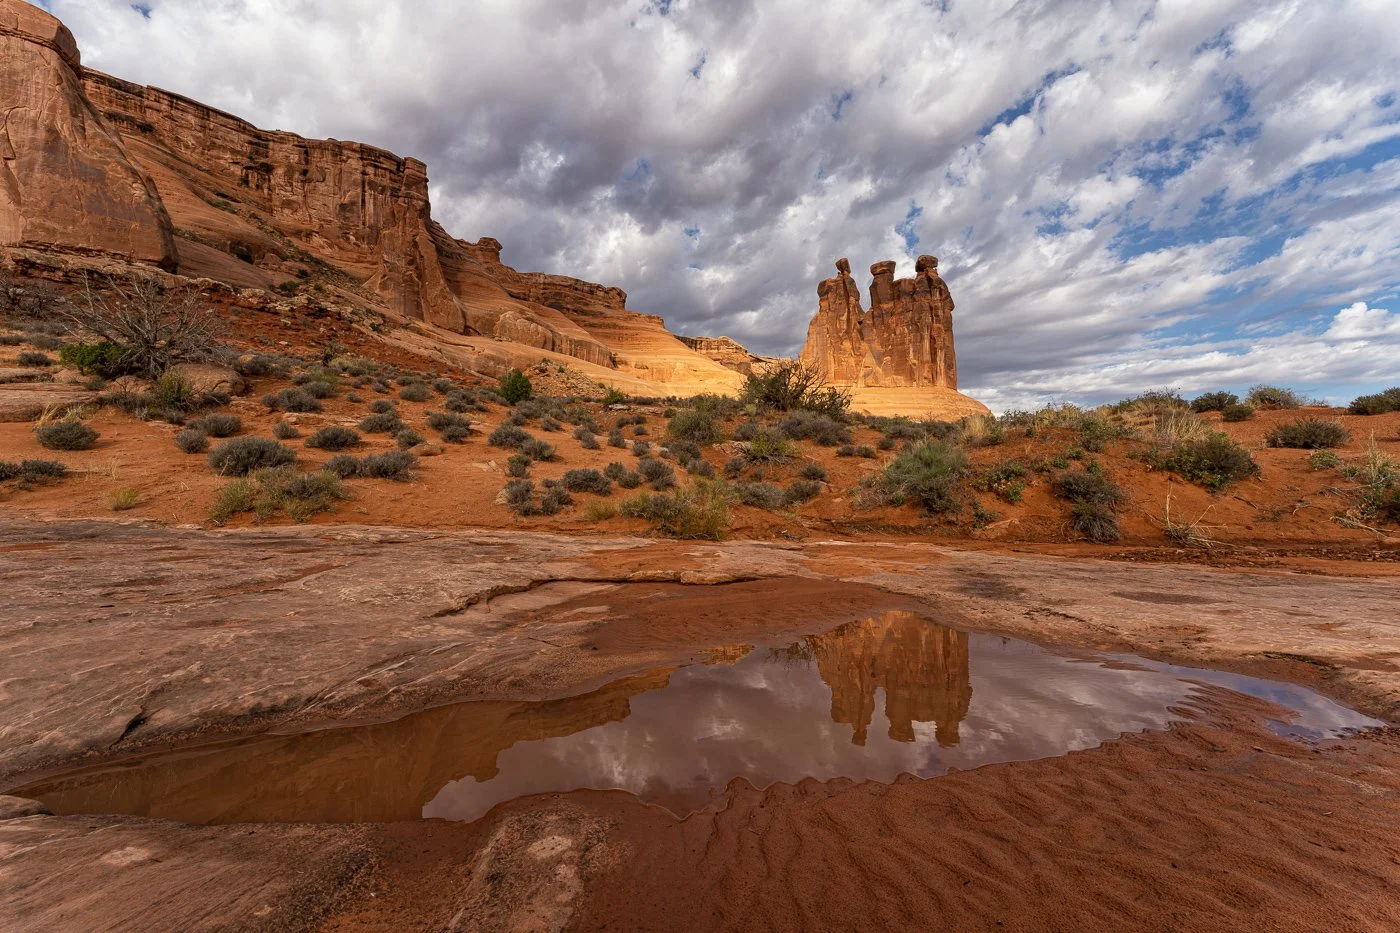
A monsoon thunderstorm at Arches National Park leaves behind the perfect canvas. Utilizing a low angle, this shot captures the iconic Three Gossips formation mirrored in a desert pothole along the Park Avenue trail, proving that looking down can sometimes give you the best view.
There is nothing quite like summer in Moab. While most people see the gathering dark clouds of a monsoon storm and head indoors, landscape photographers do the exact opposite. We grab our gear and run toward the chaos.
The American Southwest completely transforms during a summer storm. The smell of rain on hot sandstone, the dramatic drop in temperature, and the intense contrast of bruised, purple skies against vibrant red rock create a canvas you simply can't find at any other time of year. If you are willing to chase the storm, you can capture images with a level of mood and drama that ordinary golden hour light just can't match.
From hidden reflection pools to vast canyon rims, here are my favorite spots around Moab to photograph summer monsoon storms.
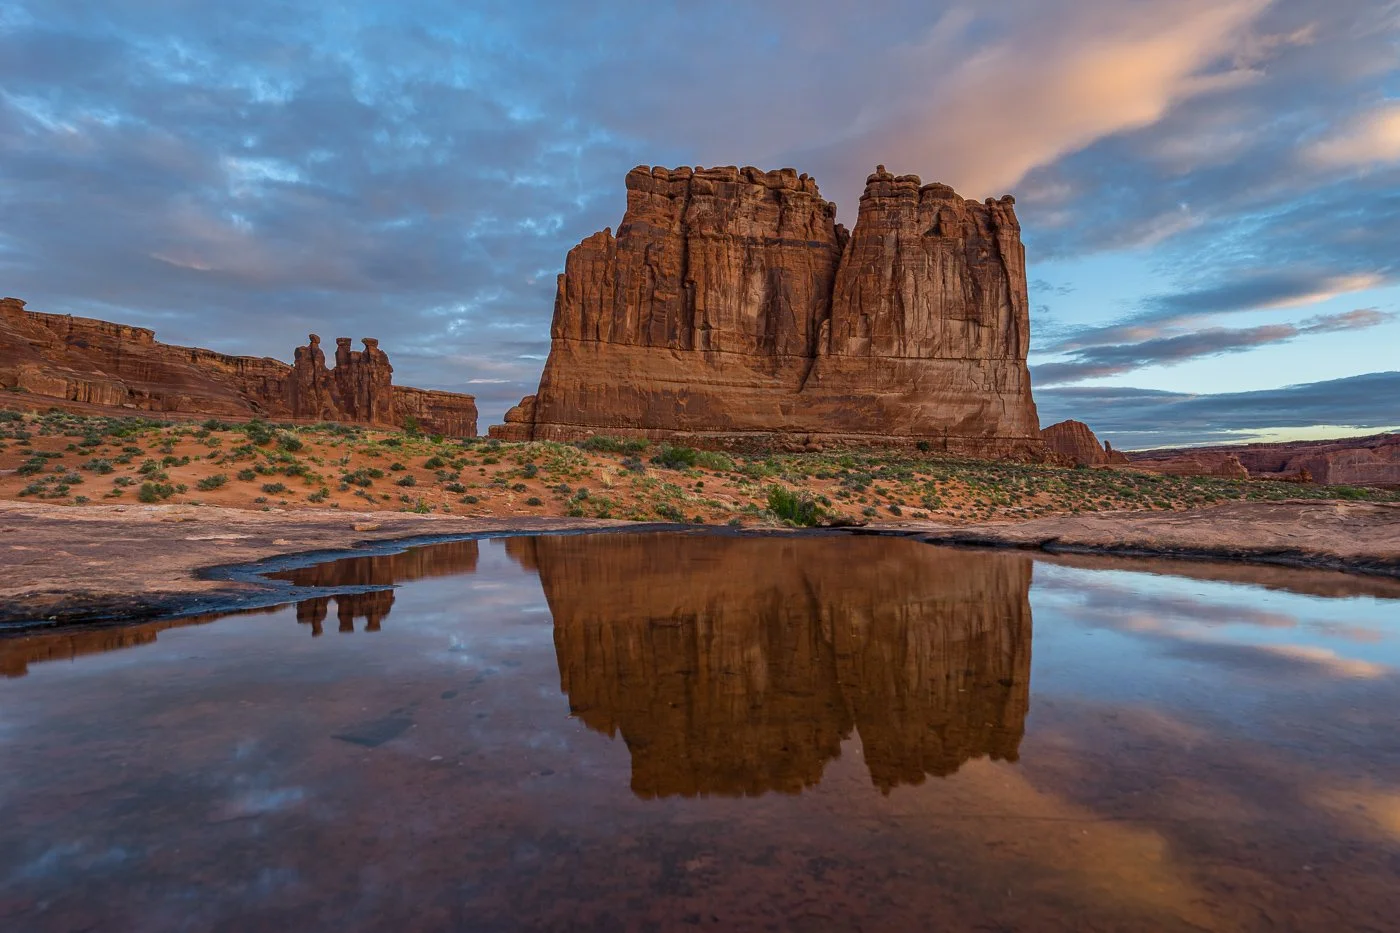
Early morning magic in the desert. The towering monoliths of Courthouse Towers catch the soft glow of sunrise as a still rain-pothole acts as a perfect natural mirror, duplicating the pastel skies and rugged desert geology below.
1. Lower Park Avenue (Arches National Park)
If you want immediate dramatic impact without a grueling backcountry hike, head to lower Park Avenue. The towering monoliths and sheer sandstone walls resemble a canyon version of a city skyline, and when a monsoon hits, this iconic location goes from spectacular to otherworldly.
The Reflection Pools: Lower Park Avenue features dozens of natural potholes carved into the slickrock. Following a heavy downpour, these basins fill with water, transforming into pristine, glass-like mirrors. Position your camera low to the ground to capture iconic monoliths like the Three Gossips, the Tower of Babel, and The Organ perfectly reflected in the water. You’ll need a tripod that gets very low to the ground. My choice? The Peak Design Pro Tripod, which sets up easily at just inches off the ground.
Endless Compositions: Because of the way the giant fins and towers align, your composition options here are virtually limitless. You can shoot wide to capture the scale of the entire canyon under a dark cloud, or use a telephoto lens to isolate interesting details in the landscape.
The Dynamic Wash: If you time it exactly right immediately following a storm, the dry wash at the bottom of the canyon can come alive with flowing water. Capturing movement in a place that is usually bone-dry adds a rare storytelling element to your images. Using a solid neutral density filter on your lens will extend the shutter speed, giving the flowing water a silky smooth texture. I only use Breakthrough filters, including their X2 6 stop ND.
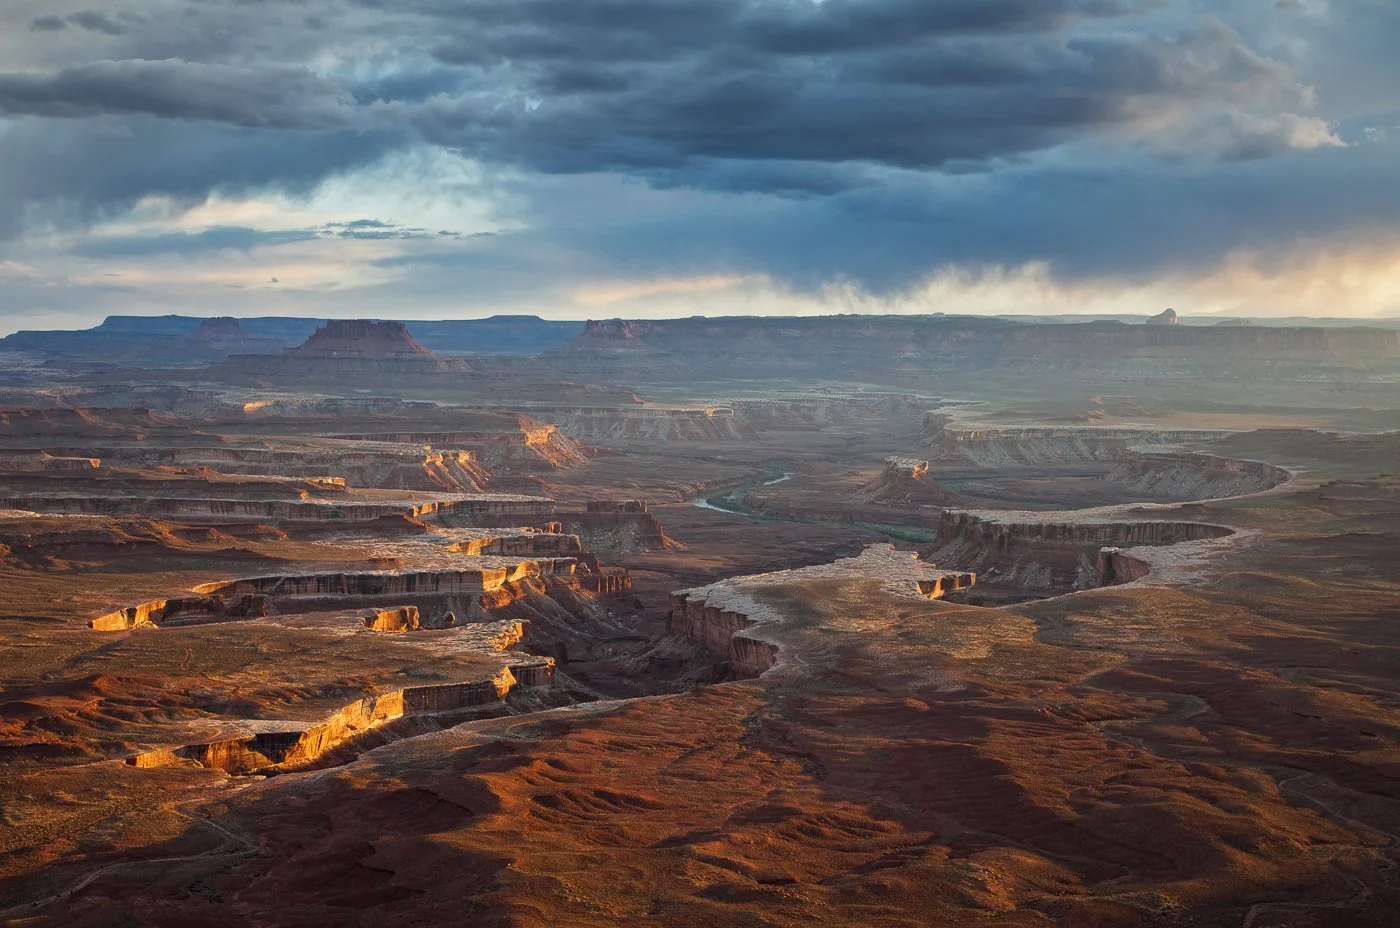
Nothing beats the high-contrast drama of a desert storm at sunset. Looking out from Green River Overlook in Canyonlands, the setting sun breaks through heavy, brooding clouds to light up the labyrinth of canyons below, highlighting the incredible depth and raw scale of the Island in the sky district.
2. Green River Overlook (Canyonlands National Park)
For pure, big-sky drama at sunrise or sunset, the Green River Overlook in the Island in the Sky district is legendary. This vantage point gives you an unobstructed view of the vast plateau deeply chiseled by the river below.
Unrivaled Storm Light: The massive panoramic view here means you can watch dramatic skies produce sweeping storm light across the landscape. The interplay of light and shadow sweeping over the canyon floors gives the entire scene significantly more visual interest than during the dry months.
Catching the Transitions: This location shines brightest just as storms are approaching or clearing. The breaking clouds can create spotlight effects on the canyon rims while the rest of the landscape remains bathed in moody blues and purples.
A Quick Safety Reminder: Because you are standing high on an exposed mesa rim, it is absolutely crucial to be lightning safe. Keep an eye on the sky, track how close the cells are, and be ready to retreat to your vehicle if lightning starts striking nearby.
Gear Recommendations: To capture this massive landscape, you’ll be best served using an ultra-wide lens like a 14-24mm if you want to include foreground elements such as interesting rock formations or juniper trees. A 24-105mm lens is always a good option here as it allows you to shoot wide landscapes or zoom in on interesting features in the canyon below.
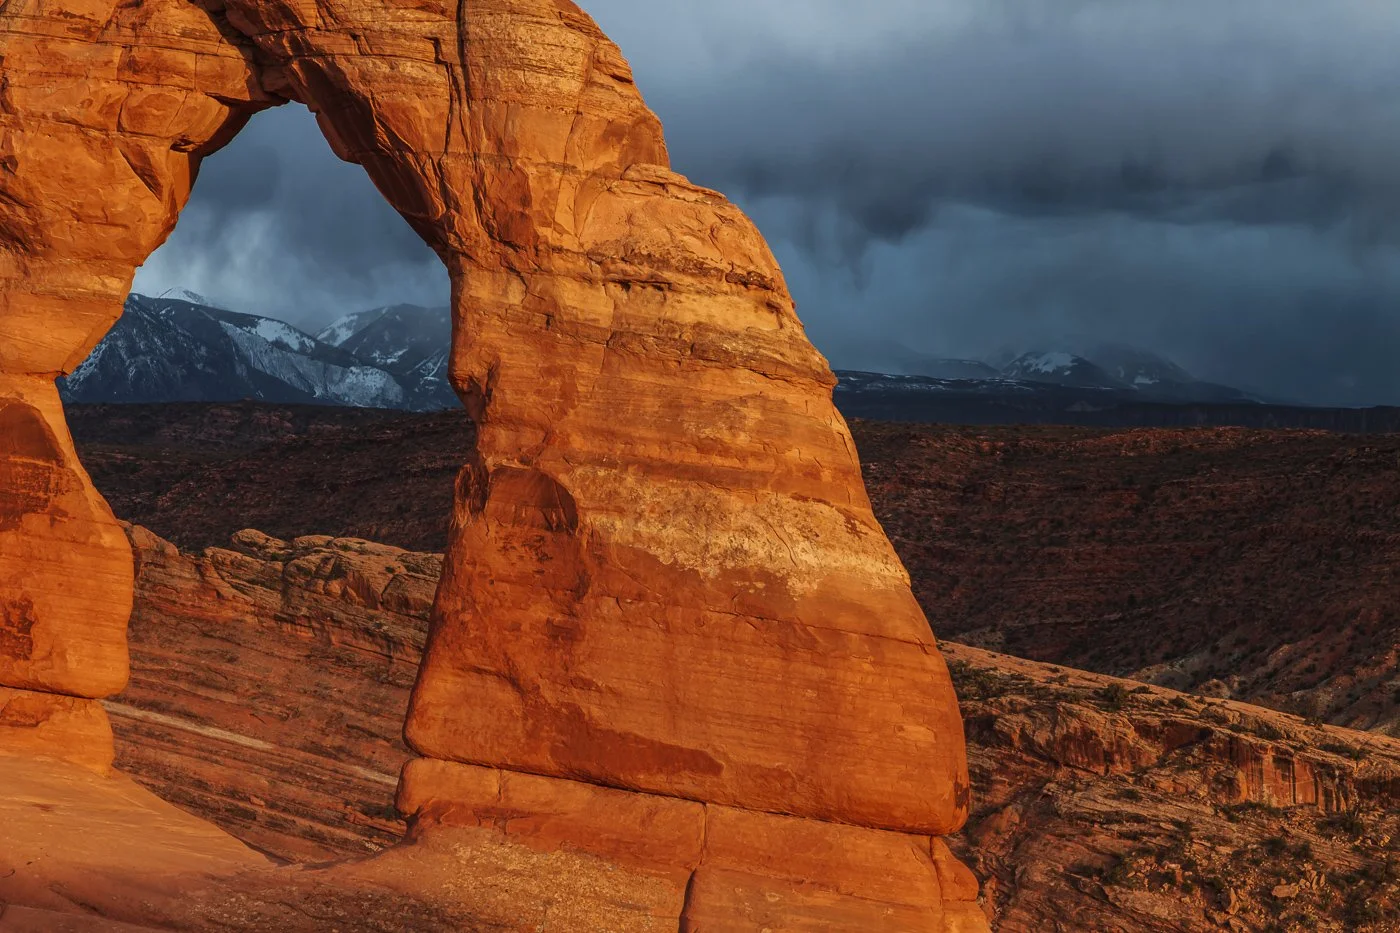
A tightly composed frame of Delicate Arch captures a masterclass in color contrast. The warm, radiant orange of the Entrada sandstone pops vividly against a deep, moody storm sky, while the snow-dusted La Sal Mountains peek through the arch's opening to perfectly frame the rugged spirit of Moab.
3. Delicate Arch (Arches National Park)
Photographing Delicate Arch at sunset is a bucket-list experience, but doing it during a summer monsoon elevates it to a whole new level.
Ditching the Crowds: Delicate Arch is notoriously busy, but a threatening storm has a magical way of clearing out the crowds. You will often find the slickrock bowl far less packed when stormy weather rolls in.
The Perfect Backdrop: Instead of a bald, clear sky, a monsoon brings dark, textured clouds that fill the negative space above the arch and frame the distant La Sal Mountains beautifully.
Slickrock Reflections: Just like Park Avenue, the giant slickrock bowl directly below the arch features natural potholes that collect rainwater. Getting down low allows you to mirror the arch in the water, a shot that is impossible most of the year.
Gear Recommendations: To capture the arch, the reflection pool, and the massive storm clouds all in one frame, an ultra-wide lens like a 14-24mm is your best friend. For tighter, more compressed compositions of the arch against the mountains, a versatile 24-105mm or 28-200mm works wonderfully.
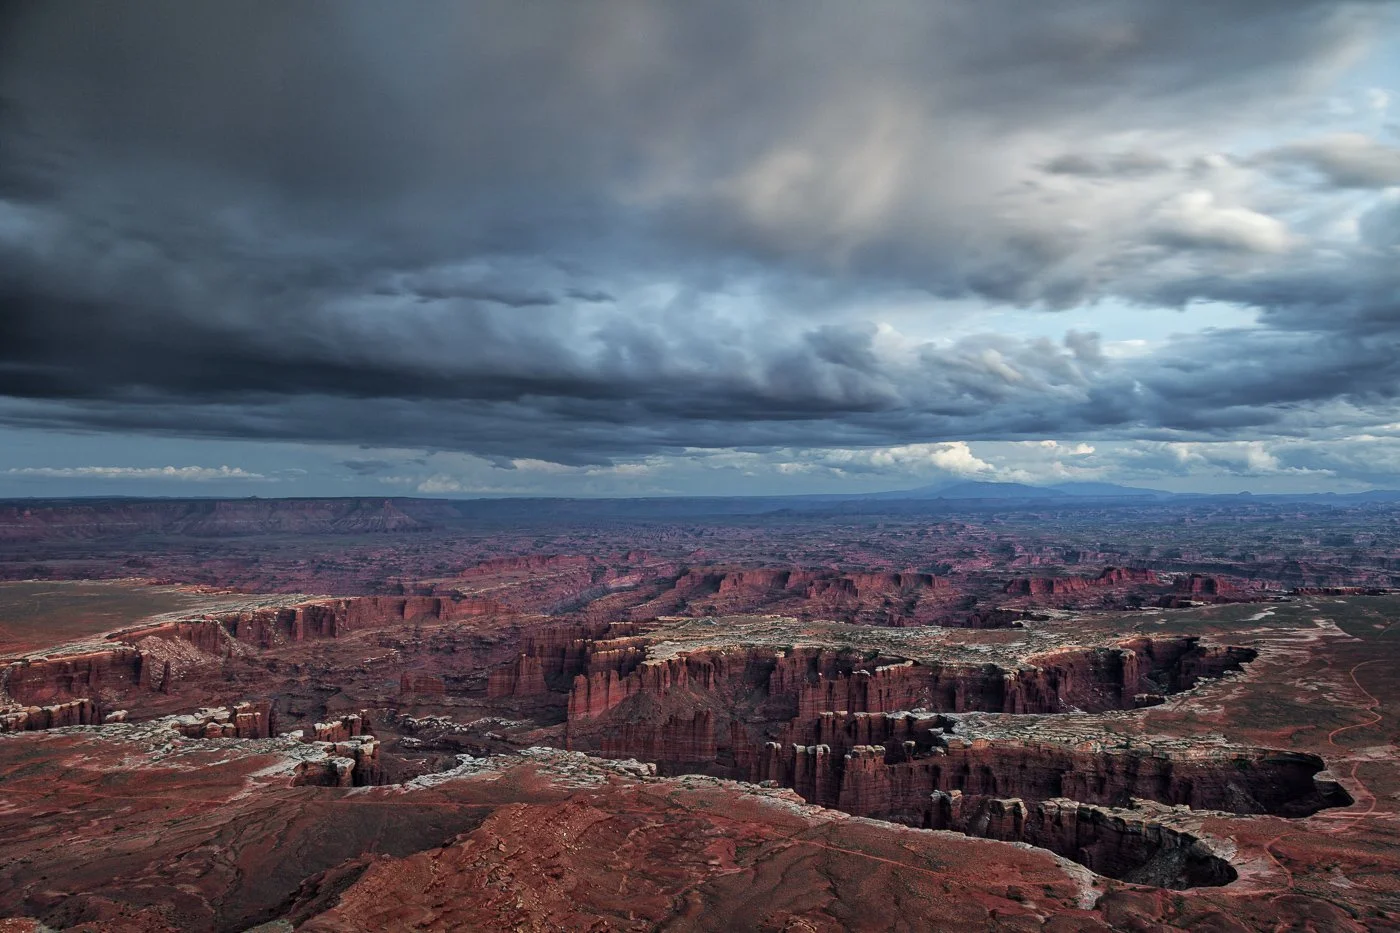
Standing at Grand View Point, the sheer scale of Canyonlands is humbling. In this shot, a heavy layer of rolling storm clouds hangs low over the white rim sandstone, casting moody shadows across the infinite maze of deep red rock canyons below.
4. Grand View Point Overlook (Canyonlands National Park)
Situated at the southernmost tip of the Island in the Sky mesa, Grand View Point offers a dizzying perspective of the canyon system below. While it's primarily a sunrise location, a monsoon storm can make it incredible at sunset, too.
Potholes as Anchors: Unlike other spots where potholes are used for mirror reflections, the large potholes along the rim here serve a different creative purpose. You can use these water-filled basins as foreground elements to anchor your scene and visually guide the viewer's eye through the frame.
Natural Foreground Elements: The entire canyon rim is dotted with twisted, weathered gnarled juniper trees. Framing these resilient desert trees against massive, stormy skies balances out the sheer depth of the canyons.
Lens Versatility: The landscape here demands flexibility. An ultra-wide to moderate zoom—such as a 14-24mm, 24-70mm, 24-105mm, or 28-200mm—will give you the freedom to transition from sweeping grand landscapes to intimate details of the rim.
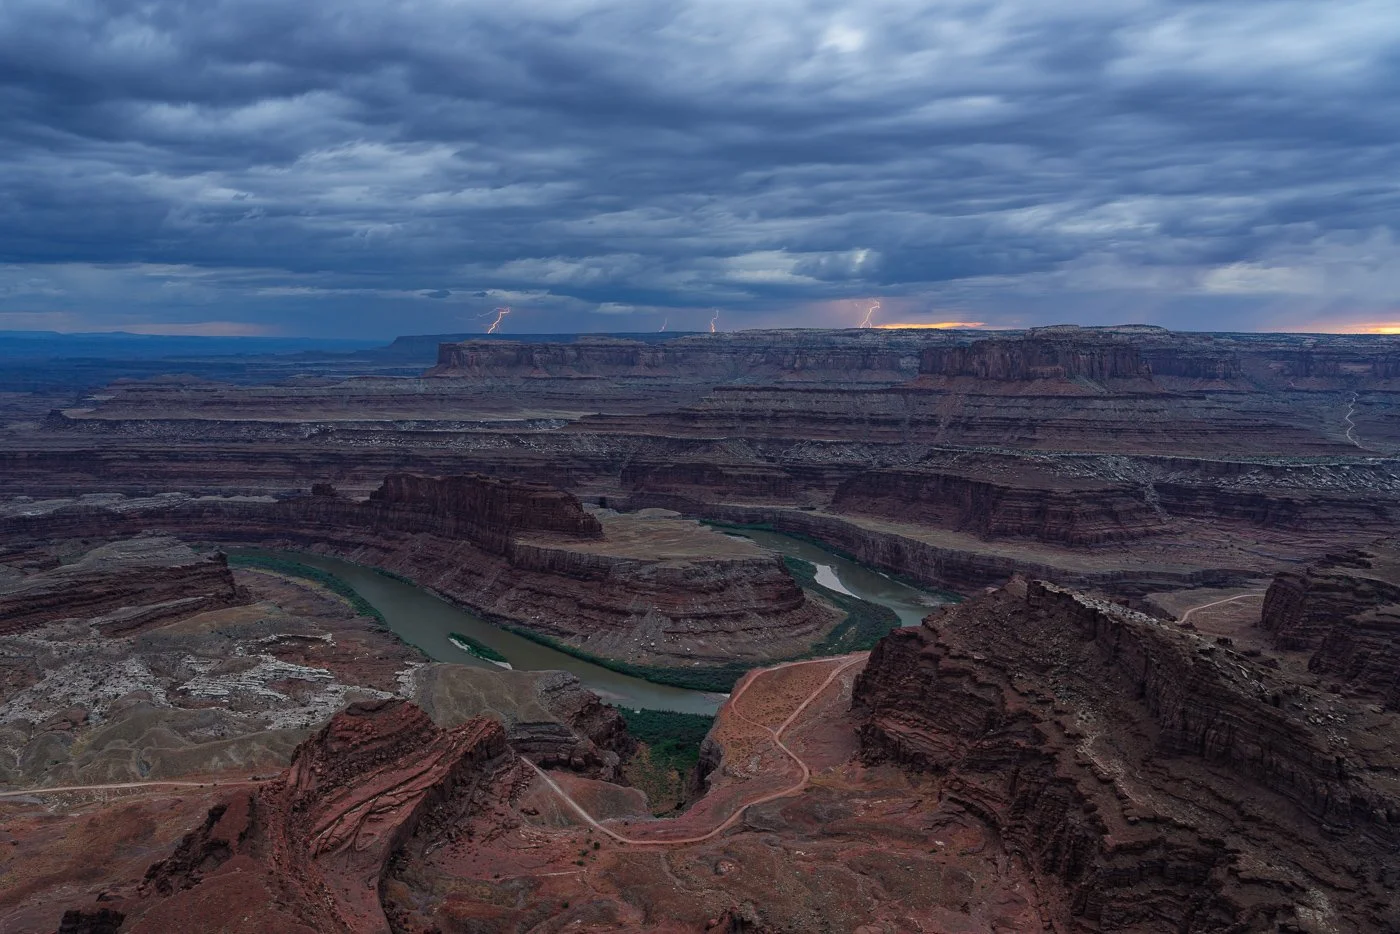
Timing is everything when monsoon season rolls through Moab. From the high overlook at Dead Horse Point State Park, this capture frames the dramatic sweeping curve of the Colorado River just as multiple lightning bolts split the sky on the far horizon, emphasizing the raw and volatile energy of a desert storm.
5. Dead Horse Point State Park
Sitting right next door to Canyonlands, Dead Horse Point offers a towering, 2,000-foot overlook above a gooseneck bend in the Colorado River. It is equally spectacular at sunrise or sunset when a summer storm breaks.
Endless Rim Compositions: Much like Grand View Point, the edge of the mesa here provides a playground for finding creative compositions. You can utilize unique sandstone rock formations and ancient junipers on the canyon rim to create depth.
Dramatic Storm Scale: The sheer verticality of the cliffs paired with a massive storm front creates an unmatched sense of scale. The wet sandstone deepens in color when rained on, making the red and orange layers pop vividly against dark, localized rain shafts.
Lens Recommendations: Stick with your workhorse focal lengths here. A wide 14-24mm is perfect for capturing the entire sweep of the river bend under a dramatic sky, while a 24-105mm allows you to isolate pockets of storm light dancing across the canyon floors.
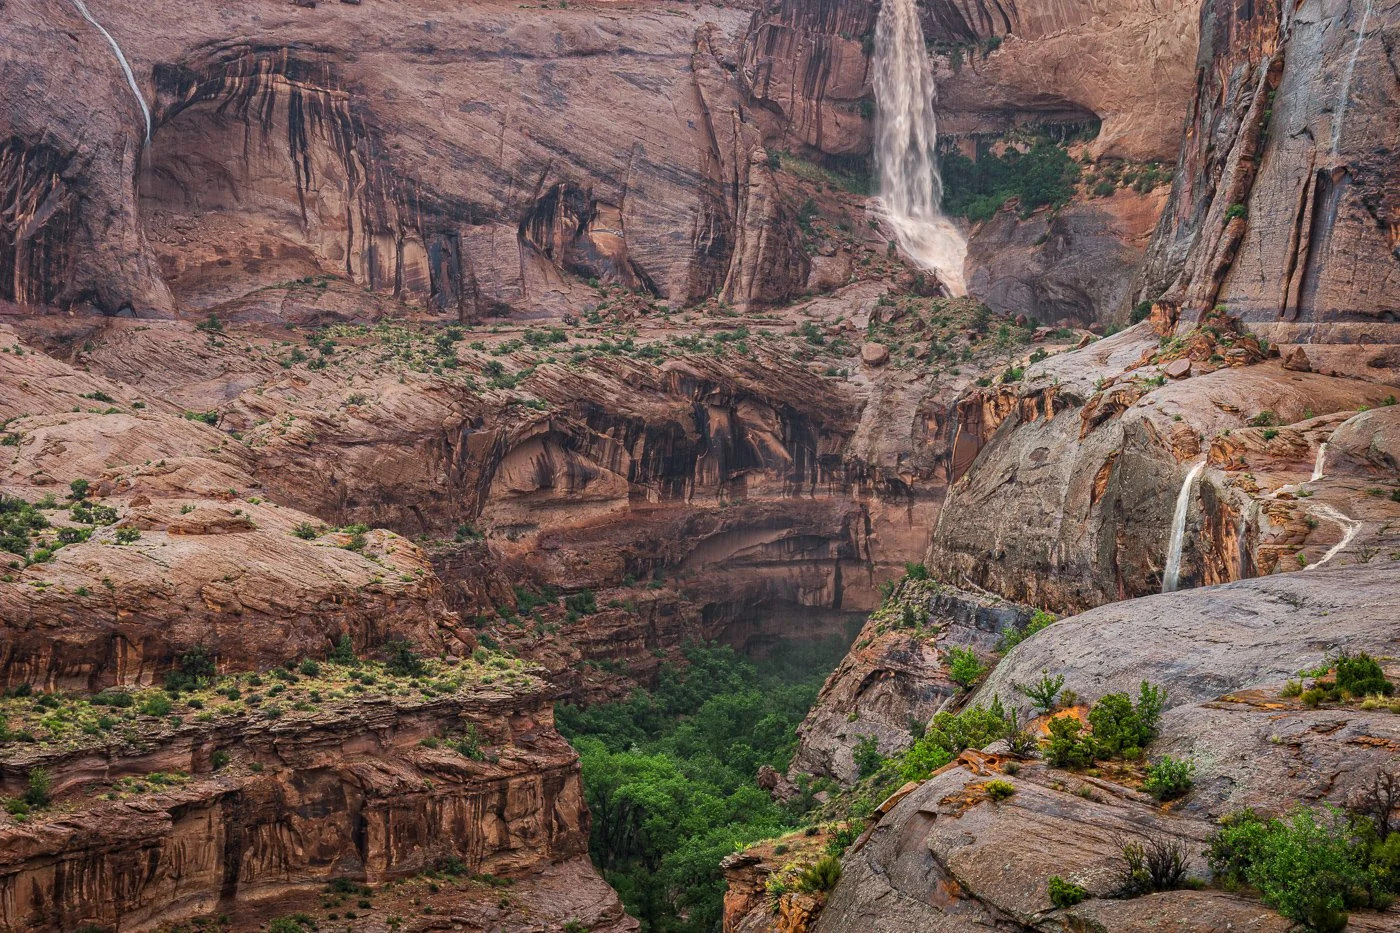
Seeing water flow in Moab is a transformative experience for any photographer. A heavy downpour turns Moonflower Canyon into a paradise of ephemeral cascades, sending a powerful muddy torrent plunging from the upper rim while delicate, smaller waterfalls spill over the foreground ledges into a surprisingly lush canyon floor.
Bonus Location: The Waterfall Hunt (Kane Creek Road & Highway 128)
If you are already out driving during a heavy downpour or immediately after the clouds break, don't just head straight back to town. Instead, take a drive down Kane Creek Road or alongside the Colorado River corridor on Highway 128.
Ephemeral Muddy Waterfalls: During a massive deluge, the desert drainage systems fill up instantly. You will be treated to the rare, spectacular sight of chocolate-milk-colored waterfalls pouring directly off the sheer canyon cliffs.
The Long Exposure Setup: To make the rushing, falling water look silky smooth against the rugged canyon walls, stack a solid neutral density (ND) filter onto your lens. This allows you to drop your shutter speed for a longer exposure even in daylight.
Lens Recommendations: A versatile intermediate zoom lens like a 24-105mm or a 28-200mm is perfect for this. It gives you enough width to capture the cliff walls, while providing the reach needed to safely zoom in on specific cascades across the river or high up on the rims.
Ready to Chase the Light?
Photographing a desert monsoon takes patience, preparation, and a willingness to get a little wet—but the rewards are entirely worth it. Be sure to check out my eFotoGuides that give you the information you need to be in the right place at the right time. As a small business owner, all purchases are appreciated and will help me continue to produce valuable content.
Which of these overlooks or backcountry drives are you adding to your photography bucket list for your next trip to Moab?

The Ultimate One-Day Moab Photography Itinerary: Sunrise to Sunset
Only have 24 hours to photograph Moab? Don't waste precious golden hour light guessing where to go. From a breathtaking canyon sunrise at Dead Horse Point to a glowing late-afternoon arch hidden in the backcountry, this is the exact, mile-by-mile itinerary a professional photographer would use to maximize every frame. Read the full guide, pack your wide-angle lens, and get ready to capture the desert like never before.
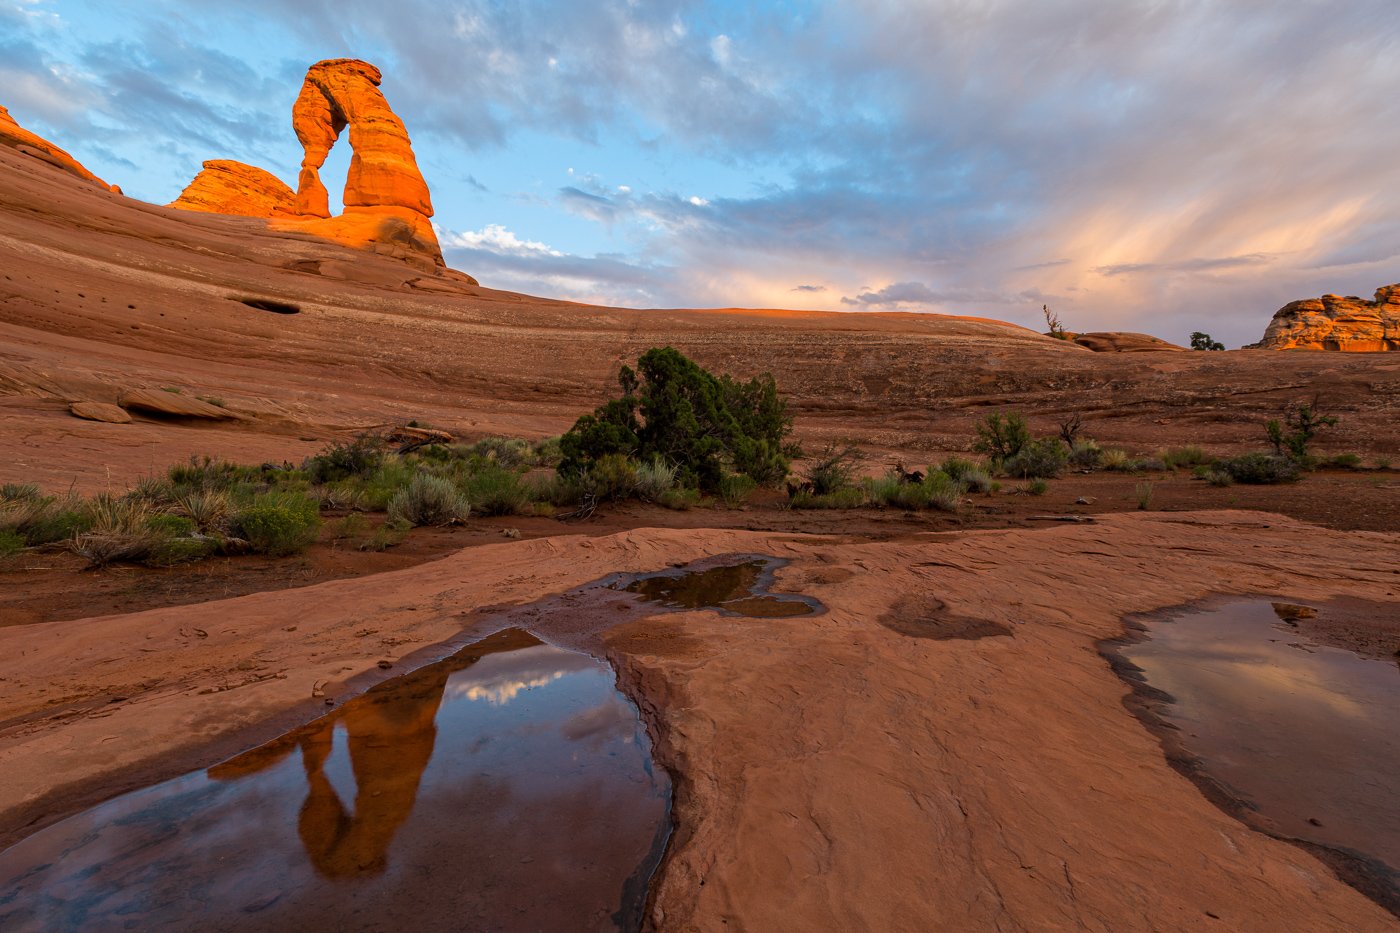
Chasing reflections in the desert. A passing storm left behind temporary potholes on the slickrock, offering a unique, mirrored perspective of Delicate Arch glowing under the golden hour light. Finding these fleeting moments is what Moab photography is all about.
Moab, Utah, is a landscape photographer’s paradise. With its soaring red rock fins, gravity-defying arches, and deep canyon overlooks, you could easily spend weeks exploring the area with your camera. Hell, I’ve spent twenty years wandering all over this landscape and have barely scratched the surface. But what if you only have one single day to capture the magic of Moab?
If I only had 24 hours to shoot the Moab area, this is the exact, fast-paced itinerary I would follow to maximize every ounce of golden hour, glowing rock, and dramatic desert light.
(Want to skip the guesswork and get exact GPS coordinates, seasonal light angles, and camera settings for these locations? Check out our premium eFotoGuides available right here on our website!)
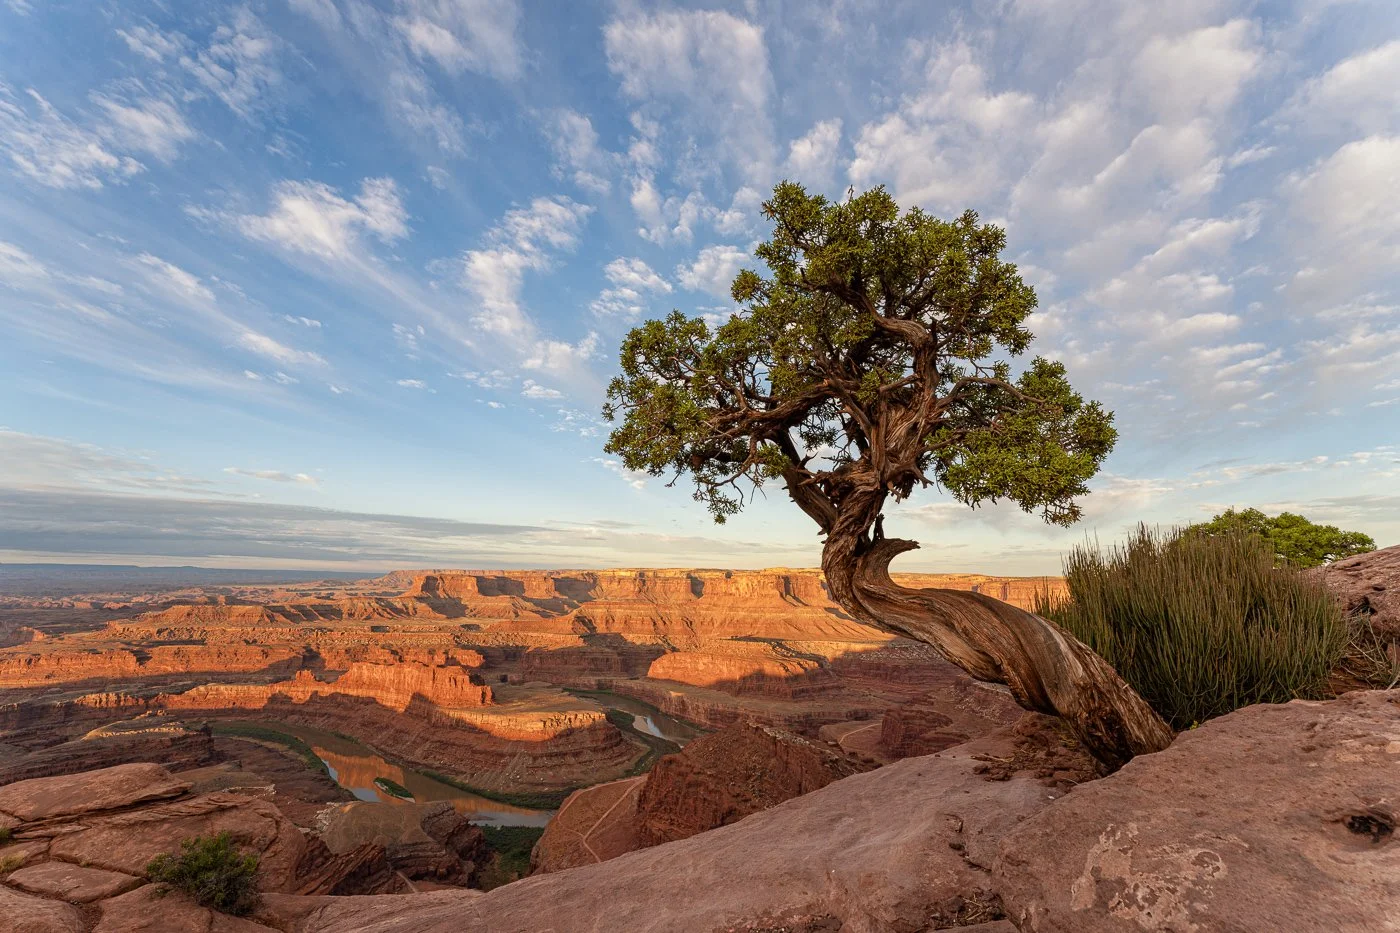
Using a strong foreground element can turn a vast, overwhelming landscape into an intimate story. By positioning this iconic twisted juniper on the right third of the frame, it gives the eye a natural anchor before wandering down into the massive, sun-drenched canyon layers of Dead Horse Point.
1. Sunrise: Dead Horse Point State Park
Gear of Choice: Sony 24-105mm lens
Your day starts early. Skip Arches for sunrise and head straight to Dead Horse Point State Park. Standing 2,000 feet above a gooseneck pinch in the Colorado River, the panoramic views here are unmatched. This is, hands down, my favorite place in all of Moab.
As the sun breaks over the horizon, the vast canyon layers light up in brilliant shades of purple, orange, and gold. I prefer using my Sony 24-105mm lens here. The zoom range allows you to shoot wide landscape vistas, but also zoom in to compress the dramatic canyon layers and isolate the winding river below.
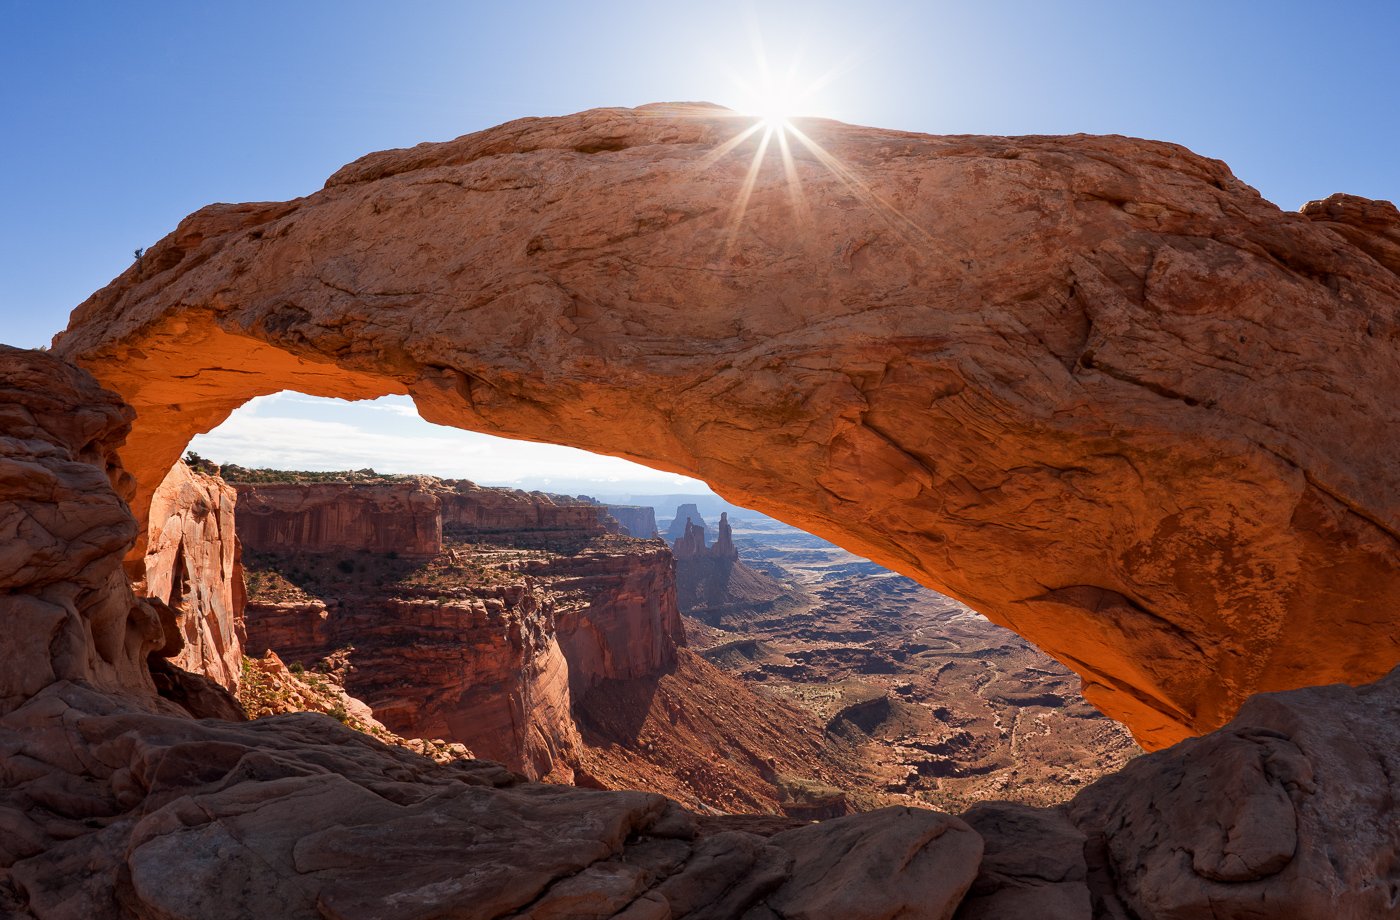
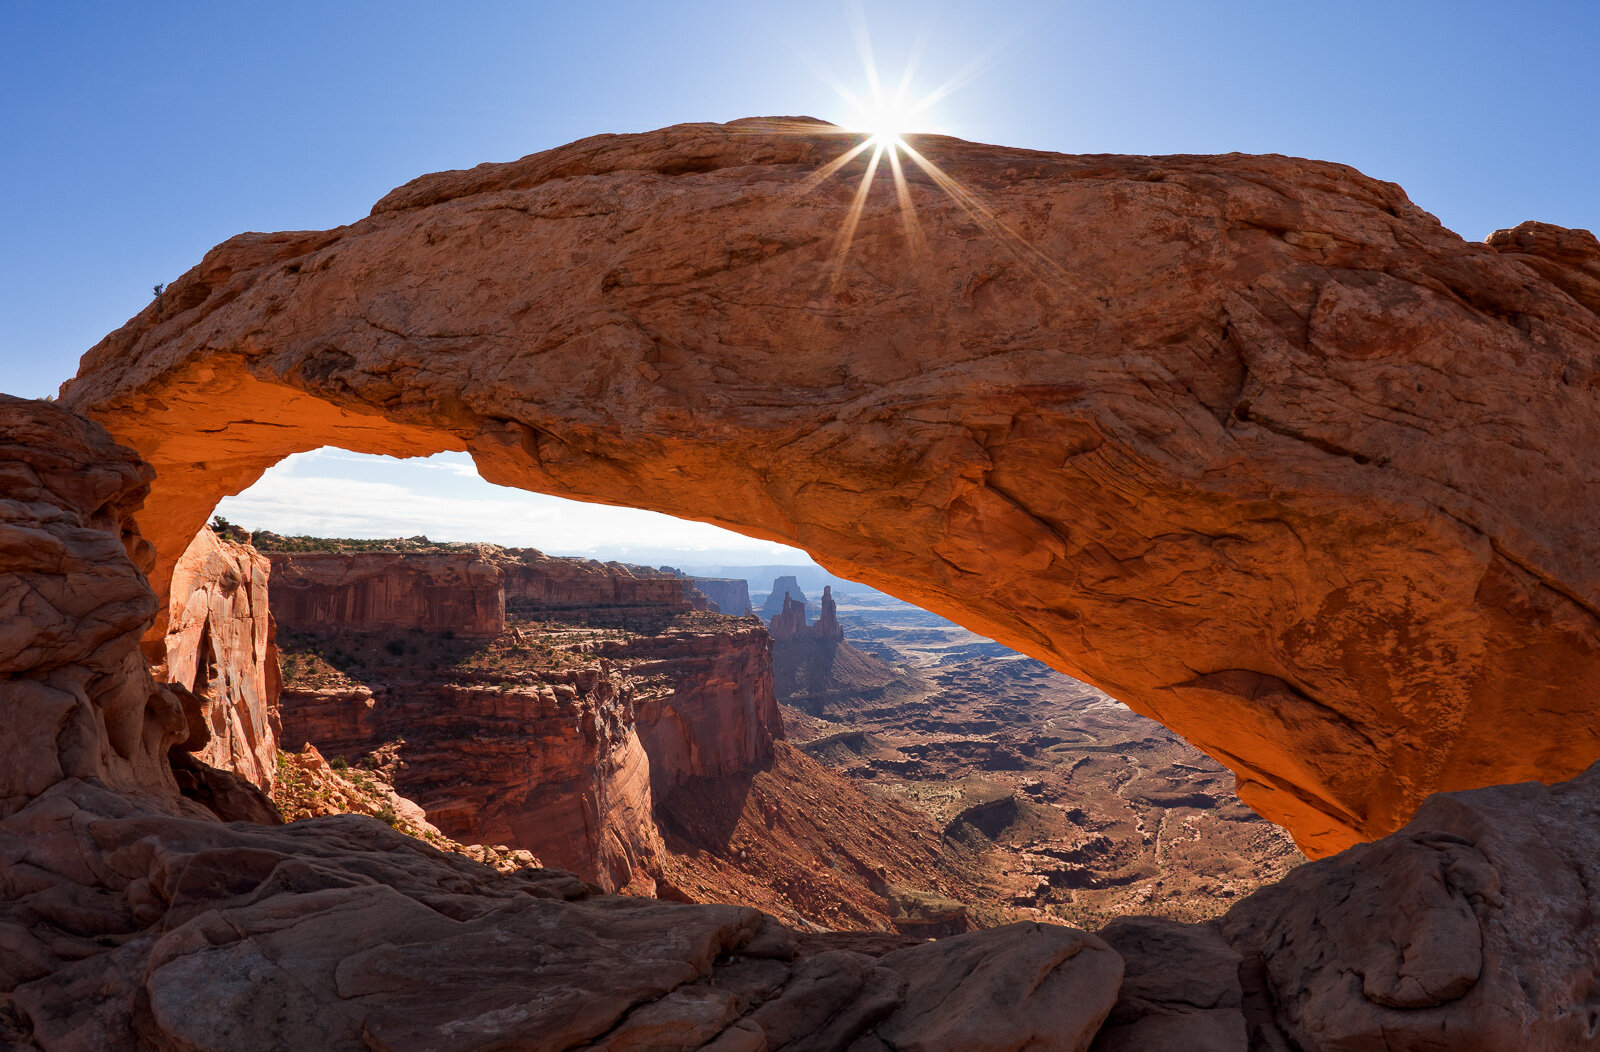
Timing and aperture are the secrets to capturing the perfect sunburst at Mesa Arch. By waiting for the exact moment the sun kisses the top edge of the stone and stepping down to a narrow aperture like f/11 or f/16, you can transform a harsh morning light source into a beautifully sharp, multi-pointed star that adds instant drama to the composition.
2. Early Morning: Mesa Arch (Canyonlands National Park)
Gear of Choice: Sigma 14-24mm
When the light begins to fade at Dead Horse Point, hop in the car and make the short drive into the Island in the Sky district of Canyonlands National Park. Your destination? Mesa Arch.
While most photographers choose to cross tripod legs with other photographers at sunrise, you can capture similar conditions up to two hours later with far fewer crowds. The sun still hits the sheer cliff face below the arch, reflecting a fiery orange glow onto the underside of the stone structure. Pack a wide-angle lens like the Sigma 14-24mm so you can get close, frame the glowing underbelly of the arch, and still capture the distant Washer Woman feature through the opening.
3. Mid-Morning Fuel: Breakfast & Photo Processing in Town
After an intense morning of shooting, it’s time to head off the plateau and back to Moab to refuel and review your images.
The Food: Head straight to the iconic Moab Diner for a classic, hearty breakfast. You’re going to need the calories for the hiking ahead.
The Workflow: Afterward, grab your laptop and head over to Dos Mas Coffee Shop on Center Street. Order a hot chai tea, grab a table, and spend a couple of hours reviewing and processing images from your morning shoot in Lightroom. This mid-day break keeps you off the trails during the harsh midday sun and lets you dial in your sunrise edits while the memory is fresh.
4. Lunch to Go: Sweet Cravings
Before you head out for your afternoon adventure, stop by Sweet Cravings Bakery + Bistro to pick up a trail lunch. My absolute favorite is The Capone sandwich, ordered "Rich’s Way." Throw it in your camera pack—you’ll thank me later when your stomach starts to growl.
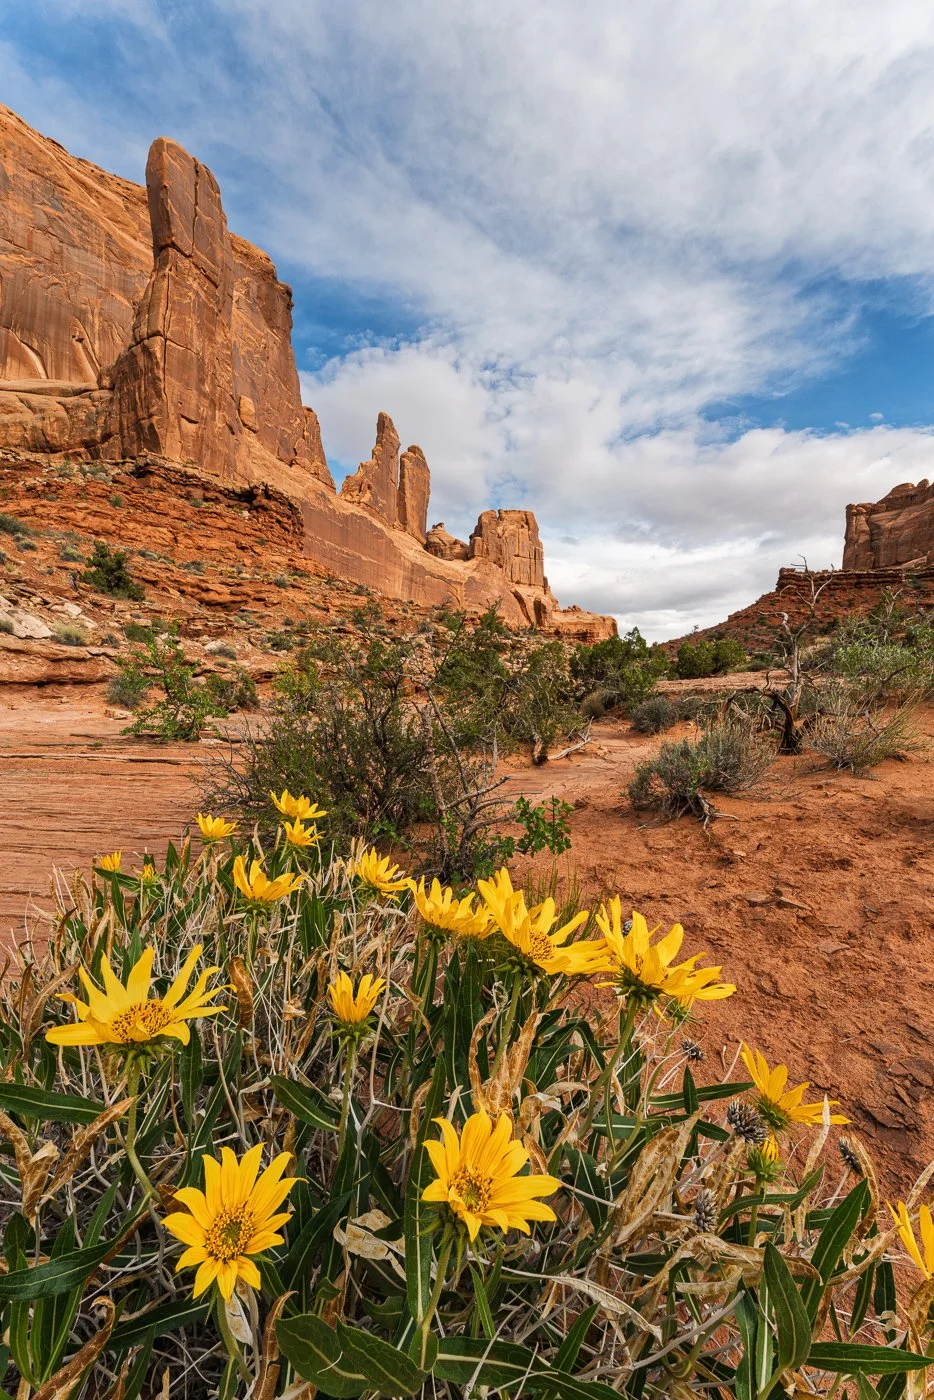
When shooting towering giants like Park Avenue, getting down low with a wide-angle lens allows you to tell a much deeper story. By placing these bright yellow Mule's Ear wildflowers right in the foreground, we create a powerful sense of scale and a beautiful color contrast against the warm, red sandstone cliffs behind them.
5. Early Afternoon: Hiking Park Avenue (Arches National Park)
The Objective: Intimate scenes and reflected light
Enter Arches National Park and make your first stop at Park Avenue. Instead of looking for grand, sweeping vistas in the high afternoon sun, look for smaller, intimate nature scenes.
As you hike between the massive, skyscraper-like sandstone walls, look up. The harsh overhead sun bounces off the opposite canyon walls, casting a beautiful, warm, soft reflected light into the shadows. Look for patterns in the rock, hardy desert plants, or abstract sandstone textures illuminated by this golden bounce-light.
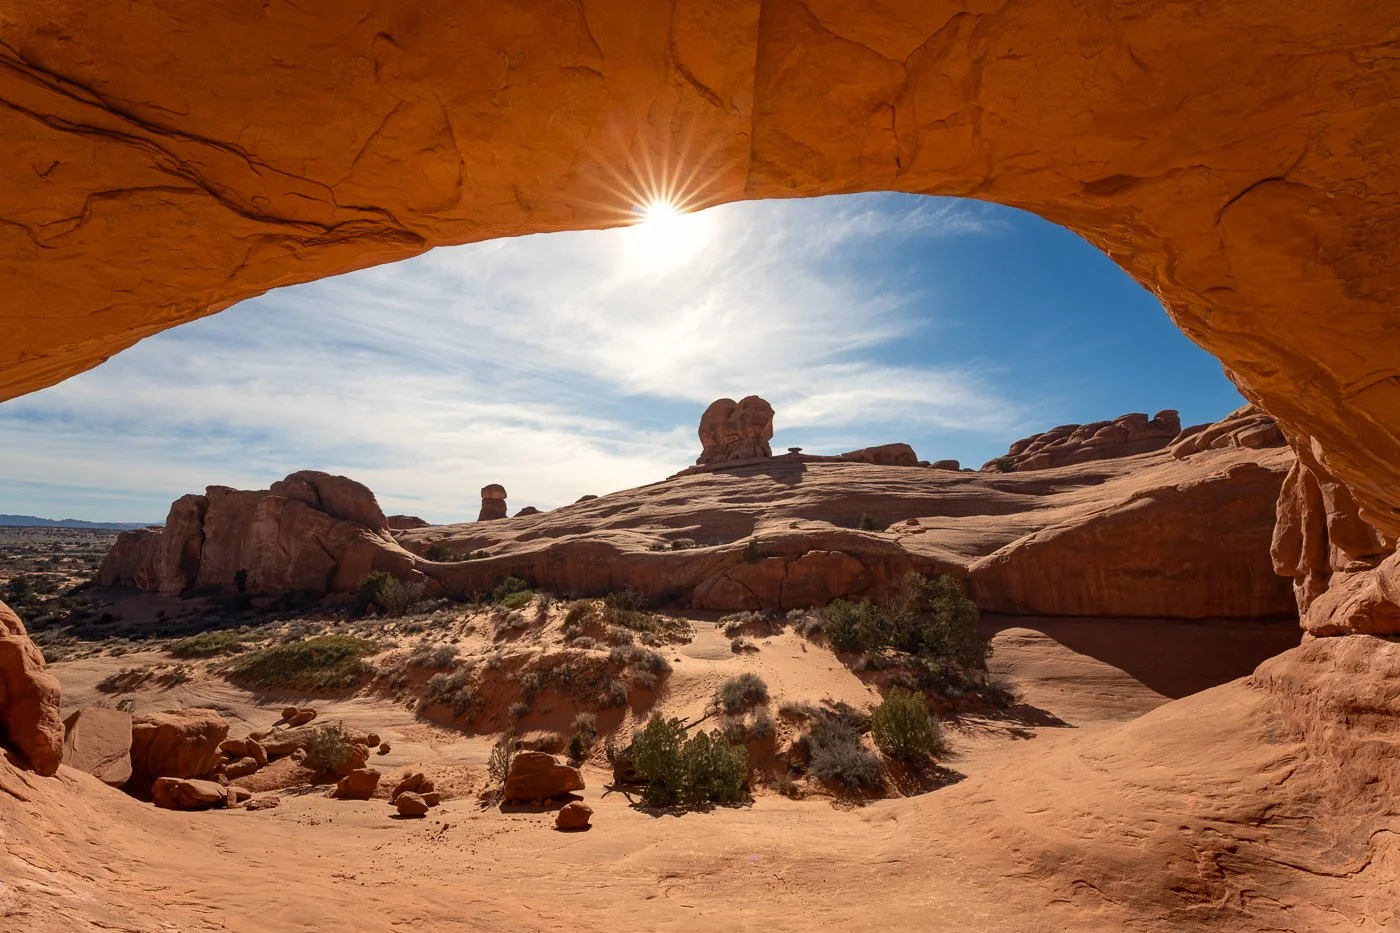
Framing within a frame is a timeless technique to create a sense of place and depth. By stepping completely inside the shadow of Eye of the Whale Arch, the massive stone opening acts as a natural vignette. A small aperture brings out that sharp, multi-pointed sunburst at the top edge, perfectly balancing the dark foreground sandstone with the brightly lit desert expanse beyond.
6. Late Afternoon: Eye of the Whale Arch
Gear of Choice: Sigma 14-24mm lens
As the afternoon begins to wane, drive out the dirt road toward Eye of the Whale Arch. This is a lesser-visited gem that shines in the late afternoon. Note: You will need a four wheel drive vehicle to navigate this road as the deep sand and small rock ledges will trap or damage anything else.
As the sun gets low, the light hits the sandy ground and red sandstone in front of the arch and reflects upward. This creates an incredible, subtle glow on the underside of the arch not unlike what you photographed earlier in the day at Mesa Arch. Put your ultra-wide lens back on your camera and experiment with different compositions, all the while shooting in the direction of the sun. This allows you to capture the immense scale and unique lighting of this hidden structure.
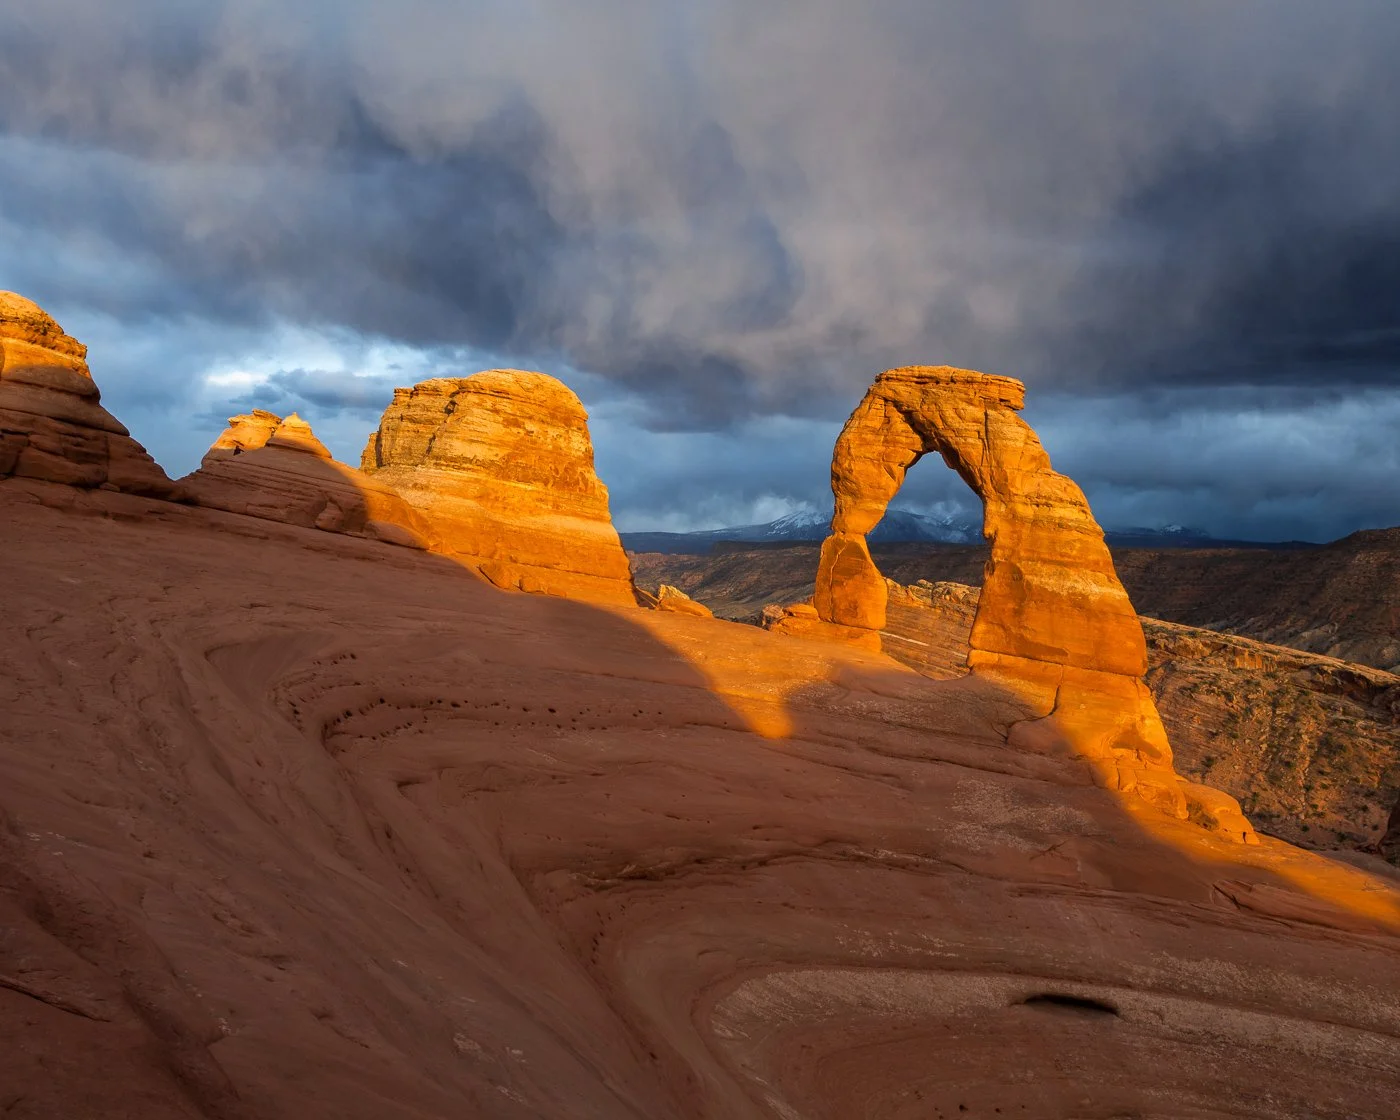
When high-contrast conditions hit, exposing for the highlights is key. By letting the storm clouds fall into deep shadow, the glowing sandstone of Delicate Arch truly pops from the frame. Weather like this is exactly why we tell our workshop participants never to pack up early when it rains—stormy clearing skies offer the highest dramatic payout in landscape photography."
7. Sunset: The Grand Finale at Delicate Arch
Gear of Choice: 24-105mm lens + a trusty headlamp
There is only one way to finish a perfect day in Moab: Delicate Arch.
Fair warning: it will be crowded. Photographers and tourists from all over the world gather here, but there is a reason for it—there is absolutely nothing else like this view at sunset. As the sun dips toward the horizon, the free-standing arch turns a deep, fiery crimson against the backdrop of the La Sal Mountains. If you happen to catch the mountains crested with snow, this scene is even more impressive!
I use the 24-105mm lens here to give myself composition flexibility, allowing me to frame the arch tightly or pull back to include the slickrock bowl below the arch.
Pro Tip: Once the sun dips below the horizon, don't rush off. Enjoy the blue hour, pack up slowly, and make sure you brought a headlamp for the 1.5-mile hike back down the dark slickrock trail to your car. Or, if you still have enough energy, stick around for some astrophotography. Just remember: light painting is not allowed in the national parks near Moab.
Maximize Your Moab Photo Trip
This 24-hour itinerary is designed to keep you in the right places, with the right lenses, at the exact moments the light is doing something spectacular.
If you want to take your Moab photography trip to the next level, don’t leave your shots to chance. We have created comprehensive, field-tested eFotoGuides for the Moab area. Our guides give you exact GPS coordinates, trail information, best times of day for photography, suggested camera settings, and even composition tips for all of these locations and many more.

Summer in Moab: Chasing Monsoons, Dramatic Skies, and Milky Way Magic
Think summer in Moab is just about surviving the heat? Think again. From dramatic afternoon monsoon storms that trigger ephemeral waterfalls and perfect pothole reflections to pristine dark skies built for Milky Way astrophotography, summer is secretly one of the most rewarding seasons for landscape photographers. Discover our top composition tips, favorite hidden viewpoints, and essential desert safety guide to capturing Moab’s most dynamic season.
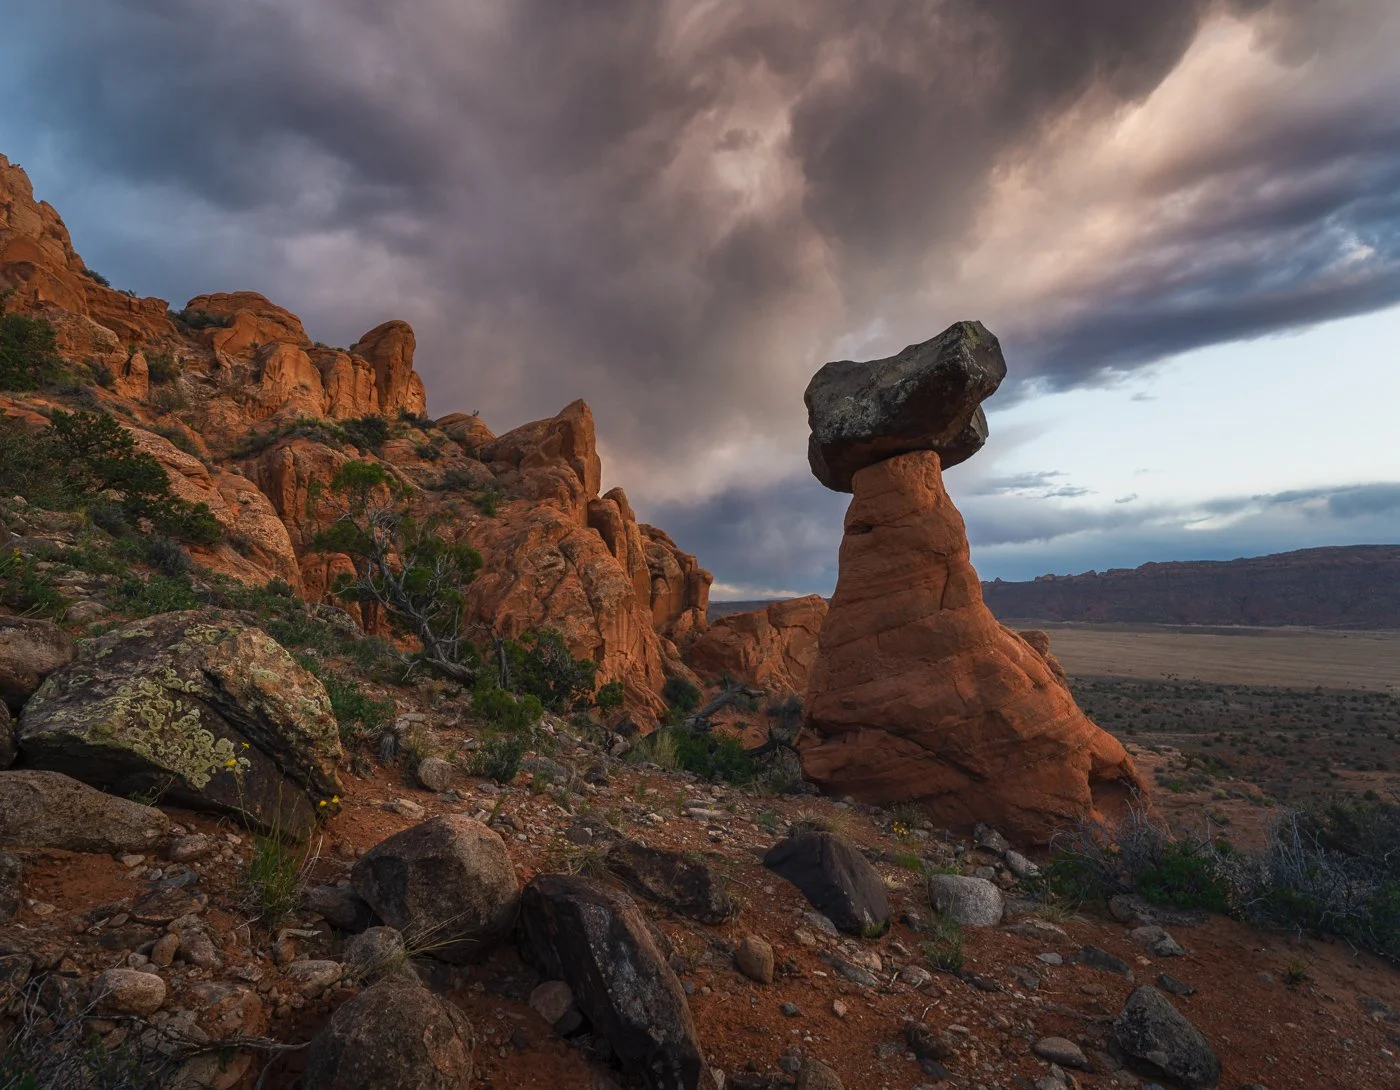
This is exactly the kind of magic you can capture when you chase summer monsoons in Moab. As a powerful afternoon thunderstorm begins to break up, the trailing edge of the storm catches the warm golden hour light, casting a dramatic glow over this towering red rock hoodoo and the sweeping desert valley below.
When most people think of summer in Moab, they think of the blazing sun, oppressive heat and long days in the Colorado River. But for landscape photographers, summer is one of the most dynamic, thrilling, and rewarding times of the year to explore the Red Rock Country.
If you are willing to brave the heat and watch the weather reports, summer rewards you with two spectacular phenomena: dramatic afternoon monsoon storms and pristine night skies.
Here is our ultimate guide to photographing Moab during the summer months, along with the essential tips and safety precautions you need to know.

This perspective from the canyon rim emphasizes the scale of the Moab region. A lone juniper tree serves as a foreground anchor, its gnarled form contrasting with the sweeping, intricate layers of the gooseneck in the distance. The sunset light breaks through the heavy monsoon-season storm clouds, revealing the rich textures and deep reds of the Colorado Plateau and highlighting the winding river.
1. The Magic of Monsoon Season
Usually starting in late June and lasting through August, sometimes even into early September, the Southwest monsoon season kicks into high gear. While empty blue skies can work perfectly fine in Arches National Park—where you can compose shots with majestic sandstone towers and arches protruding into the deep blue—they fall flat at places like Dead Horse Point and Canyonlands National Park.
Dead Horse Point and Canyonlands offer vast, sweeping vistas looking down into massive canyons. Without dramatic clouds, these wide-open views tend to lose much of their visual appeal. Monsoon season changes everything. Massive thunderheads, sweeping curtains of rain, and localized storms provide the scale, contrast, and drama these epic vistas demand.
Pro Tip: Plan to be on-site and ready to shoot right at the leading and trailing edges of storms. This is when you will catch the most dramatic skies and that fleeting, ethereal storm light that often make the difference between a good image, and a great one. If dark clouds and virga (rain that evaporates before hitting the ground) are present, change your composition to include more sky than usual. The sky becomes just as vital to the scene as the landscape itself.
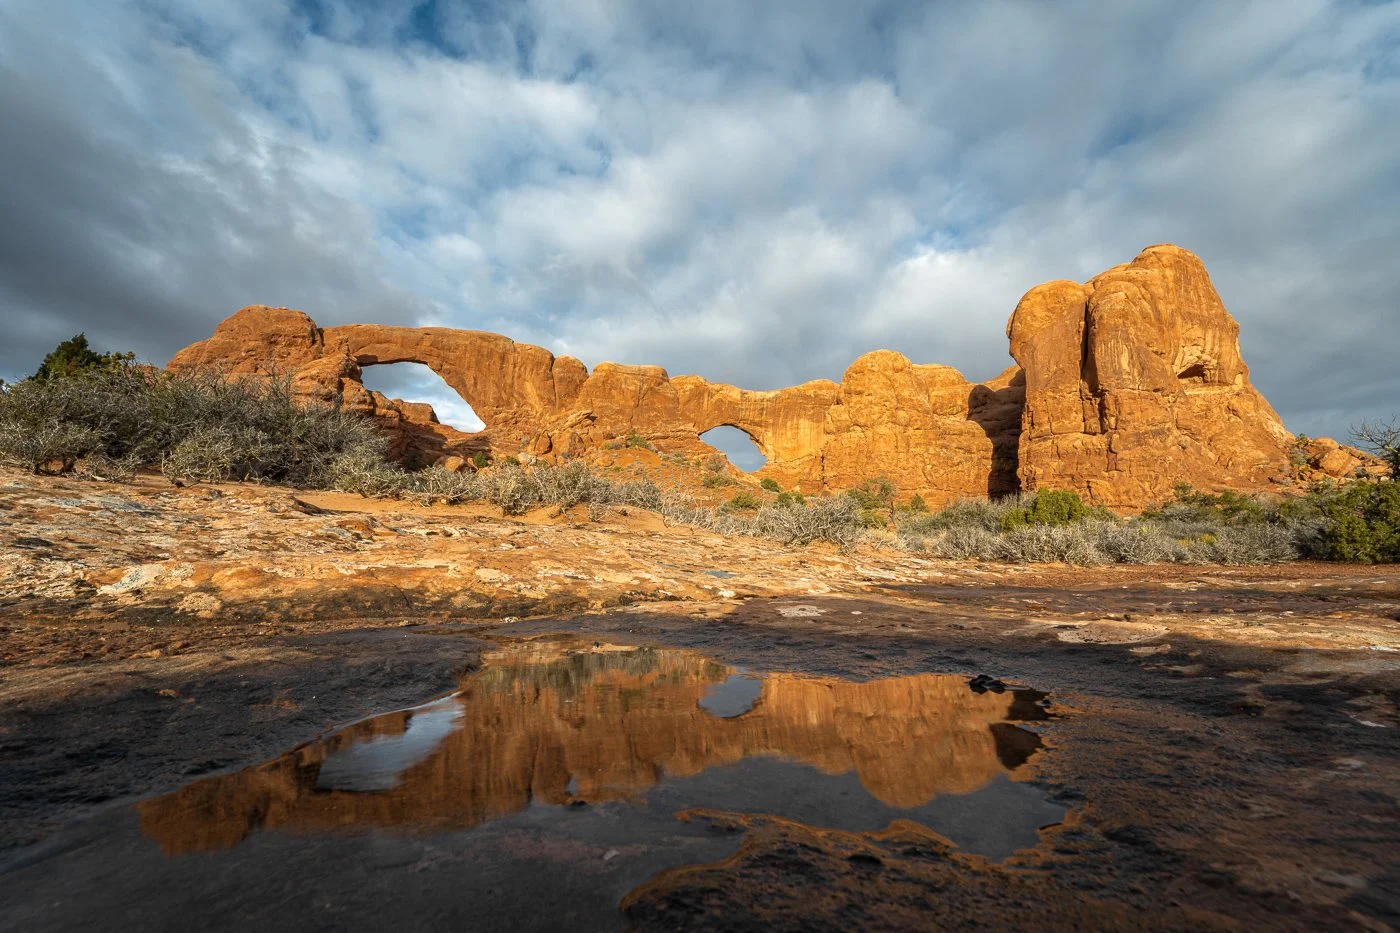
Utilizing a wide-angle lens allows you to capture the dual beauty of Arches National Park after a summer storm. By dropping the camera low to a water-filled sandstone pothole, the iconic North and South Windows (known as "The Spectacles") are mirrored in the reflection, balancing the glowing sunrise light with the dramatic, clearing clouds above.
2. After the Storm: Reflections and Waterfalls
Monsoon storms in Moab usually form in the afternoon. They are typically short-lived but incredibly intense. When the downpour stops, the desert transforms.
Keep an eye out for ephemeral waterfalls cascading directly off the sheer sandstone cliffs—a rare and breathtaking sight. Take a drive down Kane Creek Road or Highway 128 and you’ll see dozens of muddy reddish-brown falls pouring off the cliffs. Normally dry washes become powerful rivers, adding striking visual interest to your photographs. You may want to use a polarizing filter to reduce reflections off of wet rock and lengthen your shutter speed if you want to record the falls as a silky smooth ribbon of water. I’ve been using the Breakthrough Filters polarizer for years and it’s never let me down. Additionally, the rain fills the natural sandstone basin "potholes" carved into the rock. These temporary puddles create perfect, mirror-like surfaces.
Pro Tip: Pack your wide-angle lens. Get low to a water-filled pothole and use it to catch the reflections of the surrounding red cliffs, distant arches, and clearing storm clouds. These low, wide-angle perspectives can make a small pothole appear much larger in your image. My go to lens for these compositions? The Sigma 14-24mm f/2.8. You may need to use a technique called focus stacking to maintain sharpness from foreground to background. New Zealand photographer William Patino has a short, to-the-point focus stacking tutorial on YouTube that is a perfect introduction to this technique. Though it is possible to focus stack images from a handheld shot it’s much easier to do so when working from a tripod. I’ve been using the Peak Design Pro Tripod Tall for almost a year and though it isn’t cheap, it’s built like a tank and offers a lot of flexibility for creating low-angle compositions.
3. Summer Nights: Prime Astrophotography
Once the afternoon storms clear out, summer offers the absolute best conditions of the year for astrophotography. The core of the Milky Way is high and bright in the night sky, and Moab’s designated Dark Sky Parks (including Arches, Canyonlands, and Dead Horse Point) offer some of the lowest light pollution in the country. Combining the dark skies with iconic silhouettes like Balanced Rock or Delicate Arch makes for an unforgettable night shoot. Just remember: the use of artificial light, generally called light painting, is illegal in both of Moab’s national parks.
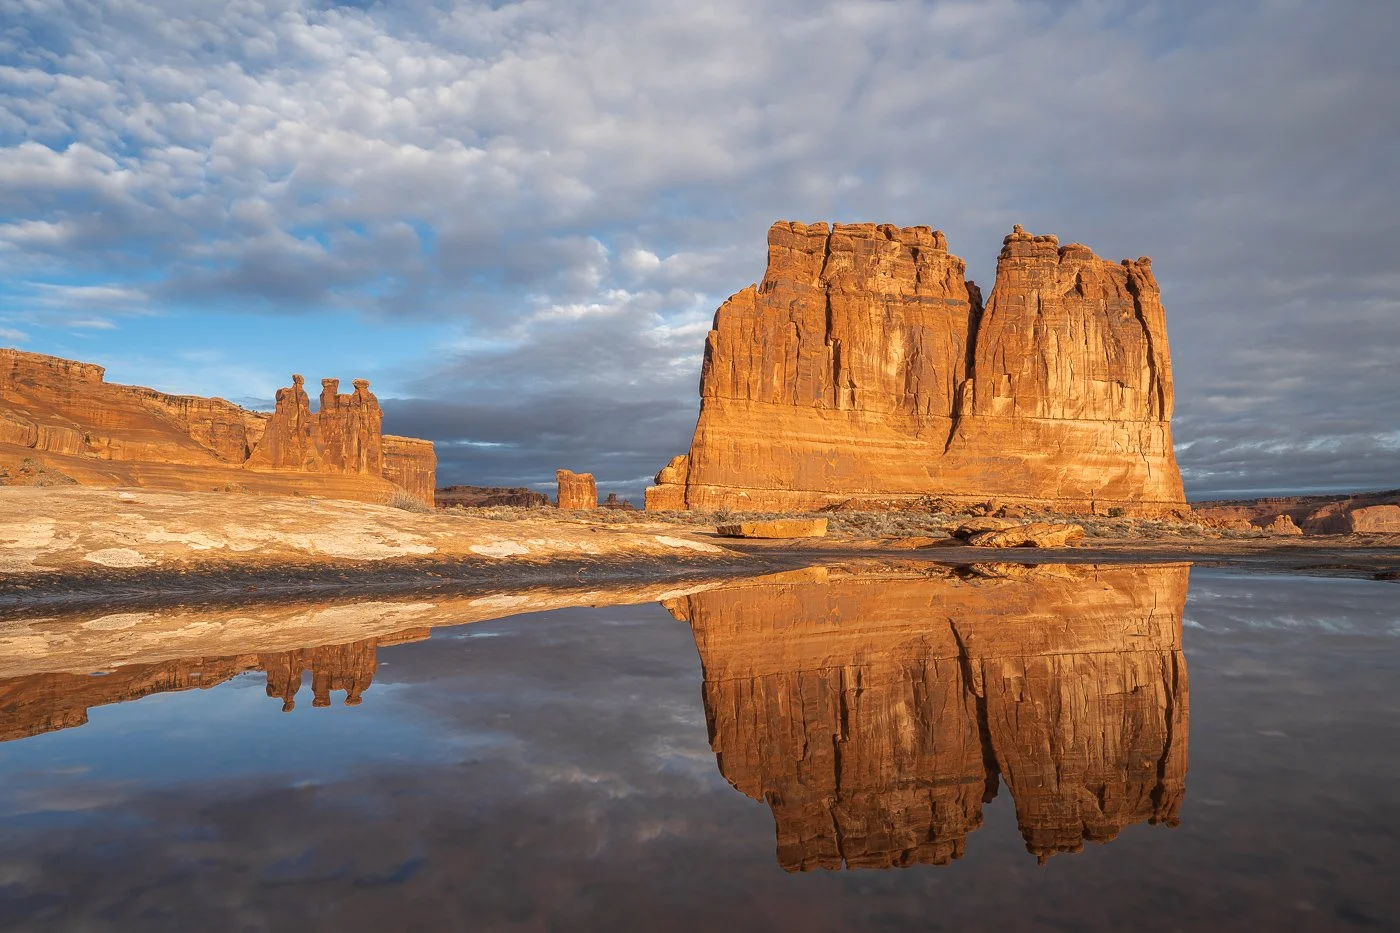
Capitalizing on the aftermath of a desert thunderstorm pays off beautifully in the Courthouse Towers viewpoint. By framing this sunrise shot using a wide-angle lens right at ground level, a temporary sandstone pothole puddle creates a stunning, symmetry-filled mirror reflection of The Organ and the Three Gossips glowing in the morning light.
4. Smart Summer Scouting
With daytime temperatures frequently soaring past 100°F (38°C), you need to manage your time wisely.
Morning/Evening: Dedicate your golden hours and blue hours to shooting.
Midday: Use the middle of the day to scout locations using maps, apps, and by driving through the parks in the comfort of your air conditioned vehicle. While it’s generally too hot for long hikes, short walks to overlooks are doable and will give you an opportunity to note potential photographic opportunities when the light is right. For more details on what to look for when scouting locations, here’s a link to my recent post, “The Art of the Scout: Why Location Scouting is a Landscape Photographer’s Greatest Tool”.
5. Critical Summer Precautions
While summer photography in Moab is unmatched, the desert can be unforgiving. Safety should always be your top priority.
Hydration: The desert air is incredibly dry. Drink significantly more water than you think you need, and always keep a cooler with extra water and snacks in your vehicle. It’s just as important to maintain your electrolytes as it is to stay hydrated!
Flash Floods: A storm miles away can send a wall of water tearing through a slot canyon or wash in seconds. Never enter canyons or low-lying washes if rain is in the forecast.
Lightning: Monsoon storms produce frequent, dangerous lightning. Because you will often be shooting on high, exposed canyon rims (like Dead Horse Point), you are a prime target. If you hear thunder, seek shelter in your vehicle immediately.
Final Thoughts
Summer in Moab isn't just about surviving the heat—it’s about chasing the drama. By tracking the monsoons, mastering the wide-angle reflection, and staying up for the Milky Way, you’ll walk away with images that most visitors never get the chance to see.
Want to learn how to safely chase storms and capture the perfect Milky Way composition? Learn more about our private photography workshops or pick up our eFotoGuides to ensure you’re at the right places, in the best light, at the right time.
Ok, so…you came to Moab and were lucky enough to make a few amazing images of dramatic landscapes under dark, ominous skies. Don’t just leave them in Lightroom or post them to social media; print them! When creating your own photography prints there are really only two printers to consider: Epson and Canon. They both produce stunning prints and each one has unique pros and cons.You truly can’t go wrong. That said, I opted for the Canon imagePROGRAF Pro-310. I chose this printer for two primary reasons; it’s cheaper to operate than the equivalent Epson and the printhead is less likely to clog during irregular use. I’ve been using it for a few months and have produce around fifty prints, at various sizes, without issue.
What You Need to Know About the 2022 Arches National Park Timed Entry Permit System
Moab nature and adventure photographer Bret Edge shares information and tips on navigating the new Arches National Park timed entry permit system that begins in April, 2022.
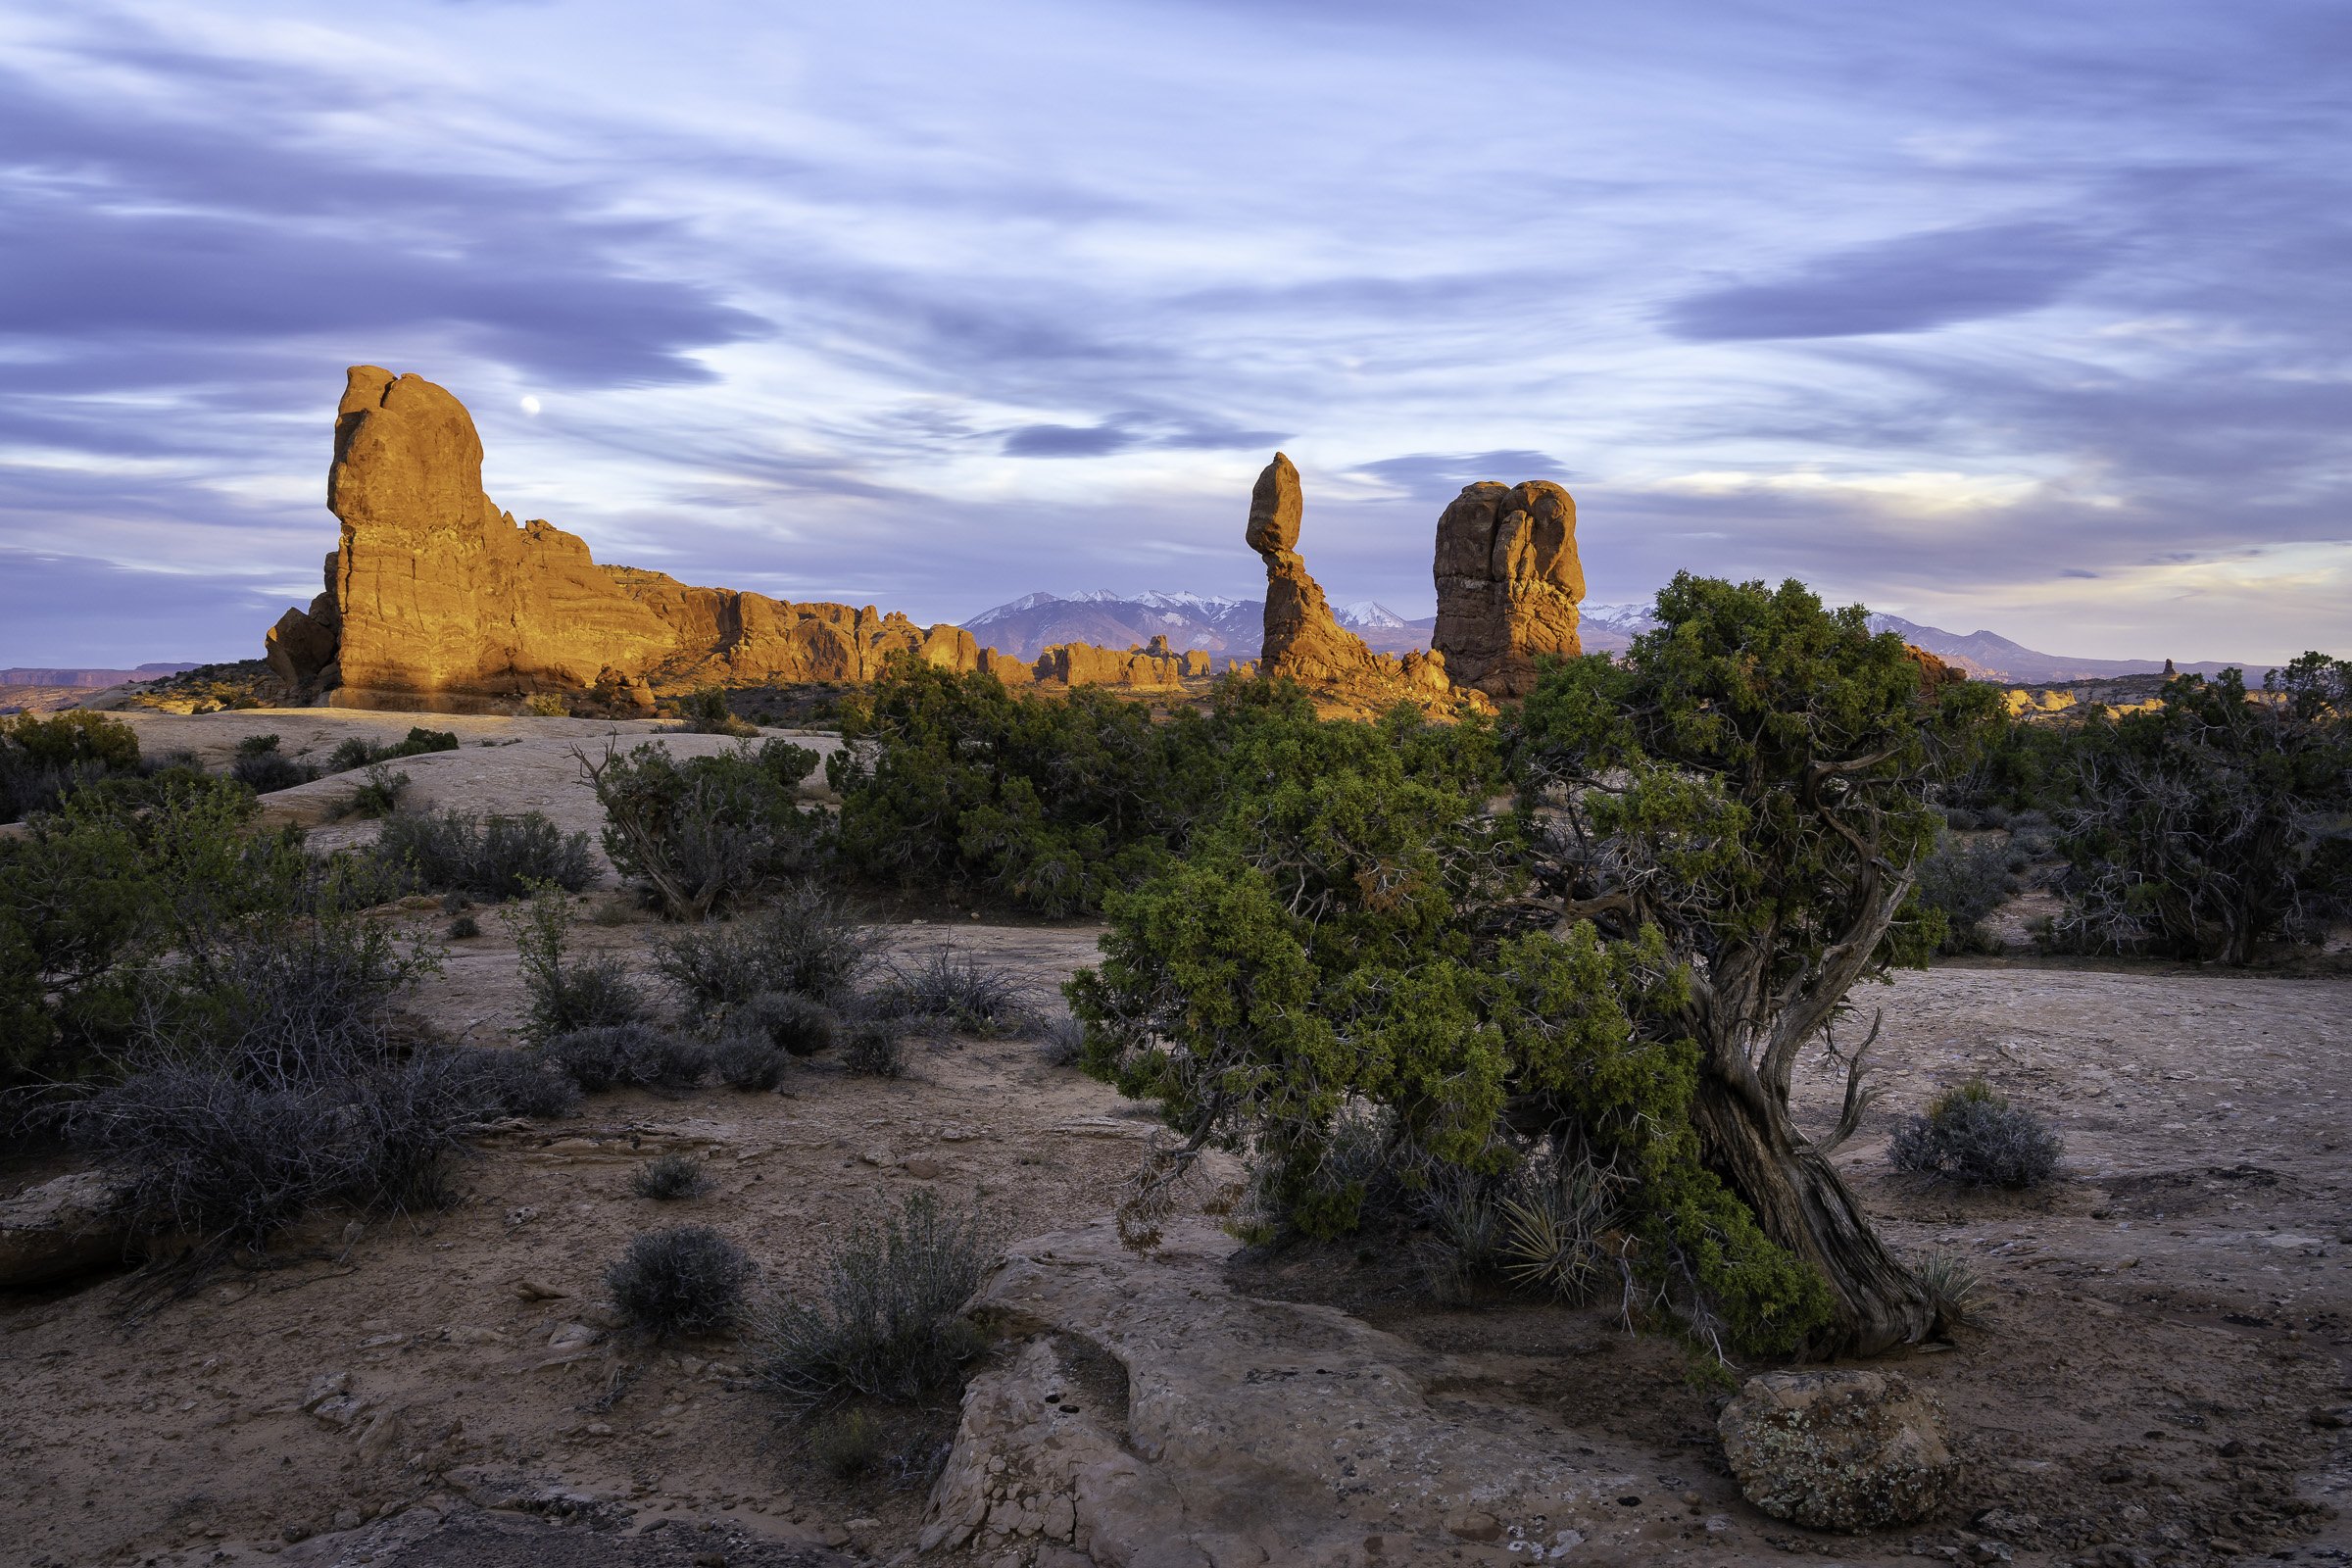
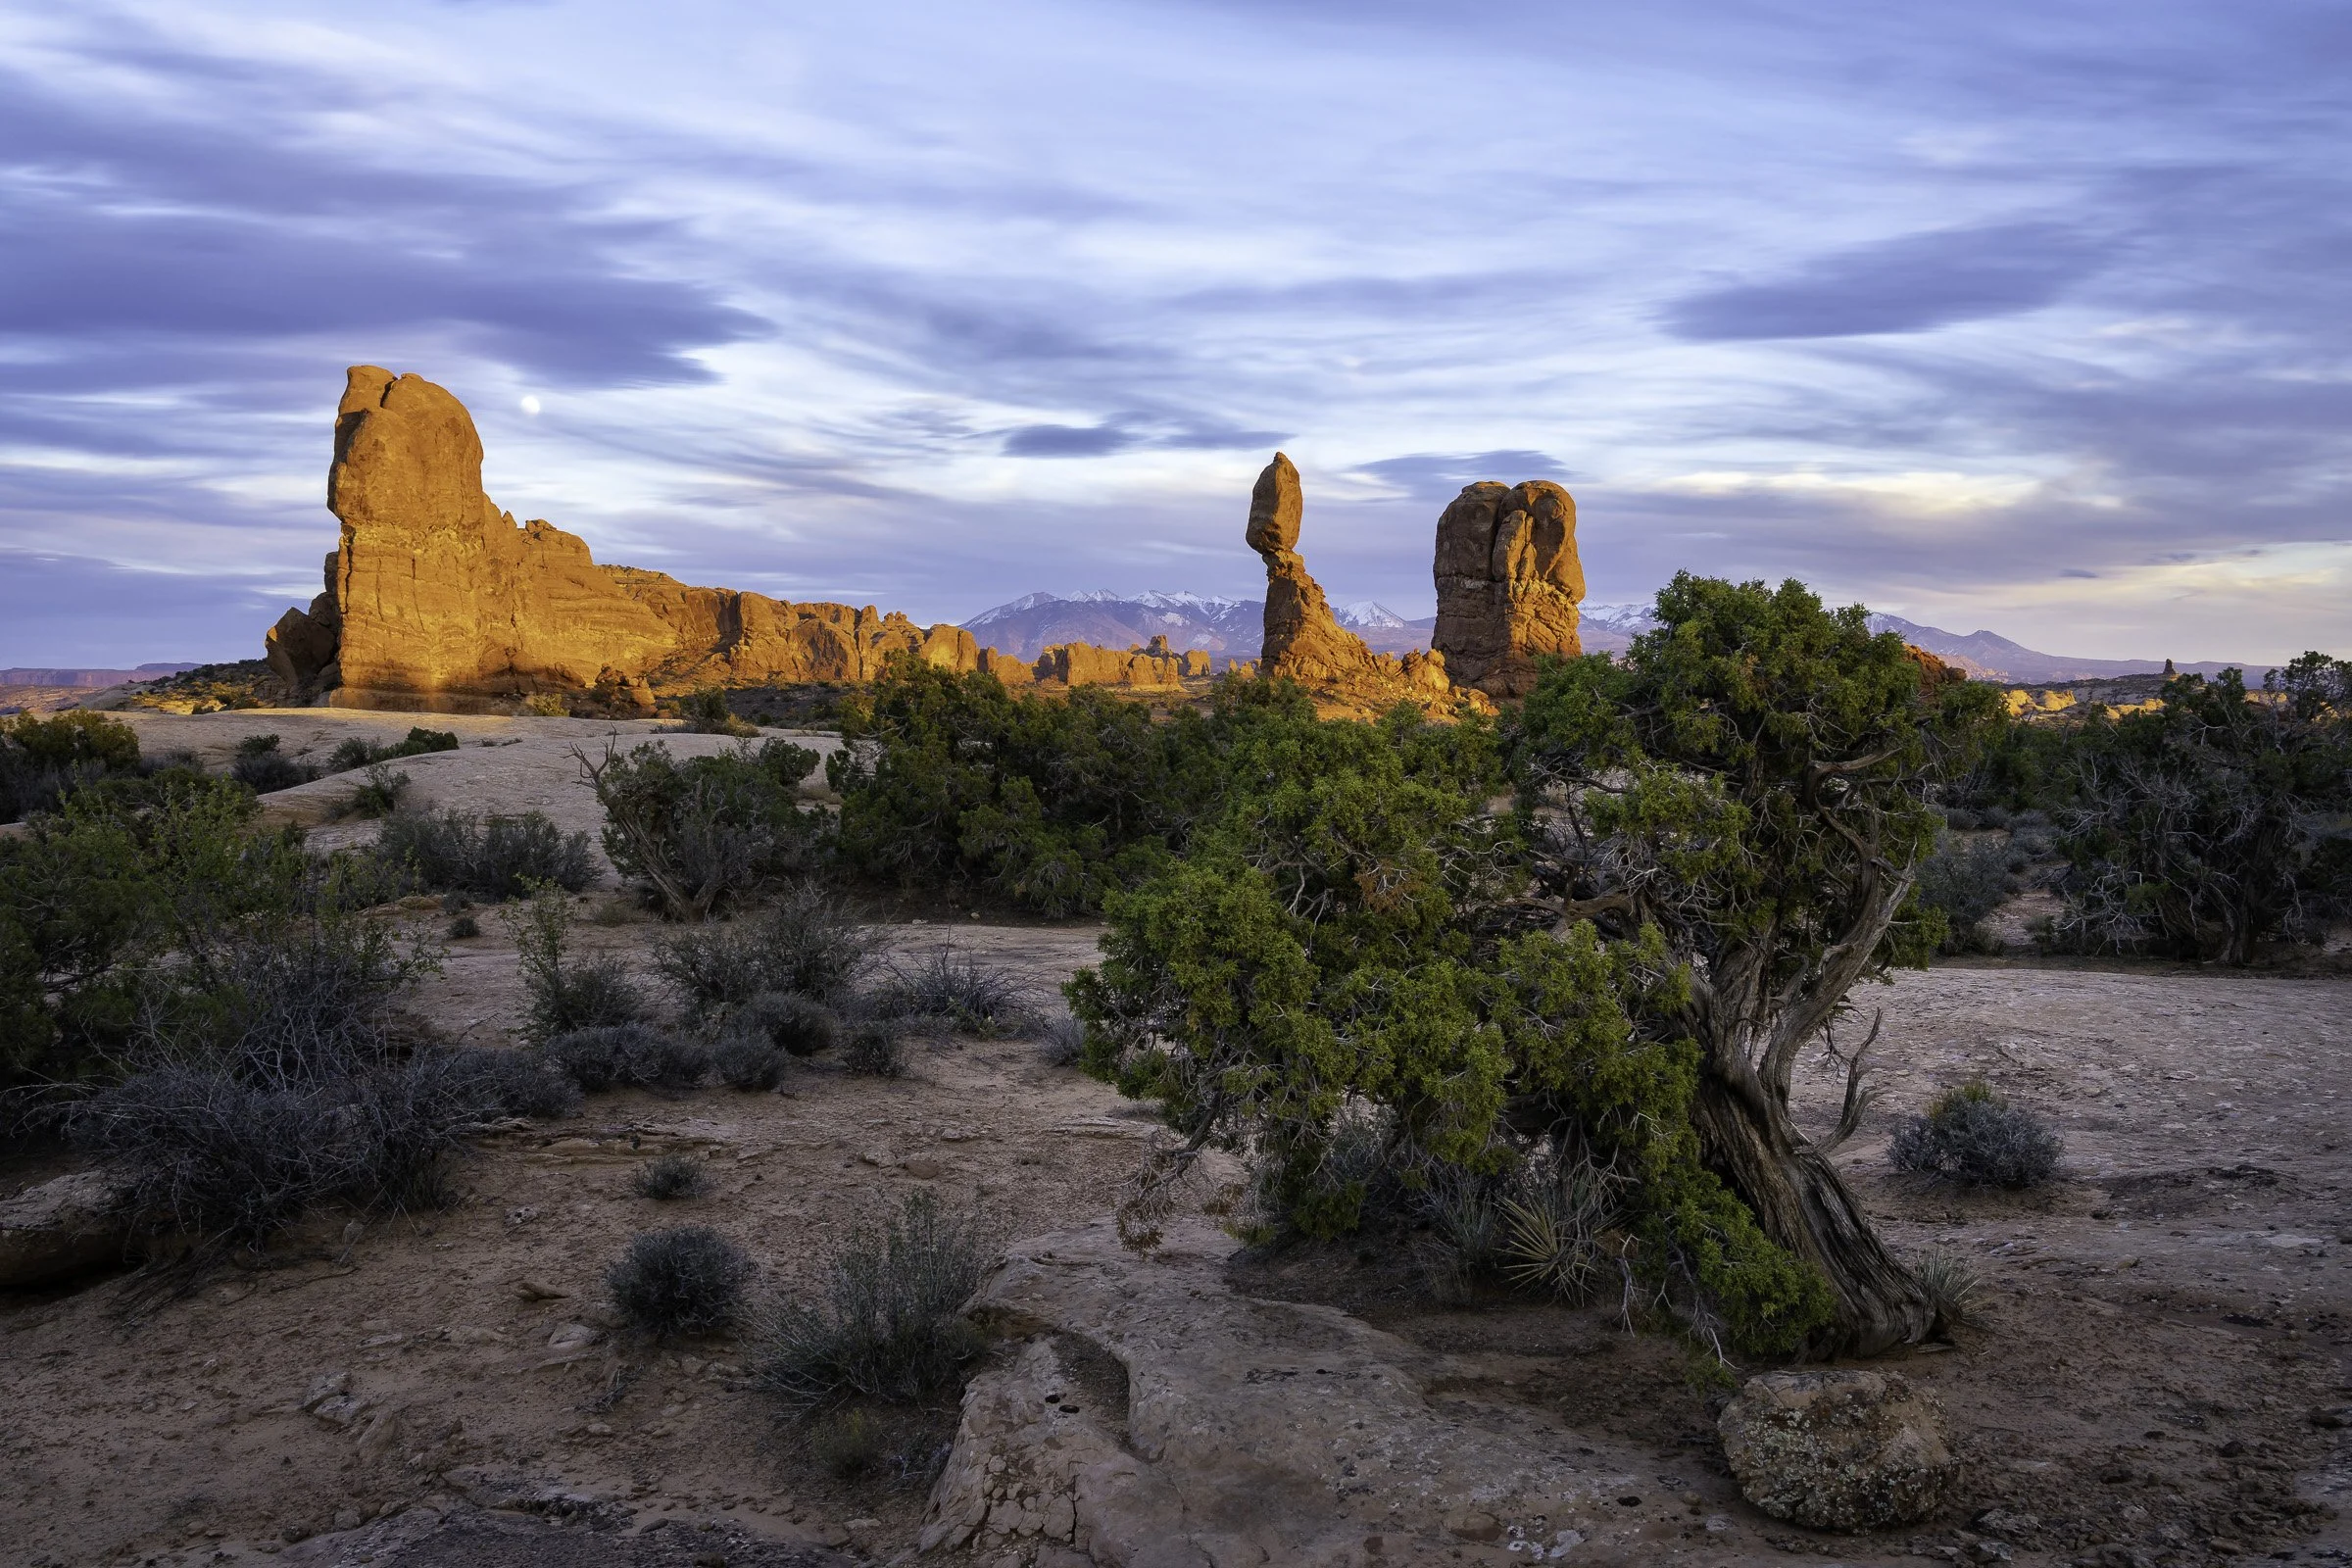
The moon rises through clouds above Balanced Rock as sunset light warms red sandstone on an autumn day in Arches National Park near Moab, Utah.
We moved to Moab in 2006. At that time annual visitation to Arches National Park hovered somewhere around 500,000. That number has increased dramatically over the last fifteen years - reaching over 1.6 million in 2019 - and it has created nothing short of chaos inside the park. National parks around the country, but especially throughout the West, have seen similar increases in visitation and the issues that accompany it. Some of the main issues include:
Long wait times at the park entrance
Traffic congestion
Lack of parking at trailheads
Resource damage
Overcrowding at popular locations, i.e. Delicate Arch
Poor visitor experience and visitor conflicts
BASIC INFORMATION ON THE ARCHES NATIONAL PARK TIMED ENTRY PERMIT SYSTEM
Over the last few years several ideas to address these issues have been discussed within the Moab community and the National Park Service, one of which is the use of a timed entry program. This year, Arches National Park is implementing a temporary timed entry program to determine if it is a viable way to address the aforementioned issues (and others not listed). The program will run from April 3 - October 31, 2022. If you enter the park between the hours of 0600 - 1700 (6:00 AM - 5:00 PM) you will not be allowed to do so unless you have a valid permit are qualify for one of the following exceptions:
You are a tribal member (the NPS website does not provide further guidance on who qualifies as a tribal member)
You are a Special Use Permit (SUP) or Commercial Use Authorization (CUA ) holder
You have a campground reservation
You have a Fiery Furnace permit
You have a backcountry permit
You are entering the park via bicycle or on foot
Timed entry permit holders will have a one hour window in which to enter the park, i.e. from 0600 - 0659. If you arrive after your designated time you will not be allowed entry. Reservations can be made online or via telephone (877-444-6777). If you plan to visit the park on two separate days you will need two permits.
WHAT DOES THIS MEAN FOR PHOTOGRAPHERS?
The good news is that most of us enter the park well before sunrise, which means that the 0600 cutoff shouldn’t impact us. However, if you plan to exit the park after sunrise and return later in the day, you will have to wait until after 1700 to return unless you have a timed entry permit. Alternatively, and this is what I recommend, spend your day entirely inside the park. Use the middle of the day to scout locations for sunrise and sunset, go for a hike (or 2 or 3 or 4!), increase your familiarity with the area and, if the weather/lighting conditions are conducive - shoot all day long! Overcast skies provide perfect light for macro photography, storms create some of the most dynamic light and conditions imaginable and even bright, sunny days create opportunities within sandstone canyons and fins for photographs utilizing beautiful reflected light.
If you plan to stay inside the park all day, you need to be self-sufficient. There are no concession services within Arches, so you’ll need to bring enough water and food to last the entire day. Be prepared for any and all weather, including bitter cold in the shoulder seasons, scorching heat in the summer and everything in between. Summer monsoons develop rapidly and bring with them heavy rain, nonstop lightning, flash floods and strong winds. Have a way to charge camera batteries and download memory cards, because you’ll blow through both quickly in this magnificent park. Of course, you should always bring eFotoGuide: The Ultimate Guide to Photographing Arches National Park if you want to make the most of your time inside the park.
WHAT ELSE DO YOU NEED TO KNOW?
The permits cost $2.00 and you’ll still need to pay the park entrance fee, or use a valid annual pass. You may reserve a timed entry pass three months in advance, and a limited number of permits will be available one day prior to entry. I suspect these will sell out quickly.
You can still visit Canyonlands National Park and Dead Horse Point State Park at any time as the timed entry program only applies to Arches National Park. For what it’s worth, my favorite place in all of Moab is Dead Horse Point. Any visit to Moab that doesn’t include at least a half day there is a tremendous missed opportunity.
This program does not guarantee you a parking space at the trailheads, nor does it guarantee that you will have Delicate Arch all to yourself at sunset. Please remember to be respectful of others during your Moab visit. Though it can be frustrating to time your sunset photos when there are no tourists posing under the arch, they have just as much right to be there as you do. Most likely, this is the one and only time they’ll ever have an opportunity to enjoy the park. Don’t ruin it for them.
If you have a timed entry permit you CAN leave the park and return on the same day, so long as your permit is validated at the correct entry time.
Remember that this is a pilot program. There will be hiccups and the NPS reserves the right to make adjustments to the program, as necessary. If things don’t go your way don’t take it out on the park rangers or gift shop staff, your waiter, bartender, hotel desk clerk, other tourists or locals, or the cop who stops you for speeding because you’re running late for your timed entry. It isn’t their fault.
For more information about the timed entry program please visit the Arches National Park time entry FAQ page.
Be sure to check out my gallery of Arches National Park photographs, all of which are available as fine art prints delivered to your door in a variety of beautiful mediums. Email me if you’re interested in purchasing a print.
Photographer’s Guide to Canyonlands National Park - Mesa Arch
Moab nature and adventure photographer Bret Edge’s guide to photographing Mesa Arch in Canyonlands National Park is guaranteed to help you create dynamic images at this iconic location near Moab, Utah.

The sun peeks over the top of Mesa Arch framing Washer Woman Arch, Monster and Airport Towers in Buck Canyon at Canyonlands National Park near Moab, Utah.
This post brought to you by eFotoGuide, the ultimate guides to photographing America’s national parks. Check out our ebook guides to Arches, Big Bend and Zion National Parks. Each ebook contains information for over 20 of the most stunning locations in each park, plus everything you’ll need to plan a successful trip. At only $15 each, or $40 for the whole bundle, it’s quite the bargain!
Mesa Arch needs no introduction. If you’re a landscape photographer, even if you picked up a camera for the first time yesterday, you know of Mesa Arch. You’ve seen photos of Mesa Arch. You’ve heard stories about Mesa Arch. Like Antelope Canyon, Snake River Overlook, the Dallas Divide or Mount Rainier’s Reflection Lakes, Mesa Arch has achieved the much heralded rank of “icon”.
That said, I was always surprised how many questions I’d get about photographing this spectacular location during private photography workshops. What lens should I use? Where’s the best composition? What time of day is ideal? When should we plan to arrive? In this post I’ll attempt to answer all of those questions and more, arming you with all the knowledge necessary to produce your own dynamic images of Mesa Arch.
The Basics
Best Time of Day: Sunrise to early morning
Best Season: Spring, Summer, Fall and Winter
Hike Stats: .7 miles R/T, 75’ elevation gain
Travel Time from Moab: 45 minutes
Solitude: None, Zero, Zip
Why Should I Photograph Mesa Arch?
Expansive views of Buck Canyon, Airport Tower, Washer Woman Arch, Monster Tower and the La Sal Mountains are framed through Mesa Arch, which sits at the very edge of a high cliff with dizzying exposure below. Sunrise and early morning light strikes the red sandstone cliff below and reflects onto the underside of the arch, creating a supernatural glow that quite literally takes your breath away. Or maybe it’s the exposure. Either way, it’s a visual treat for you and your camera.
How Do I Get to Mesa Arch?
Mesa Arch is located in the Island in the Sky district of Canyonlands National Park, approximately 45 minutes from downtown Moab. From town, drive north on Highway 191 for approximately 9 miles. Turn left, or west, on Highway 313. Follow Highway 313 to the intersection with Grand View Point Road and continue straight toward Canyonlands. (Highway 313 turns left and dead ends at Dead Horse Point State Park) From the Canyonlands entrance booth, continue straight for approximately 6.3 miles to the signed Mesa Arch trailhead on your left.
From the parking lot, a well marked obvious trail proceeds up a small hill before dropping down to Mesa Arch. The trail is easy to follow but can be slippery as it large sandstone slabs are often covered with blown sand.

Sunrise light filters through wildfire smoke filling Buck Canyon as Washer Woman Arch, Monster Tower and Airport Tower rise high above the White Rim in Canyonlands National Park near Moab, Utah
What Camera Equipment Should I Bring to Mesa Arch?
Bring. It. All. Seriously. I’ve used everything from a 15mm fisheye lens to a 100-400mm telephoto at Mesa Arch. Most importantly, bring a tripod and a 5 gallon bucket of patience. Make that two. This is one of the most popular photography locations in all of Moab-landia and the area in which the classic compositions are made is very small. You’ll need to arrive early to secure a tripod spot for sunrise. At a minimum, get there one hour before sunrise. You won’t be the first person there but you should be able to set up your tripod without too much trouble. Actual fights have broken out at Mesa Arch and on an average day, you will be crossing tripod legs with other photographers. Remember to be respectful.
The classic compositions using Mesa Arch to frame the landscape beyond are photographed with very wide angle lenses. A lens like the Sigma 14-24mm f/2.8, or something similar, is an outstanding option. This provides an expansive view that allows you to record all, or most, of the arch in your composition. My go to lens is the Sony 24-105mm f/4 and even this range of focal lengths will provide many options for creative compositions. It’s easy to get suckered into the common wide-angle compositions at Mesa Arch but look a little deeper, like deeper into the canyon, and you’ll discover more unique ways to frame a compelling photo with longer focal length lenses. Back in 2008 I created what I believe was one of the first telephoto images of Washer Woman Arch, Airport Tower and Monster Tower backlit by morning sun. It has become a popular and oft-copied image. There are other long lens options too, for those willing to stretch their imaginations a bit.
A good, solid tripod and ballhead are necessary for the long-ish exposures in early morning light, as is a remote shutter release, or at the very least the use of your camera’s self-timer. I’ve used Induro tripods and Acratech ballheads exclusively for over a decade and they’ve proven themselves time and again as competent, durable and reliable equipment. I’ve never been an advocate of using too many filters but a circular polarizer may help to reduce haze on windy days or when wildfire smoke fills the canyon which, unfortunately, seems to be happening more often as of late.
General Tips for Photographing Mesa Arch
The very best light in which to photograph Mesa Arch is sunrise but that doesn’t mean you’re committed to that 15 minute window of hero light. The glow on the underside of the arch persists well into the morning. The image at the top of this post was made over two hours after sunrise and was one of my top selling prints at the Edge Gallery. Most of the “real” photographers will throw their tripod over the camera vested shoulder and smugly hike back to their car within an hour of sunrise, leaving the arch more accessible for the rest of us to experiment with different compositions.
Nailing an exposure at Mesa Arch requires skill or a whole lot of experimentation. Generally speaking, I recommend that photographers expose for the underside of the arch (that glow!) and let the rest of the tones fall where they may. Yes, you’ll probably lose some highlights. Get over it. Or don’t, and use HDR to recover some of the highlights and shadows but do us all a favor and don’t max out all the sliders.
If I know you, you’ll want the entire image to be as sharp as a Shun knife. Small apertures with wide-angle lenses and very carefully placed focal points will achieve that incredible depth of field you desire. Or, focus stacking. It’s always tempting to just set your aperture at f/22 and pull the trigger but the reality is that you’ll get sharper images at slightly larger apertures. I typically use f/11 to f/16 when shooting with wide-angle lenses.
Winters are cold, sometimes brutal. On one winter morning I realized I’d forgotten my gloves but luckily I kept a pair of chemical hand warmers in my pack. They saved the day. I know many photographers who bring a thermos of hot coffee to help ward off the cold. Layer appropriately, wear a warm hat and gloves and be extra careful descending the trail when it’s icy/snowy and moving around at the arch.
There’s much more to this location than just the arch. Walk the rim in both directions and you’ll find ample opportunities to fill up memory cards. Tortured old trees, canyon views and lots of smaller, intimate landscapes are there for the finding.
Last, but not least, don’t be an jackass. Be considerate of other photographers AND tourists. You all have the same right to enjoy the arch. The fact that you brought $100,000 of fancy digital camera gear all the way from Iowa doesn’t afford you any extra special liberties. Nearly every time I visit the arch I offer to take photos of tourists posing in front of the arch so they can wow their friends and family back home with a photo that’s a notch or two above the typical selfie. It’s all about the karma.
Oh, one more thing: the best photo that will ever be produced of Mesa Arch already exists so don’t be too bummed when yours doesn’t stack up to Whit Richardson’s image of a freakin’ bighorn sheep standing in front of the arch at sunrise. Mic drop…

Fresh snow contrasts with warm light at Mesa Arch with clouds filling Buck Canyon on a cold winter day in Canyonlands National Park near Moab, Utah.